
Discovered a cool desktop app for managing Kubernetes clusters I want to share called Lens. In this tutorial I’m going to show you how to create a K3s cluster and use Lens metrics to introspect on the cluster. Finally we’ll use Lens to install cert-manager on your cluster for the purpose of issuing SSL certs.
Requirements
- Digital Ocean account (referral link)
- Digital Ocean CLI doctl github.com/digitalocean/doctl
- Lens github.com/lensapp/lens available via lens cask on macOS
- Ketchup k3sup github.com/alexellis/k3sup
- Helm helm github.com/helm/helm package manager for K8s
Create Droplets
Once requirements are met and you’ve authenticated with doctl you’re ready to create your droplets. We’re going to create a three-node cluster with one server and two agents. We’ll do this from the command line using Digital Ocean CLI.
First check your SSH keys:
doctl compute ssh-key list
You should see output like:
ID          Name                      FingerPrint
25964658    OutlineServerFrankfurt    06:75:9f:5f:e9:96:7b:3f:64:a2:6e:07:3b:1d:3e:cd
28090058    MBP 2019                  7e:44:3c:71:86:34:ac:37:fc:e6:95:15:5b:c0:d2:1e
28011965    Invisible Arch            8b:79:d2:81:18:97:3e:b3:ea:26:6f:45:f4:c5:0e:b7
25980340    OutlineServerSingapore    a0:c3:ad:06:a3:ba:cf:6d:b5:0b:83:6a:45:38:10:e3
2783983     MacBook Pro (Personal)    ab:95:0f:c9:f2:95:06:a4:5d:c6:99:7d:86:d3:c0:15
Note: If you don’t see any keys listed, run doctl compute ssh-key create -h for instructions on how to create one and do so before continuing.
Make note of the SSH key you want to use to authenticate:
export SSH_KEY=28090058
Then provision three droplets for the cluster. Here we’ll provision 1 server (master) and 2 agents (slaves). Notice the server is given beefier specs than the two agents. This is because the 1GB RAM droplets don’t have enough oomph.
We’re going to use the latest version of Ubuntu DO has available as it itself has an updated Linux kernel compared to the 20.04.1 LTS released last April.
Tip: Run doctl compute size list to get a list of droplet size slugs and doctl compute image list-distribution for available distribution images.
Create the server with the s-1vcpu-2gb size ($10/month):
doctl compute droplet create --image ubuntu-20-10-x64 \
  --size s-1vcpu-2gb --region sfo2 k3s-server-1 \
  --tag-names k3s,k3s-server --ssh-keys $SSH_KEY
And the two agents with s-1vcpu-1gb images (2x $5/month):
doctl compute droplet create --image ubuntu-20-10-x64 \
  --size s-1vcpu-1gb --region sfo2 k3s-agent-1 \
  --tag-names k3s,k3s-agent --ssh-keys $SSH_KEY

doctl compute droplet create --image ubuntu-20-10-x64 \
  --size s-1vcpu-1gb --region sfo2 k3s-agent-2 \
  --tag-names k3s,k3s-agent --ssh-keys $SSH_KEY
When you’re finished list droplets with k3s tag:
doctl compute droplet ls --tag-name k3s
You should see output like:
ID           Name            Public IPv4      Private IPv4    Public IPv6    Memory    VCPUs    Disk    Region    Image               VPC UUID                                Status    Tags              Features              Volumes
221561079    k3s-agent-2                                                     1024      1        25      sfo2      Ubuntu 20.10 x64                                            new       k3s,k3s-agent
221561070    k3s-agent-1     178.128.74.60    10.120.0.2                     1024      1        25      sfo2      Ubuntu 20.10 x64    9644ec63-d589-44ee-906e-2a0ac601503b    active    k3s,k3s-agent     private_networking
221561062    k3s-server-1                                                    2048      1        50      sfo2      Ubuntu 20.10 x64                                            new       k3s,k3s-server
Note: It will take a moment before Status of each droplet becomes active. Once they’re all active each will have a Public IPv4 assigned.
When all of the images have an IPv4 address:
- Run vi ~/.ssh/config and add entries for the droplets (optional).
- Perform any other hardening steps desired (optional).
Now run Ketchup to install K3s on each node. Install first to the server and then once on each of the agents, joining them to the cluster:
export SERVER1=<Public IPv4>
export AGENT1=<Public IPv4>
export AGENT2=<Public IPv4>

k3sup install --ip $SERVER1 --user root \
  --ssh-key ~/.ssh/do_ed25519 \
  --context do-sfo1-k3s-cluster

k3sup join --ip $AGENT1 --server-ip $SERVER1 --user root \
  --ssh-key ~/.ssh/do_ed25519

k3sup join --ip $AGENT2 --server-ip $SERVER1 --user root \
  --ssh-key ~/.ssh/do_ed25519
Assume root is the user and do_ed25519 is the SSH key associated with the DO account associated with SSH_KEY selected/created earlier (you may be using RSA). The value of context can be anything you like. Choose something memorable.
For each of the two agents you should see output like:
Expand to view output
Running: k3sup join
Server IP: 178.128.74.60
K10c48d64a1752610819963c500ce6da266878f6c89dc22f11991a9d0753ecc904f::server:3399f9e0456b128c081ee52be7ad65c
[INFO]  Finding release for channel v1.19
[INFO]  Using v1.19.5+k3s1 as release
[INFO]  Downloading hash https://github.com/rancher/k3s/releases/download/v1.19.5+k3s1/sha256sum-amd64.txt
[INFO]  Downloading binary https://github.com/rancher/k3s/releases/download/v1.19.5+k3s1/k3s
[INFO]  Verifying binary download
[INFO]  Installing k3s to /usr/local/bin/k3s
[INFO]  Creating /usr/local/bin/kubectl symlink to k3s
[INFO]  Creating /usr/local/bin/crictl symlink to k3s
[INFO]  Creating /usr/local/bin/ctr symlink to k3s
[INFO]  Creating killall script /usr/local/bin/k3s-killall.sh
[INFO]  Creating uninstall script /usr/local/bin/k3s-agent-uninstall.sh
[INFO]  env: Creating environment file /etc/systemd/system/k3s-agent.service.env
[INFO]  systemd: Creating service file /etc/systemd/system/k3s-agent.service
[INFO]  systemd: Enabling k3s-agent unit
Created symlink /etc/systemd/system/multi-user.target.wants/k3s-agent.service → /etc/systemd/system/k3s-agent.service.
[INFO]  systemd: Starting k3s-agent
Logs: Created symlink /etc/systemd/system/multi-user.target.wants/k3s-agent.service → /etc/systemd/system/k3s-agent.service.
Output: [INFO]  Finding release for channel v1.19
[INFO]  Using v1.19.5+k3s1 as release
[INFO]  Downloading hash https://github.com/rancher/k3s/releases/download/v1.19.5+k3s1/sha256sum-amd64.txt
[INFO]  Downloading binary https://github.com/rancher/k3s/releases/download/v1.19.5+k3s1/k3s
[INFO]  Verifying binary download
[INFO]  Installing k3s to /usr/local/bin/k3s
[INFO]  Creating /usr/local/bin/kubectl symlink to k3s
[INFO]  Creating /usr/local/bin/crictl symlink to k3s
[INFO]  Creating /usr/local/bin/ctr symlink to k3s
[INFO]  Creating killall script /usr/local/bin/k3s-killall.sh
[INFO]  Creating uninstall script /usr/local/bin/k3s-agent-uninstall.sh
[INFO]  env: Creating environment file /etc/systemd/system/k3s-agent.service.env
[INFO]  systemd: Creating service file /etc/systemd/system/k3s-agent.service
[INFO]  systemd: Enabling k3s-agent unit
[INFO]  systemd: Starting k3s-agent
Verify you also have a file called kubeconfg in the current working directory.
Tip: If you’d prefer to merge the kubeconfig file into an existing config file, you can use the --merge flag of k3sup when creating the server.
You’ll plug the kubeconfg into Lens, which we’ll configure now.
Configure Lens
Open Lens and add a new cluster using the kubeconfig file Ketchup created:
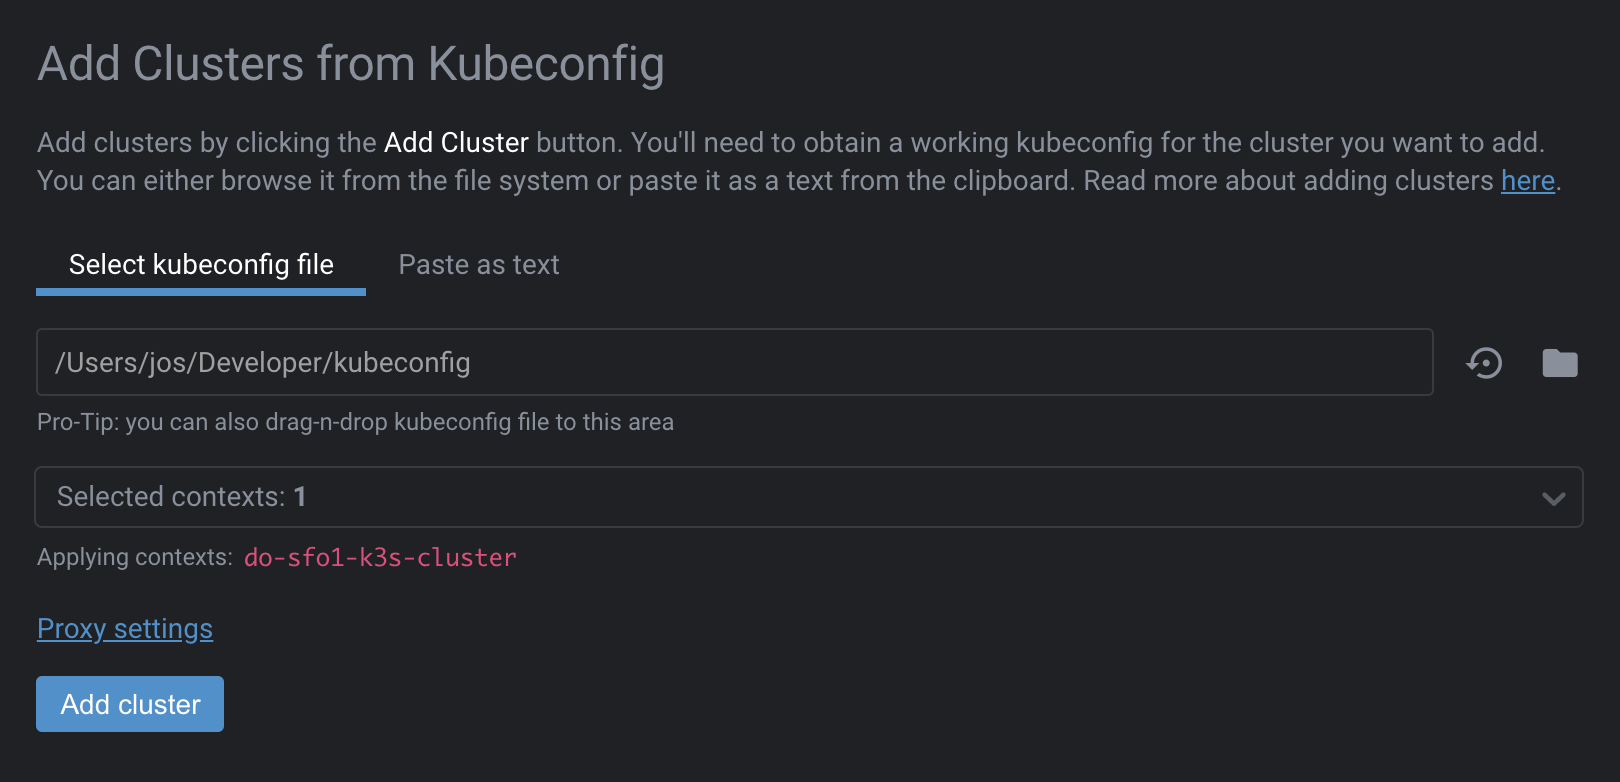
Choose Add cluster to add the cluster. When the cluster is added the view will refresh and you should be looking at a stark and rather boring Cluster pane:
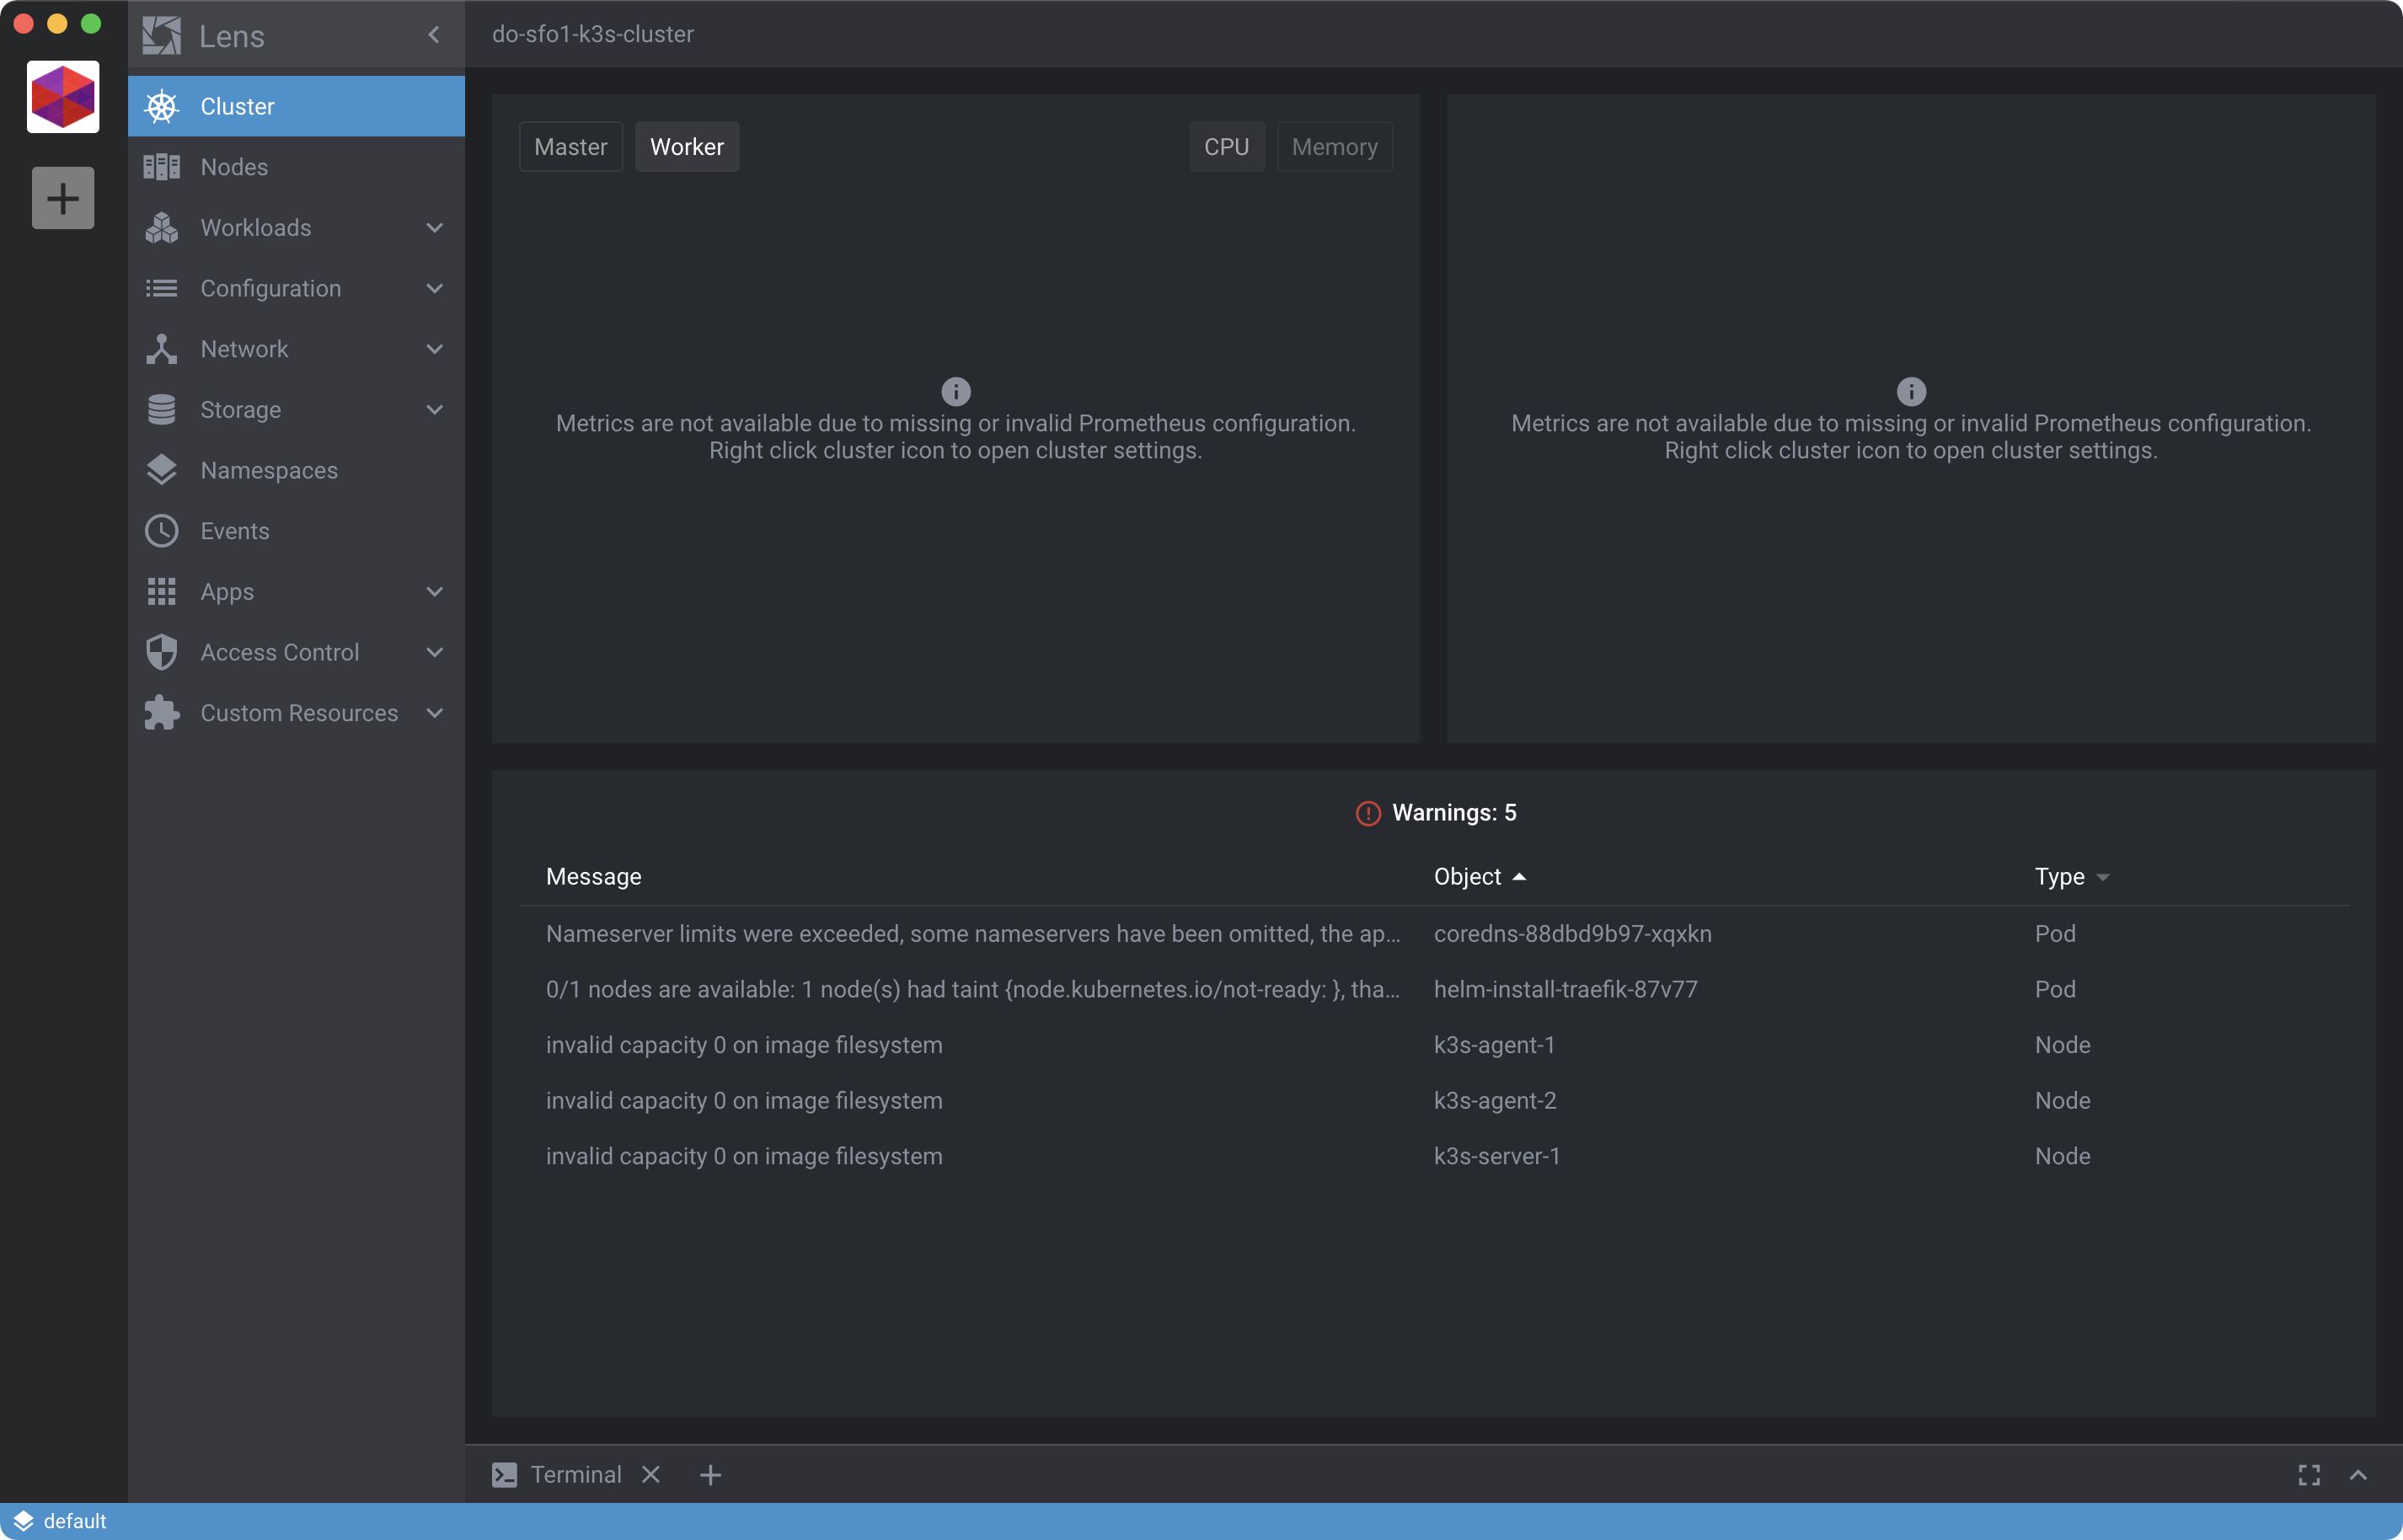
You’ll probably see some Warnings which you can ignore for now.
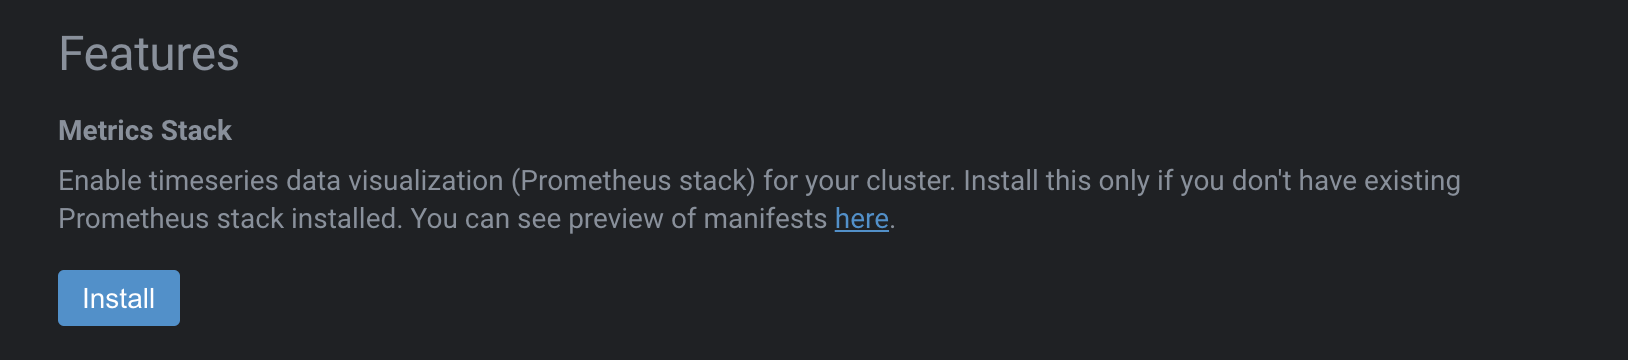
Context-click on the cluster and choose Settings then scroll down to the section called Features and click Install under the Metrics Stack section:
The installation will take a minute or so. When it’s ready your Cluster dashboard should look less barren and a bit more useful:
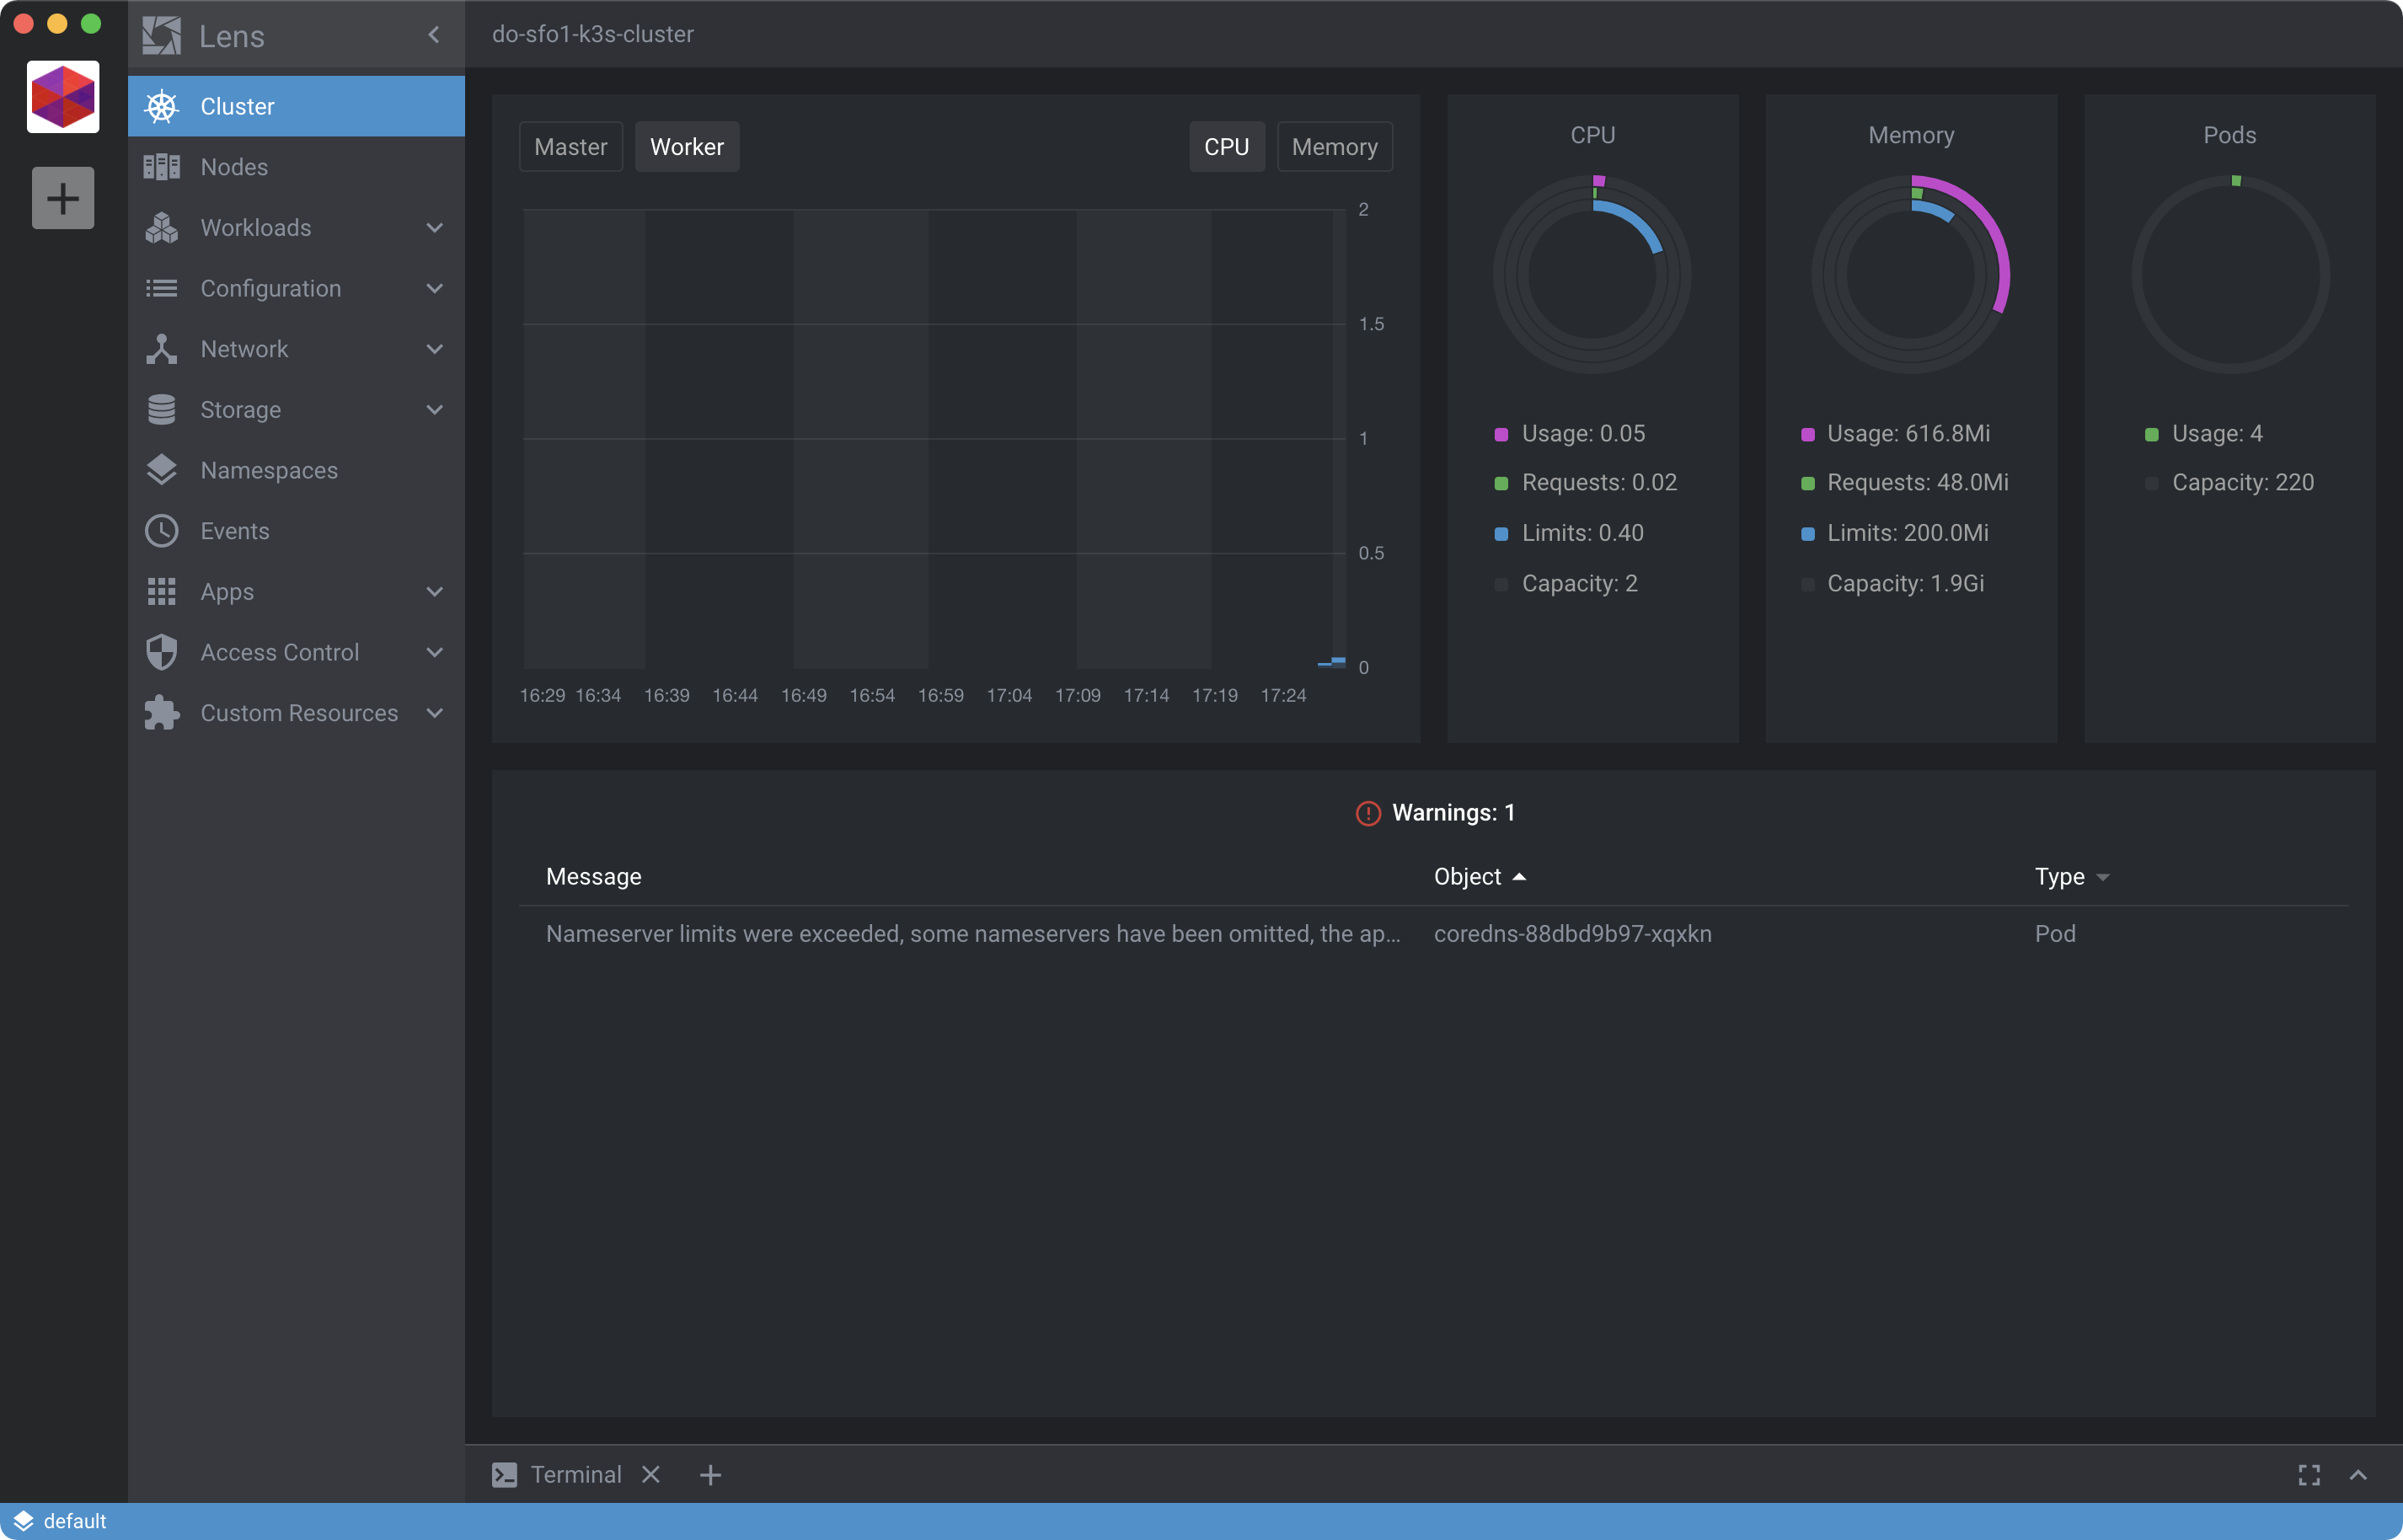
We’ll see why these metrics become important in the next step.
Install cert-manager
With Lens configured we’re now going to add cert-manager via the integrated terminal in Lens. cert-manager is used for issuing and managing SSL certificates. It’s not required in Kubernetes, but we’re going to use it to make life easier. That is, unless you really want to pour over these docs.
Click the Terminal tab near the bottom of the Lens window and enter the following command to install cert-manager from the Helm chart in its own namespace:
kubectl create namespace cert-manager && \
helm repo add jetstack https://charts.jetstack.io && \
helm repo update && \
helm install cert-manager jetstack/cert-manager \
  --namespace cert-manager --version v1.1.0 --set installCRDs=true
You should see output like:
Expand to view output
NAMESPACE: cert-manager
STATUS: deployed
REVISION: 1
TEST SUITE: None
NOTES:
cert-manager has been deployed successfully!

In order to begin issuing certificates, you will need to set up a ClusterIssuer
or Issuer resource (for example, by creating a 'letsencrypt-staging' issuer).

More information on the different types of issuers and how to configure them
can be found in our documentation:

https://cert-manager.io/docs/configuration/

For information on how to configure cert-manager to automatically provision
Certificates for Ingress resources, take a look at the `ingress-shim`
documentation:

https://cert-manager.io/docs/usage/ingress/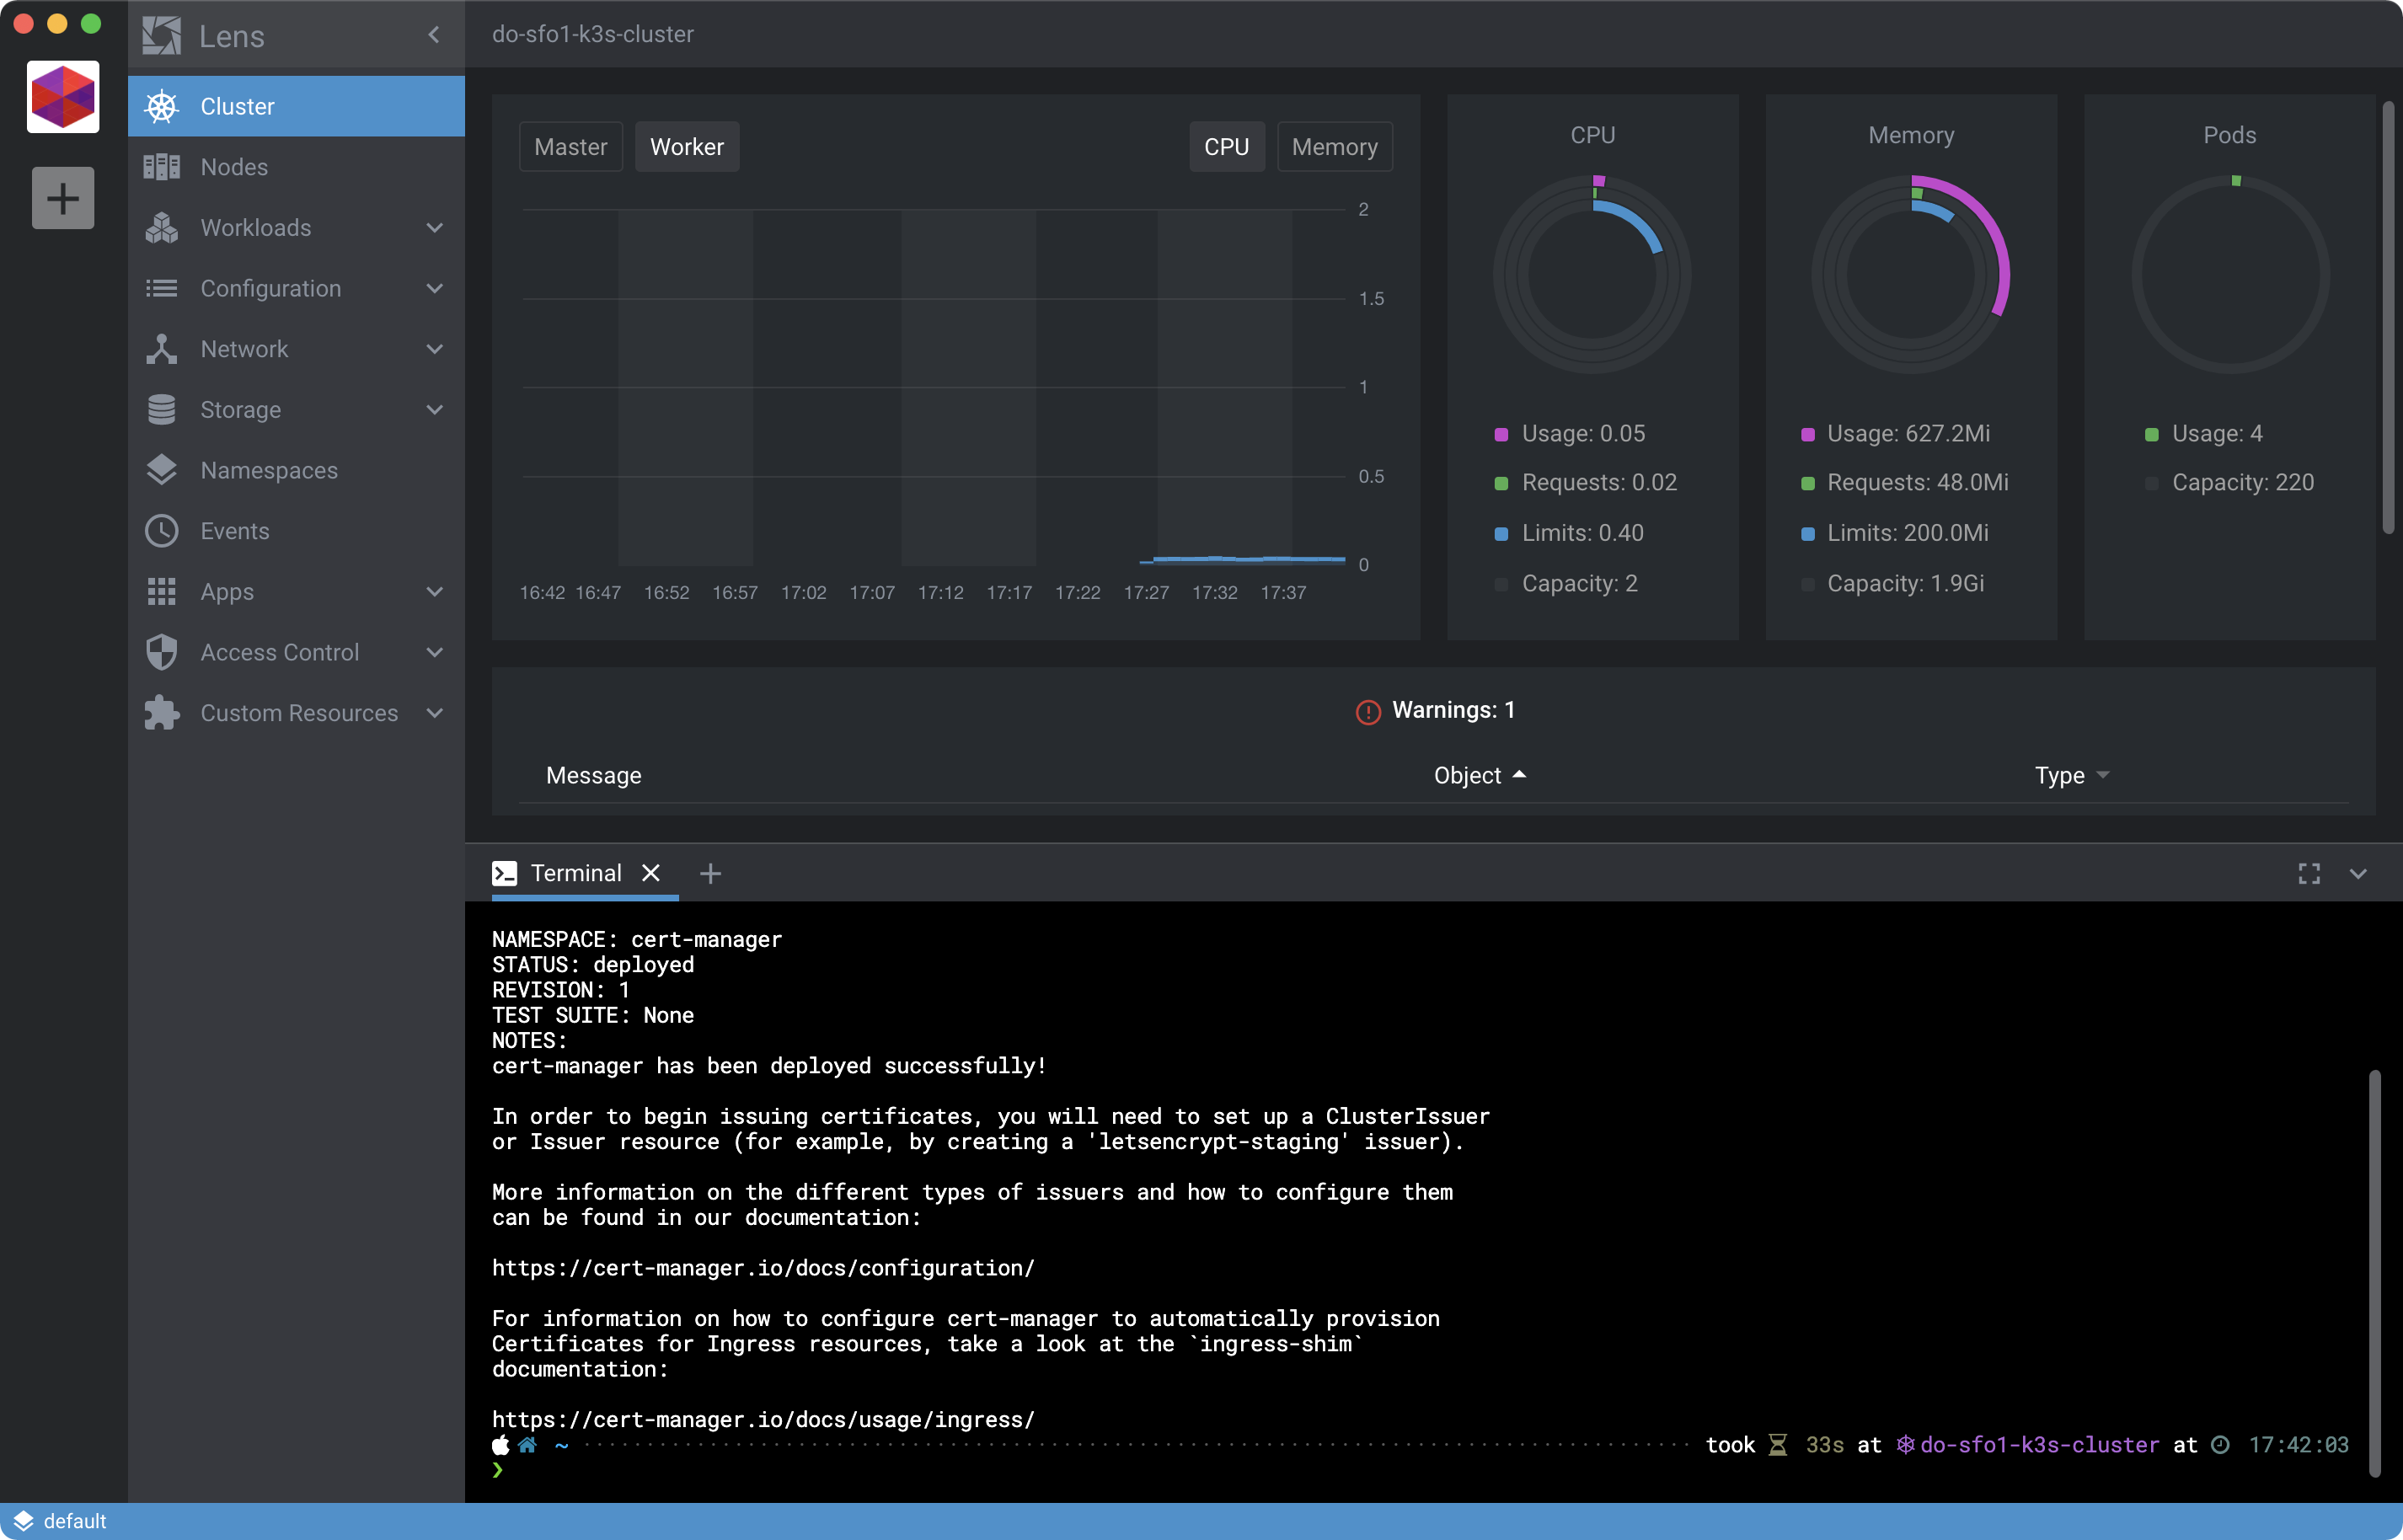
Be sure you included --set installCRDs=true in the command or you will be unable to create the resources needed later to issue TLS certificates. That’s a little gotcha which may change later but it’s necessary at the moment.
Now take a look at the current memory utilization of the server droplet by clicking Master from within the Lens interface using the Cluster view:
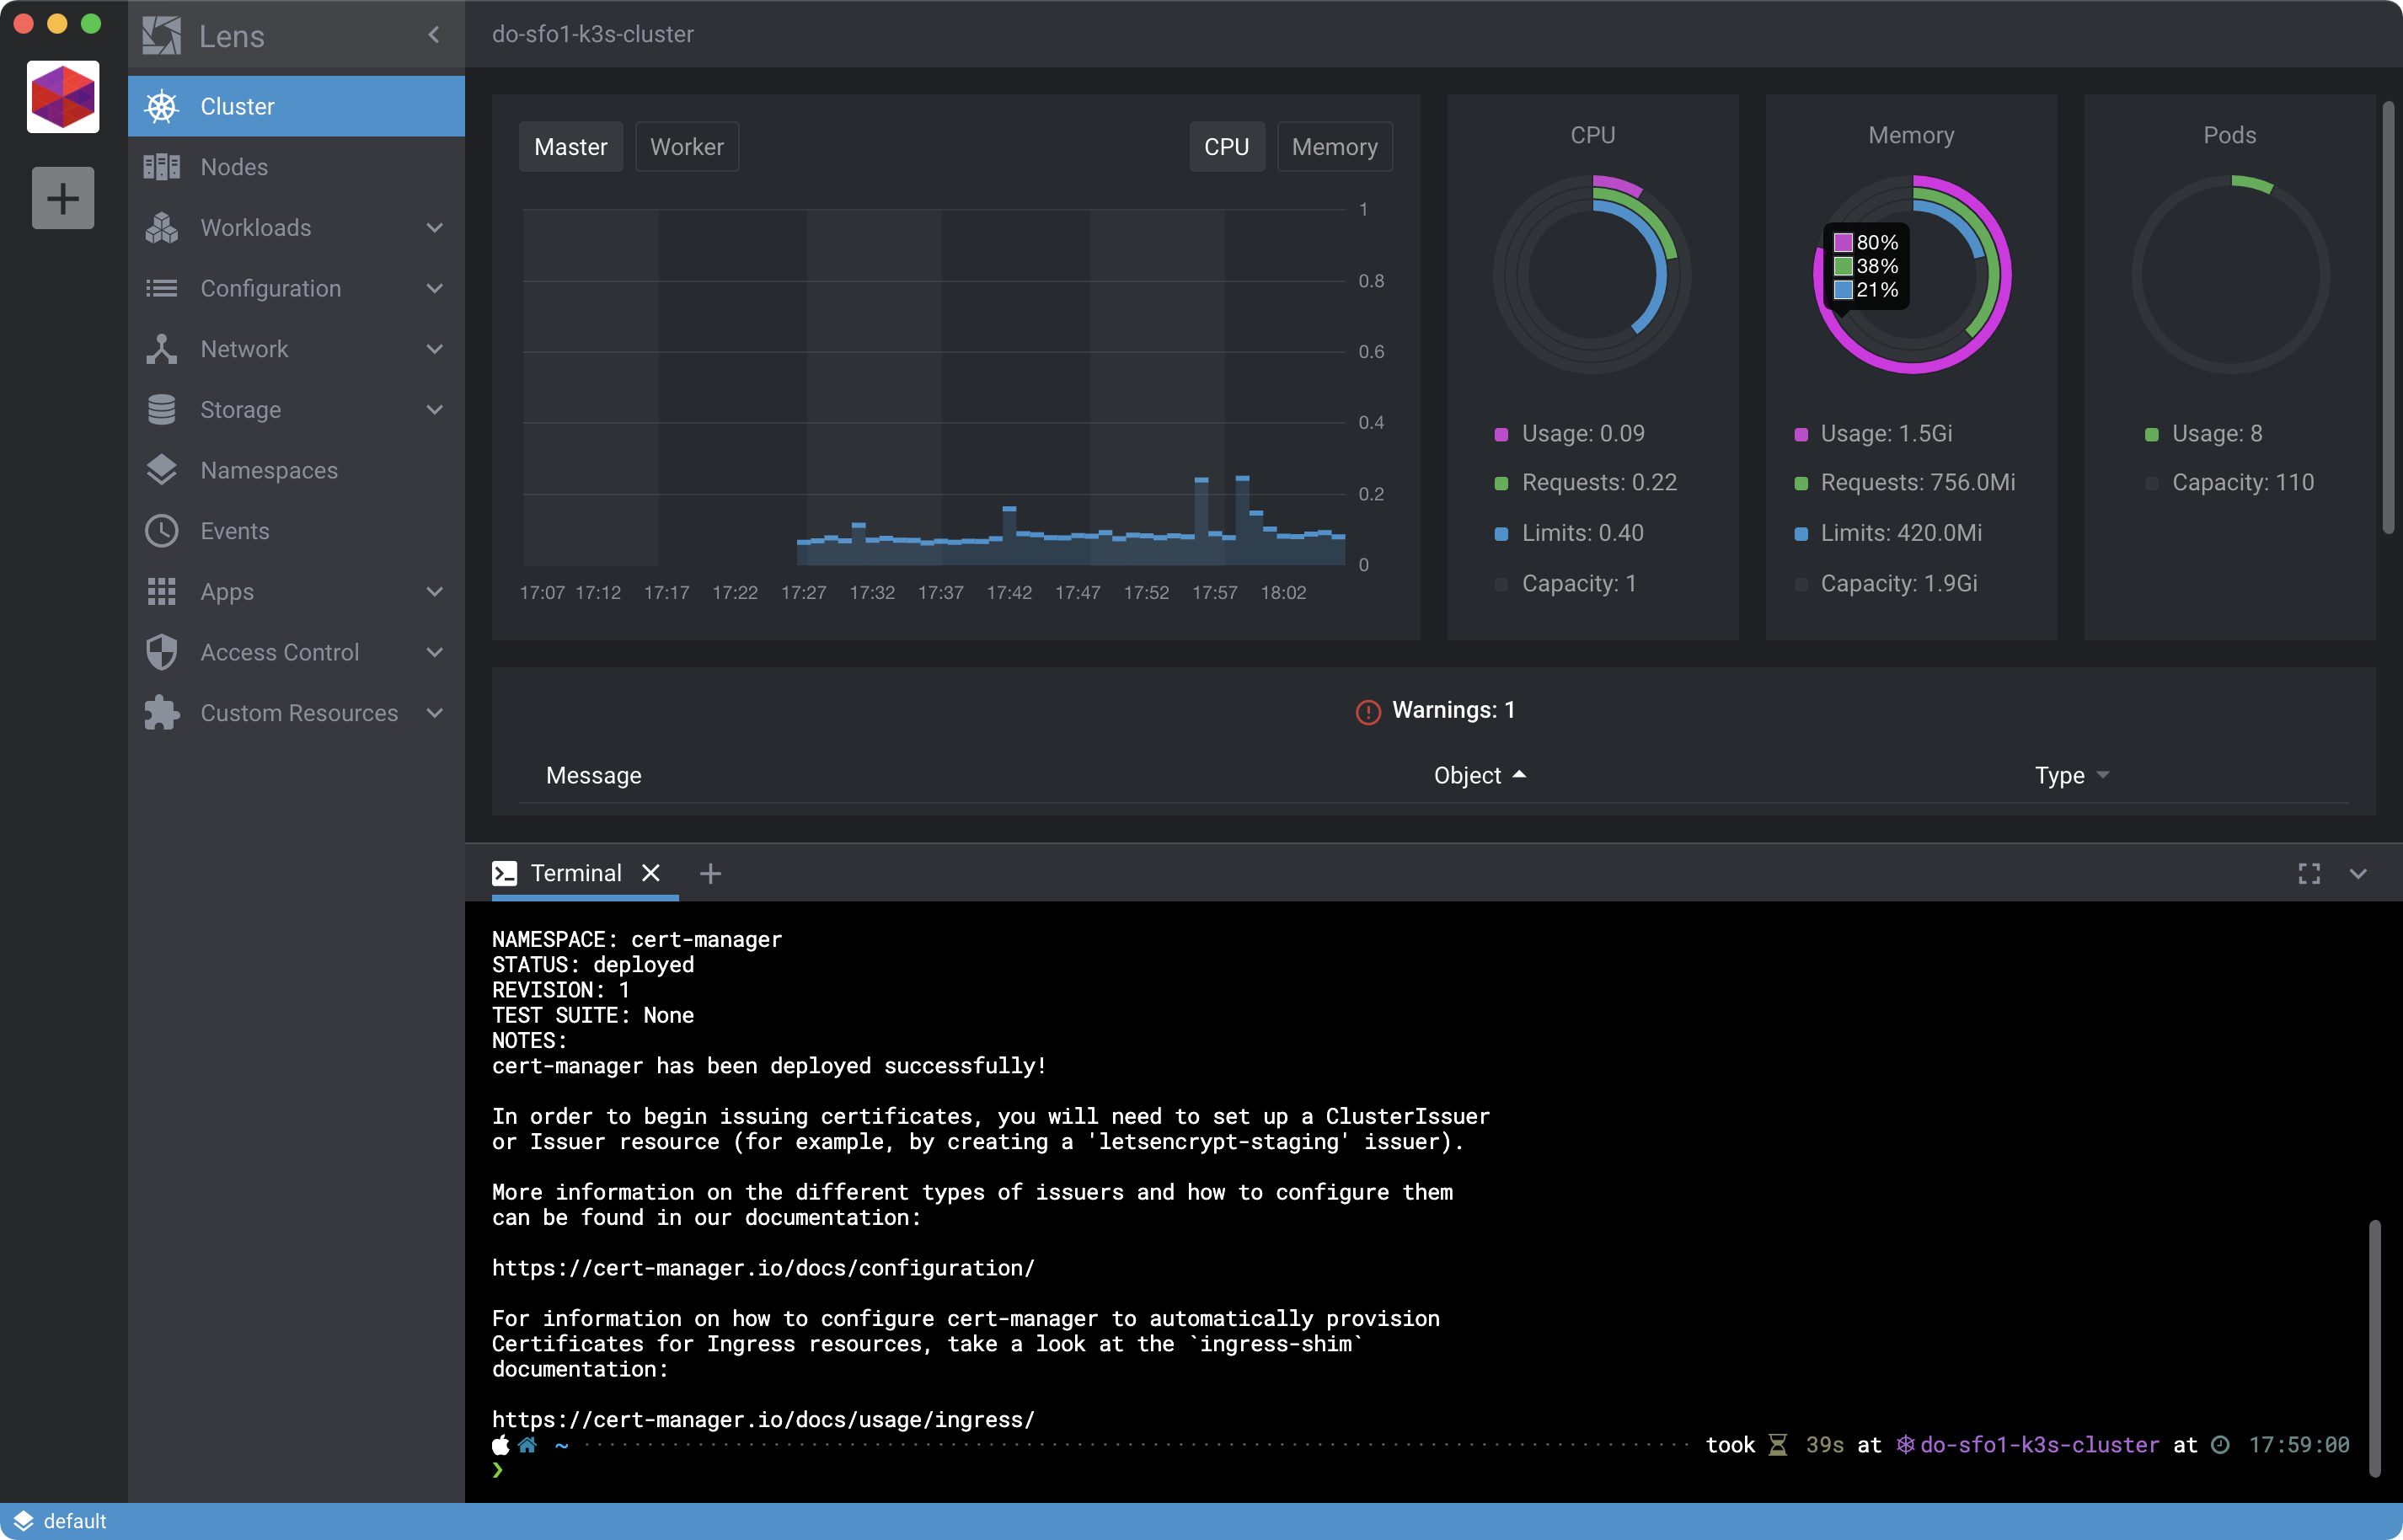
Notice memory utilization is at 80%. That’s why we picked the 2GB droplet option for the server. Had we used the 1GB option the cert-manager installation might have finished. But it also would’ve nuked all the RAM on remaining on Master, which I’ve observed on vanilla Ubuntu installs with K3s to cause kswapd0 to go haywire. Consequently, Lens would also have issues connecting to the cluster.
If you’re suddenly having issues with Lens use the doctl compute droplet-action resize command to resize the server (master) droplet to at least 2GB of memory.
Assuming your cluster is still humming along, it’s time to create a ClusterIssuer as suggested in the cert-manager installation output.
Configure cert-manager
Before cert-manager can issue TLS certificates it needs to be configured. Instructions for configuring are available on the cert-manager website. Rather than bore you with documentation let me just give you the skinny here:
Got it? Good. Create a ClusterIssuer for your K3s cluster from a manifest file, substituting the email with one of your own by editing the code inline below:
cat > letsencrypt-issuer-staging.yaml << EOF
apiVersion: cert-manager.io/v1
kind: ClusterIssuer
metadata:
  name: letsencrypt-staging
  namespace: default
spec:
  acme:
    # The ACME server URL
    server: https://acme-staging-v02.api.letsencrypt.org/directory
    # Email address used for ACME registration
    email: user@example.com
    # Name of a secret used to store the ACME account private key
    privateKeySecretRef:
      name: letsencrypt-staging
    # Enable the HTTP-01 challenge provider
    solvers:
    # An empty 'selector' means that this solver matches all domains
    - selector: {}
      http01:
        ingress:
          class: traefik
EOF
Above manifest modified from HTTP Validation tutorial original on 2020-12-15. Notice kind is ClusterIssuer and ingress.class is traefik. Traefik ingress is available in K3s out of the box. No additional configuration is necessary.
Apply the resource using the integrated Lens terminal:
kubectl apply -f letsencrypt-issuer-staging.yaml
You should see output like:
clusterissuer.cert-manager.io/letsencrypt-staging created
At which point you can use Lens to view the Kubernetes resource. To locate it click Custom Resources and then ClusterIssuer under the cert-manager.io rollup then click the item itself to open up a details view:
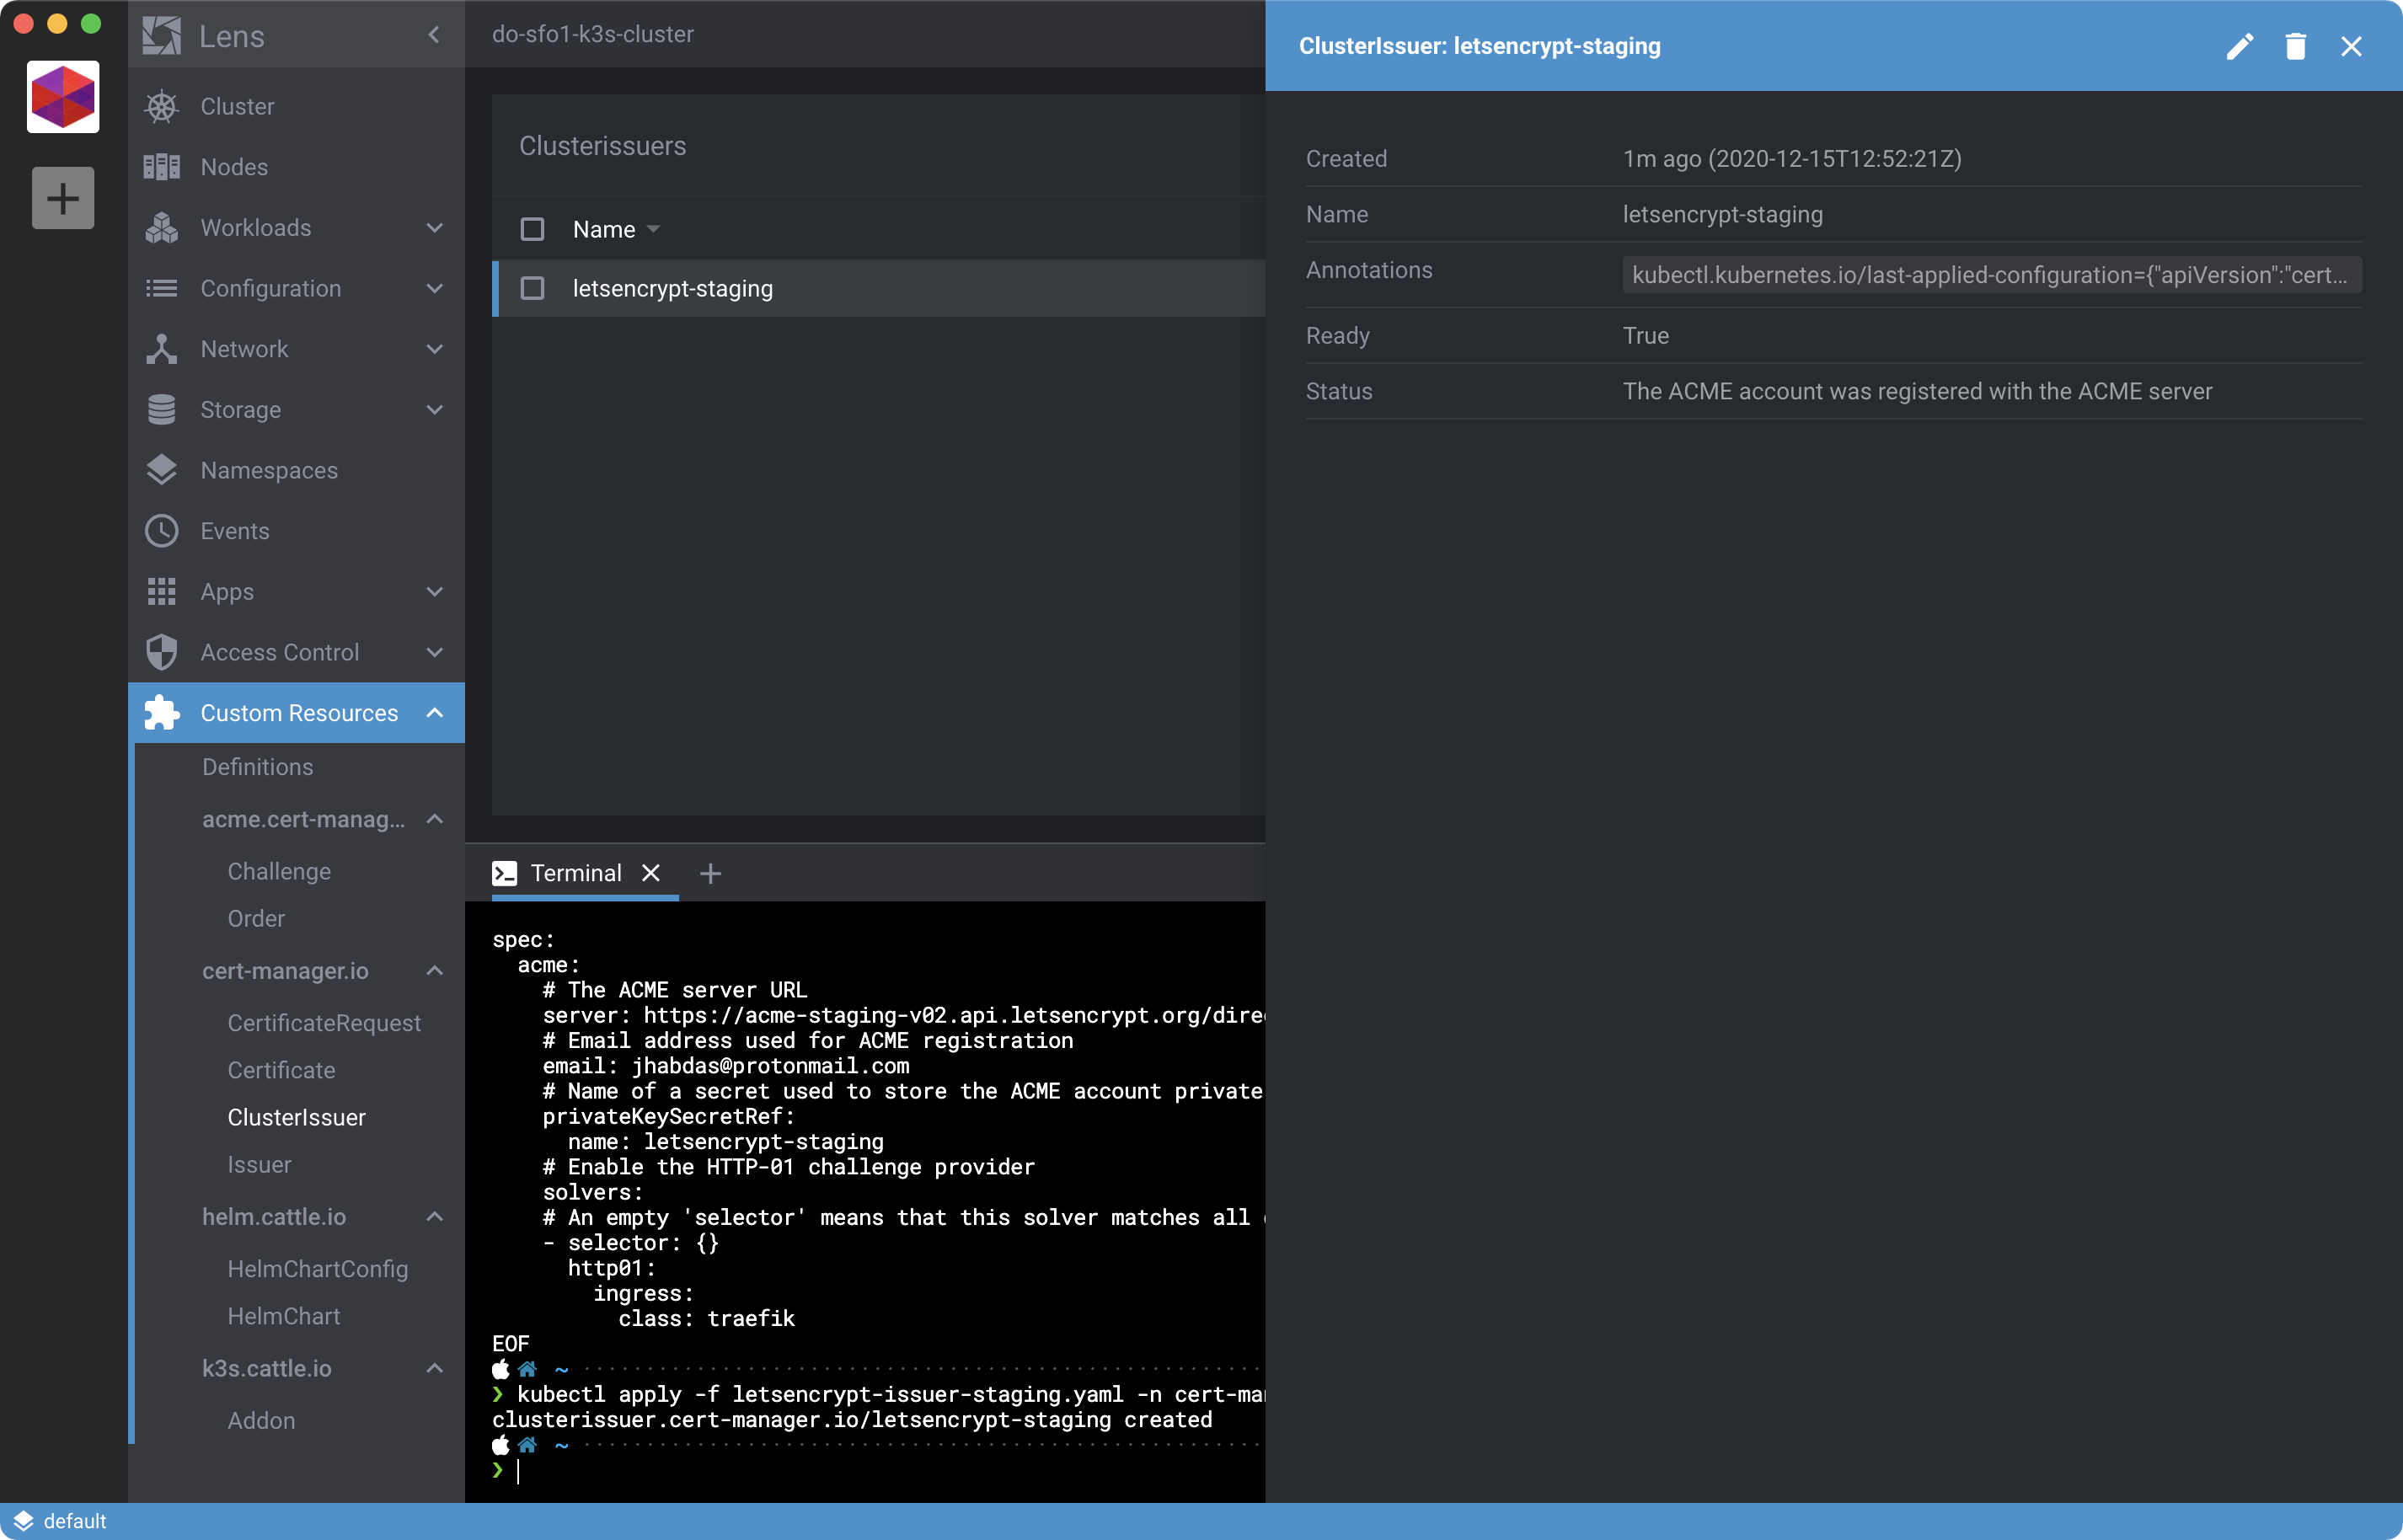
Confirm the Ready state is True to know it worked. Otherwise, review the Status and fix any issues described in the field, delete and reapply the CRD.
Tip: Status also available via kubectl get clusterissuers in the Terminal as described at 10:23 in “Installing and using cert-manager with k3s”.
From here you can continue with the cert-manager tutorials or watch the very excellent YouTube video linked in the tip above to learn how to test out your letsencrypt-staging issuer and generate an actual TLS certificate.
By now, however, you’re probably more interested in seeing what else Lens can do. And I can’t say I blame you. So I’ll leave you to it.
Considerations
If you’re going to be using your cluster for more than throwaway activities, you’ll want to adjust some Ubuntu behaviorS to prevent some gotchas which can chew up system resources:
sudo swapoff -a && \
apt remove unattended-upgrades -y && \
killall -9 unattended-upgr 2>/dev/null
SSH into your server and two agents and run this script to disable swap, prevent unattended upgrades and kill all existing unattended upgrade processes.
Why disable swap? That’s what the docs say MUST be done and I believe it may be an operational security consideration related to data remanence.
As for the upgrades, you can run those manually when the need arises. Just be sure you’re making regular back-ups of your system so you can recover quickly in case the VPS is somehow compromised.
If you run out of memory without swap top -o %MEM may show a process called kswapd0 laying waste to your CPU. Attempting to kill this process will not have the desired effect. See comment #191 in kswapd0 100% CPU usage and:
doctl compute ssh k3s-server-1 \
  --ssh-command "touch /etc/udev/rules.d/40-vm-hotadd.rules" && \
doctl compute droplet-action reboot <droplet-id>
Where droplet-id is the ID of the k3s-server-1 droplet. If it’s an agent causing problems and not the server, apply the changes to the agent instead.
Finally, don’t forget to harden your system a bit.
Clean Up
When you’re finished with your cluster don’t forget to destroy the droplets created on Digital Ocean. Doing so from the command line is super easy:
doctl compute droplet rm --tag-name k3s
You’ll receive a warning prompt confirming droplets to be deleted:
Warning: Are you sure you want to delete 3 Droplets tagged “k3s”? [affected Droplets: 221561079 221561070 221561062] (y/N) ?
Rely on droplet ls and use --tag-name to ensure you know exactly which droplets you’re deleting. Because once they’re gone they don’t come back.
Summary
In this post you learned how to set-up a Kubernetes cluster with K3s and use Lens to introspect on the cluster. You also learned how to install cert-manager for the purpose of issuing SSL certificates in your cluster, considerations for maintaining your cluster longer-term and how to clean it up when you’re done.
Lens is a great addition to any Kubernetes toolkit. If not because Kubernetes lacks a proper IDE, because learning Kubernetes can be sped up by combining the utiltariansm of the terminal, visual feedback of a user interface and time-saving capabilities of an integrated development environment.