
It was around 2004 when TBP was infiltrated by the Feds. For at least a day or two the homepage of the website showed nothing other than an emblazoned FBI logo. I’m sure I still have a screenshot somewhere but I trust you know how to verify claims people make on the Internet.
Back then I was an avid IRC user and knew how to set up a sophisticated FTP server replete with eggdrop reporting real-time connection activity to a hidden channel on EFNet. Those were the days when anything felt possible online. Then, all of a sudden, the walls came crashing down.
Around that time people started using torrent sites like kat.ph with apps like LimeWire and KaZaa. But torrents couldn’t hold a candle to the FTP dumpsites we used to set-up behind dynamic DNS servers back in the day. Most of the stuff on sites like KickAssTorrents was either improperly released, of sub-par quality or straight-up malware waiting to infect unsuspecting users.
I walked away. My full-time job out of college demanded regular 50-60 hour work weeks and I didn’t have much time to do anything else but work and sleep. That’s what a four year college degree bought us in the early 2000’s in America: Wage slavery.
In the 15-odd years which’ve passed since then we’ve seen a boon in privacy technology as an natural reaction to the rise of the surveillance capitalism from consitutional breaches in privacy. It took 10 years for GDPR to make it into law but now that its here the Web we know is going to change.
But until that day comes for the masses, arm yourself.
In this post I will show you how to access the contents of magnet links using Deluge and Mullvad with WireGuard VPN on Invisible Arch Linux.
Using this method you can download content to a deniably encrypted machine using an IP of your choice in one of several different countries and do so undetected by your ISP. Whats more you will be connected to an anonymous server running WireGuard paid for using a pseudonymous digital currency: Bitcoin.
Let’s not waste any more time.
Fund Samourai Wallet
First things first. If you’re going to buy Mullvad, do so anonymously otherwise there’s little point in using it. Mullvad provides three options for purchasing accounts with pseudononymity:
- Cash in an envelope
- Bitcoin
- Bitcoin Cash
Given you’d be a fool to send cash in an envelope anywhere I’m going to assume you’re going to use one of the two latter options. And my currently suggestion is to use Samourai Wallet with Tor enabled (it’s built in) to send Bitcoin. Do this in Airplane mode with your Wi-Fi turned on at a coffee shop you hate.
Create Mullvad Account
Next create a Mullvad account. Do this over Tor using TailsOS using a different Wi-Fi access point (not your own, idiot) then use your Mullvad account to create a Wireguard configuration you can save and send to yourself offline. Use your Samourai Wallet to send the payment – again using Tor – and be sure to use the Samourai “Stonewall” option to add entropy to your payment transaction.
Configure WireGuard
Next boot your Invisible Arch and install WireGuard with:
pacman -S wireguard-arch wireguard-tools
You can do this online or off, your call. Once WireGuard is installed you’ll have a folder called /etc/wireguard and you can move your configuration file there and protect it using one of these jobs:
mv mullvad*.conf /etc/wg0.conf && \
chown root:root /etc/wireguard/wg0.conf && \
chmod 600 /etc/wireguard/wg0.conf
Do that as the root after a su - or face permissions issues. If you need help consult ArchWiki. And when you’re done bring up and enable the WireGuard interface using systemd with:
systemctl start wg-quick@wg0.service && \
systemctl enable wg-quick@wg0.service
The first command will start the WireGuard interface using WireGuard tools and the second will enable it so it starts immediately as your system boots up.
Connect to Mullvad
Next connect to the Internet as you normally would using your eth0 or wlan0 as explained in tremendous detail on ArchWiki. Because the WireGuard service is already running you’ll connect immediately to the Mullvad server after your own device connects to the access point. You can connect from any access point you like as WireGuard will hide your Internet traffic using a ChaCha stream cipher.
With link up visit am.i.mullvad.net and verify you’re connected to your Mullvad server and that there are no DNS leaks. If there are no leaks you’re ready to proceed. If you’re leaking DNS figure it out before you continue.
Install Deluge
Now that you’re pseudonymously connected to the Internet go ahead and configure your mirrorlist to find a fast, reliable Pacman server close to your WireGuard endpoint and use it to install the Deluge BitTorrent client with command:
pacman -S deluge
While you’re at it install and configure Uncomplicated Firewall:
pacman -S ufw && \
ufw default deny && \
ufw allow from 192.168.0.0/24 && \
ufw limit ssh && \
systemctl start ufw && \
systemctl enable ufw
Configure Deluge using the instructions on ArchWiki. Go for the client-server model for improved security on your system. Once configured start Deluge GUI or console using deluge-console. You should see something like:
Expand to view sample output
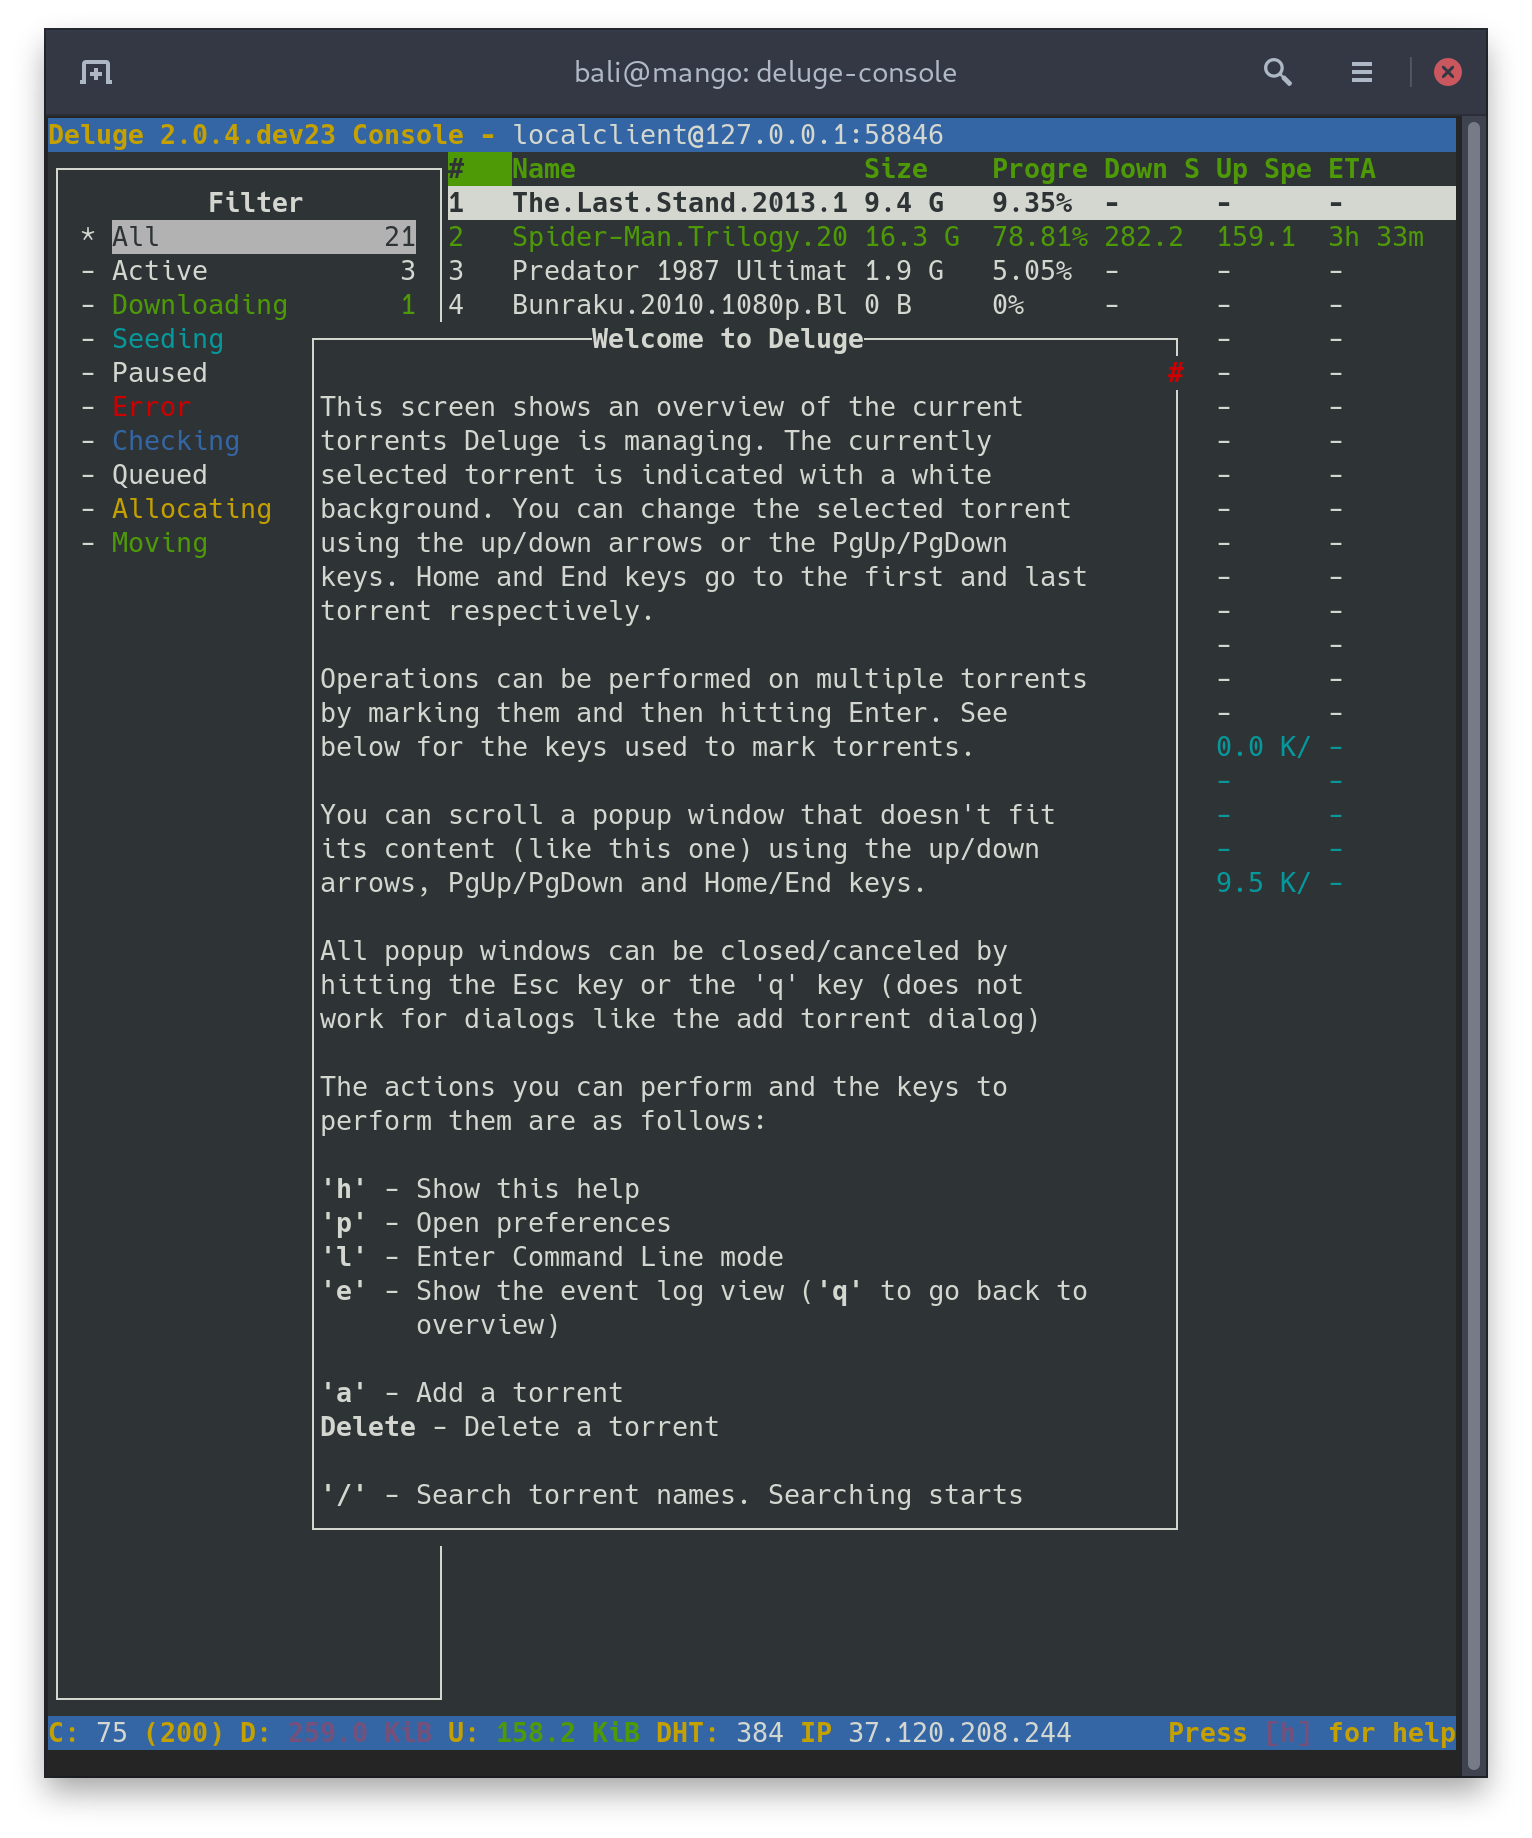
If you do, you’re almost finished.
Configure Deluge
The final step is to configure the incoming port of Deluge to receive connections and activate it in the Deluge client. To do so you need to access your Mullvad account again on the Web, navigate to your WireGuard settings page, find the Add Port button, and add a port and associate it with your config.
When complete the port will be open but still blocked by your firewall. Update your firewall by adding a custom Deluge app to /etc/ufw/applications.d with the custom WireGaurd port as explained on ArchWiki.
Then configure Deluge to use the port as the Incoming Port option (replacing the random default) as shown here:
Expand to view sample output
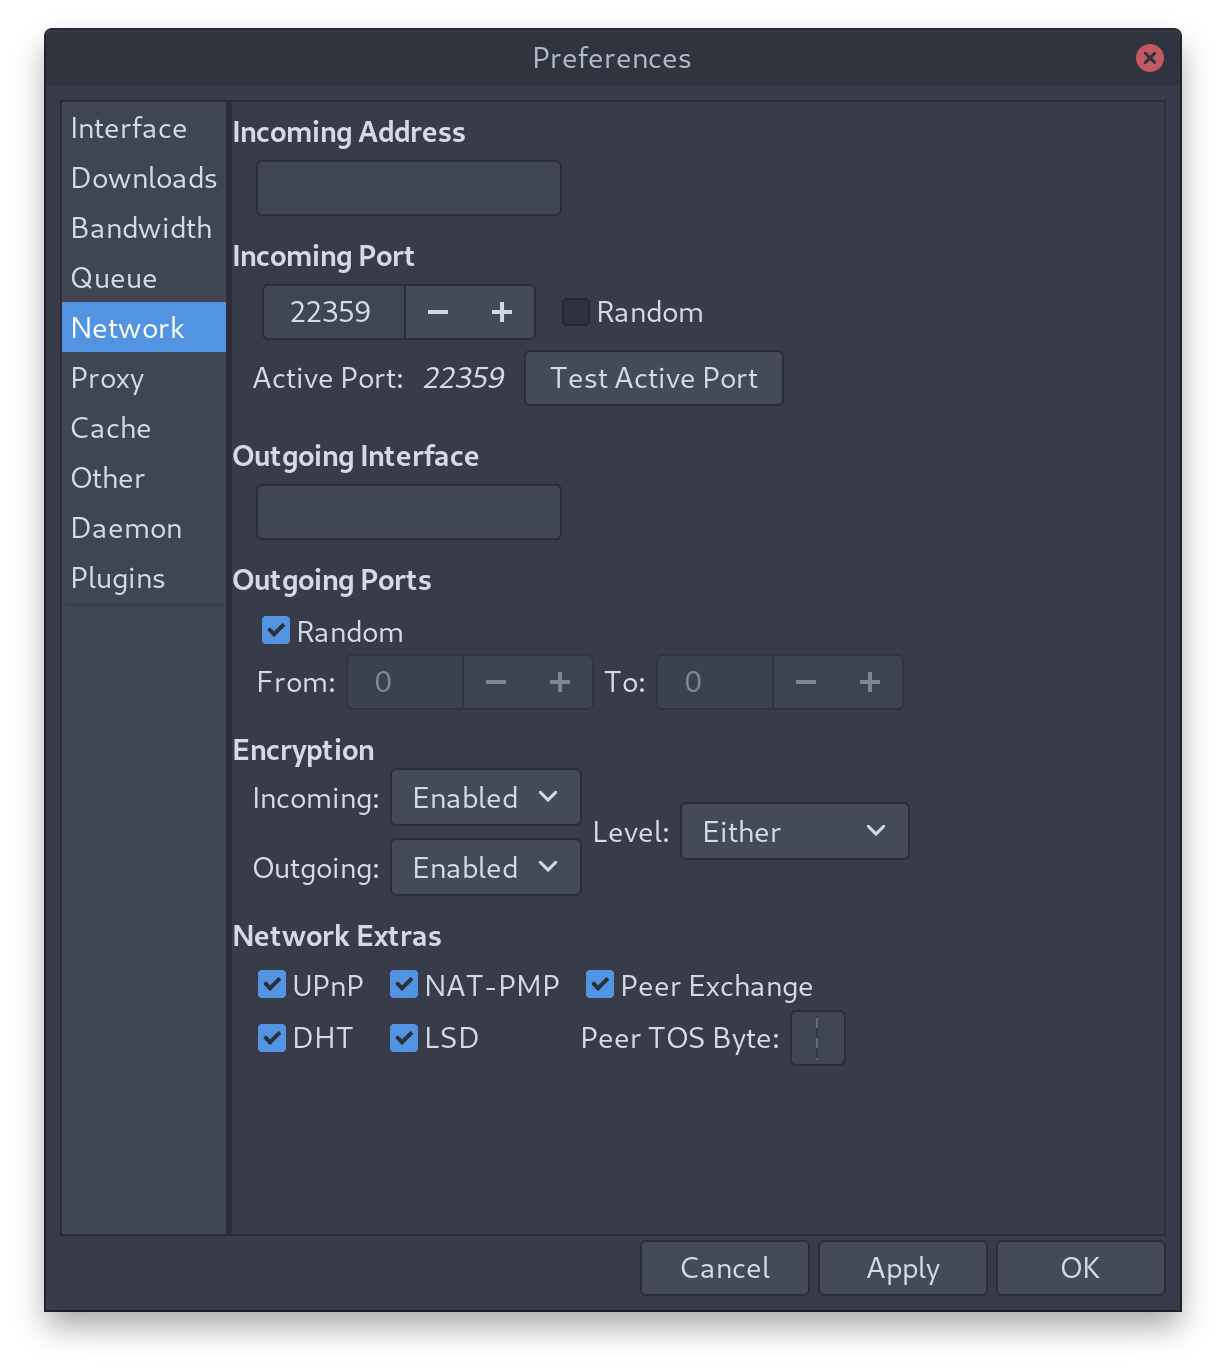
Use the Test Active Port option in Deluge to confirm the port is working and you’re finished. You can now add magnet links to Deluge and seed torrents using the BitTorrent protocol behind the safety of your WireGuard.
Profit
If you’re looking for a place to find magnet links check out ZeroNet. There are a few sites on there which will give you more than you bargained for. And some of them have been around for quite some time.
Should anything go wrong just power off Invisible Arch. Any data you downloaded will be deniably encrypted so long as no one knows you have an invisible OS. And if they do know you’re using deniable encryption you can’t open it anyway if you don’t remember the password to access the system.