Learning Kubernetes is fun but it does come with its own unique challenges. For instance, last November I found myself in a situation where I had 21 gigabytes of WordPress upload content locked inside a Persistent Volume (PV) I needed to pull down to my machine otherwise I was going to lose it. Here’s how I did it.
Create Pod with PV attached
In my situation the Pod I was using to access the Persistent Volume became unusable and the data inaccessible. In order to access the data I needed to create a new pod with the PV attached as described on StackOverflow:
---
apiVersion: v1
kind: Pod
metadata:
  name: dataaccess-wp-content
  namespace: wordpress
spec:
  containers:
  - name: alpine
    image: alpine:latest
    command: ['tail', '-f', '/dev/null']
    volumeMounts:
    - name: wordpress-production-wp-content
      mountPath: /data
  volumes:
  - name: wordpress-production-wp-content
    persistentVolumeClaim:
      claimName: wordpress-production-wp-content
I chose alpine because it’s relatively slim and easy-to-use. The tail commend keeps the container running in order to be able to access its shell and execute commands. Finally the namespace matches the PVC which can be determined from the CLAIM after running kubectl get pv (i.e. wordpress):
NAME                                       CLAIM
pvc-509c67a7-fdd9-4548-bb64-d993eb984ac7   lens-metrics/data-prometheus-0
pvc-ebe7771a-bd03-4115-a2dc-69edf1a97cc1   wordpress/wordpress-production-wp-content
pvc-16f1b977-ac78-42ad-9ffe-99d4847aec5a   wordpress/data-wordpress-production-database-primary-0
pvc-b3978c27-9c72-4b59-9d89-1257c8df8808   wordpress/data-wordpress-production-database-secondary-0
After saving the PodSpec above to a YAML file called dataaccess-wp-content.yaml (or whatever), deploy the Pod to the cluster using kubectl apply like so:
kubectl apply -f dataaccess-wp-content.yaml
# => pod/dataaccess-wp-content created
Checking the Pod status with kubectl get pods -n wordpress:
NAME                                        READY   STATUS    RESTARTS        AGE
dataaccess-wp-content                       0/1     Pending   0               31s
If the Pod does not move from Pending to Ready after 10-15 seconds, it’s likely there are some logs you’ll need to investigate (shown here using Lens App):
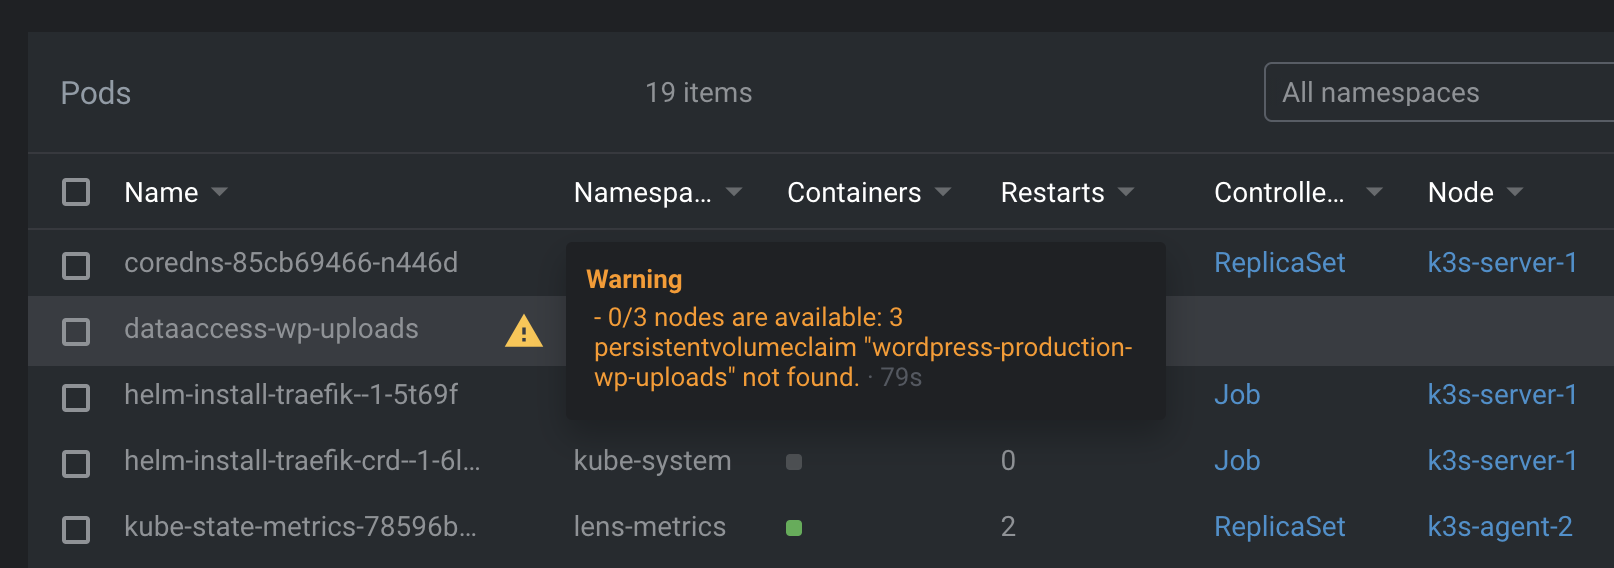
If this happens to you, double-check your claim name using kubectl get pv and compare it with the name you used in your PodSpec.
Once the Pod is Ready move onto the next section. When you’re done, or if you want to remove the Pod to update the claim name, run the following command:
kubectl delete -f dataaccess-wp-content.yaml
# => pod "dataaccess-wp-content" deleted
Syncing Files from the PV
To recover files from the Persistent Volume create a bash script called krsync as described by Karl Bunch on ServerFault:
#!/bin/bash

if [ -z "$KRSYNC_STARTED" ]; then
    export KRSYNC_STARTED=true
    exec rsync --blocking-io --rsh "$0" $@
fi

# Running as --rsh
namespace=''
pod=$1
shift

# If use uses pod@namespace rsync passes as: {us} -l pod namespace ...
if [ "X$pod" = "X-l" ]; then
    pod=$1
    shift
    namespace="-n $1"
    shift
fi

exec kubectl $namespace exec -i $pod -- "$@"
Make the script executable and run it like you normally would rsync:
krsync -av --progress --stats src-dir/ pod:/dest-dir
Or with a namespace as Karl illustrates:
krsync -av --progress --stats src-dir/ pod@namespace:/dest-dir
Above examples from Karl are for uploading. To move data in the reverse direction, flip the order of src-dir and dest-dir. To use krsync with the data access Pod created in the last section shell into the Pod with sh, install rsync and begin your transfer:
Using krsync allows you to copy large files, or hundreds of thousands of small ones, to and from a Persistent Volume in Kubernetes. In addition, and unlike kubectl cp, you get progress indication, the ability to resume transfers and will not suffer from this 4 year-old issue in Kubernetes individuals continue to struggle with.
Losing data is never enjoyable especially when it can be avoided. Hopefully this will help someone as much as it helped me. And if it did, please share.
Bonus: Uploading Files
If you use krsync to upload files, reverse the order of the src-dir and dest-dir in described in the last section. Once the files are uploaded make sure you adjust the permissions as needed after shelling into the dataaccess container:
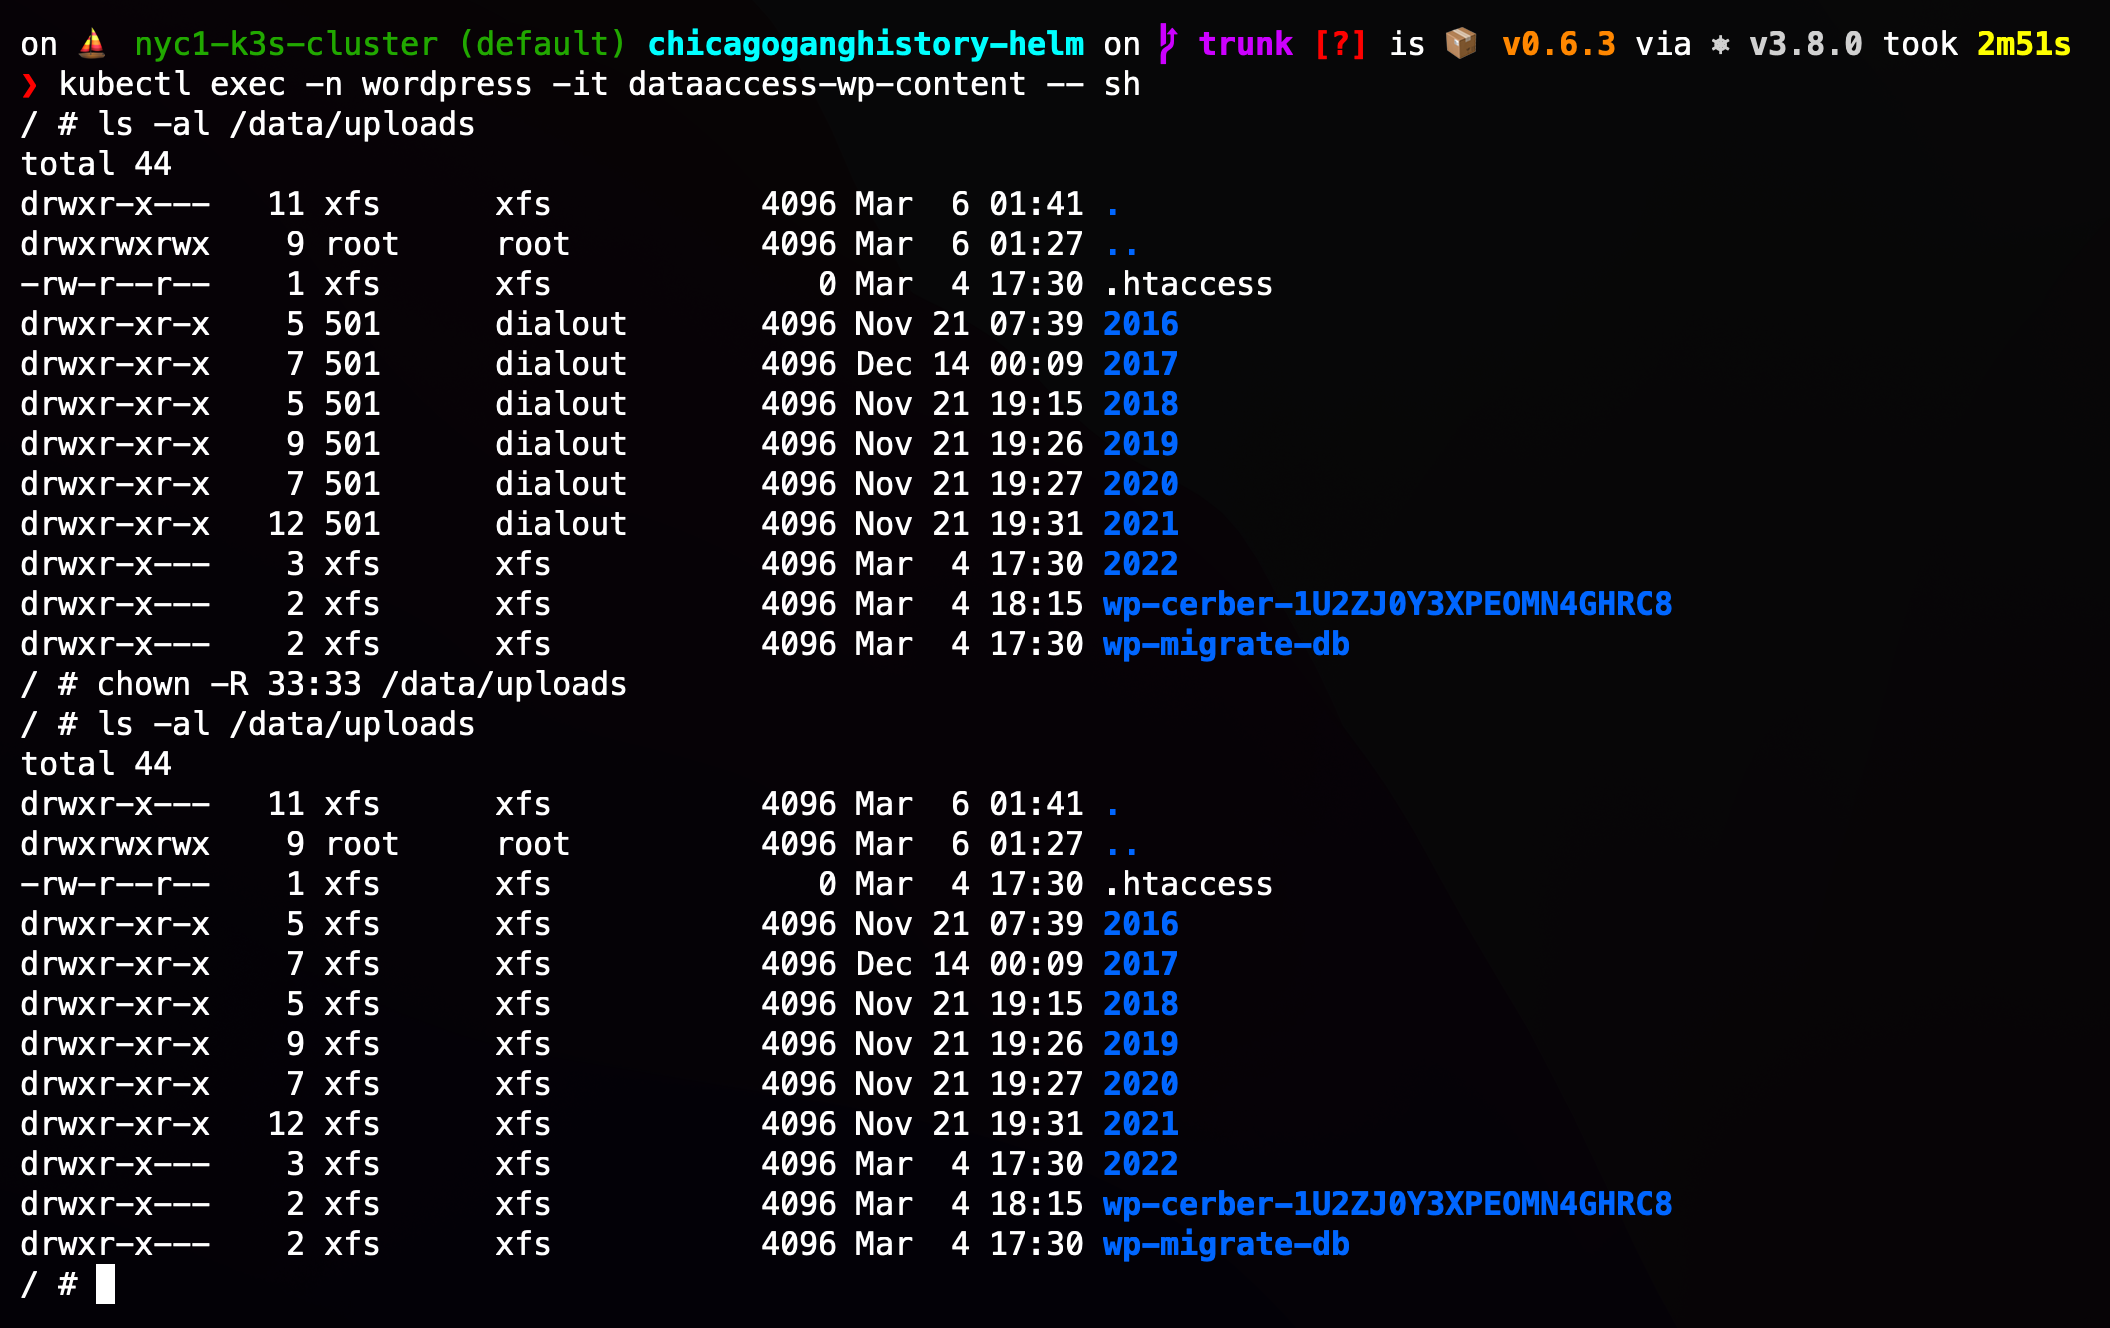
kubectl exec -n wordpress -it dataaccess-wp-content -- sh
Changing file ownership to xfs user:
chown -R 33:33 /data/uploads
If you don’t adjust file permissions, you may have issues accessing any files uploaded due to permissions errors from within other Pods in your cluster.