
Last week Pantheon dealt the final blow to the website I drove from 100 visitors up to 80,000 per month. By the time I heard the death knell we had a 10-day advance notice the price of hosting was increasing 1025% to $450/month.
I quickly spun up a Plesk instance on Digital Ocean and installed WordPress on a $10/month VPS but realized Plesk was too bloated for our needs and probably not going to cut the mustard in the scale department should traffic decide to climb.
After initially attempting to deploy Wordpress using the Helm chart by Bitnami via the App Marketplace in Rancher 2.5 I found the chart difficult to use, kept looking and eventually found a an alternative chart on a self-hosted VCS.
Like the Bitnami chart the independent chart includes optional database set-up. Unlike the Bitnami chart, however, the self-hosted chart also includes a Redis object cache, OpenID Connect authentication. It also builds a hardened WordPress Pod using WP CLI from scratch with Ansible inside an Init Container. And in this tutorial I’m going to show you how you install it on macOS with K3D.
Note: In case you’re not familiar K3D is an alternative to KiND which runs a lightweight Kubernetes distribution called K3s using Docker Engine.
To install WordPress with K3D you’ll need a few things set-up first.
Requirements
Requirements for this tutorial are the same as K8s on macOS with K3s, K3d and Rancher. Rather than copying them here please check them out there and come back when you’re finished. Some development environments will already be good to go.
Clone Repo
You’ll be installing locally from source. To get the source onto your machine clone the self-hosted repository I linked to earlier:
cd $HOME/Developer && \
git clone https://open.greenhost.net/openappstack/wordpress-helm.git && \
cd wordpress-helm
Open the repo in your favorite code editor. I’ll be using VSCode which I switched to from Atom about a year ago. Once open you should see something like this:

As you can see the repo is pretty beefy. It also includes a fair amount of documentation in the README, including instructions on importing an existing WordPress site, which I found reassuring given the Pantheon situation.
After about an hour evaluating the code I felt like I was ready to rock with this thing and realized that, while well documented, the README didn’t keep up with some refactoring and there was one documented bug to workaround. So rather than leaving you at “okay, here’s the README” let me take you through the steps I took to get this puppy running.
Copy Docker Images
While reviewing the code I noticed some of the scripts were pulling images off a self-hosted Docker registry on the same domain the code was hosted on. Rather than consuming the bandwidth of the self-hosted registry I decided to pull down both images and make my own copies in Docker Hub. I recommend anyone using this do the same just in case the registry goes down for any reason.
The images to copy are listed in the file values.yaml. So before you do anything else locate the two images and create your own copies on Docker Hub or your own self-hosted/private registry:
Expand to view changes
diff --git a/values.yaml b/values.yaml
index 0e85651..86a096a 100644
--- a/values.yaml
+++ b/values.yaml
@@ -240,13 +240,13 @@ ansibleVars:
   wordpress_default_plugins: "[classic-editor]"

 image:
-  repository: open.greenhost.net:4567/openappstack/wordpress-helm/wordpress
+  repository: index.docker.io/vhs/wordpress
   tag: 0.1.5
   pullPolicy: Always
   pullSecrets: []

 initImage:
-  repository: open.greenhost.net:4567/openappstack/wordpress-helm/wordpress-cli-ansible
+  repository: index.docker.io/vhs/wordpress-cli-ansible
   tag: 0.1.5
   pullPolicy: Always
Assuming you have a Docker Hub account pull them down with the following:
docker pull open.greenhost.net:4567/openappstack/wordpress-helm/wordpress && \
docker pull open.greenhost.net:4567/openappstack/wordpress-helm/wordpress-cli-ansible
Once you’ve got the images locally docker tag them, referencing the tag value corresponding to each image in values.yaml and then do:
docker login && \
docker push {namespace}/wordpress:0.1.5 && \
docker push {namespace}/wordpress-cli-ansible:0.1.5
Where 0.1.5 is the tag value and {namespace} is your username or organization. Be sure you make the images public in Docker Hub after you’ve uploaded them otherwise the Init Container that pulls them during installation will fail.
Customize Values
Next thing you need to do is called out in the README and that’s to copy values-local.yaml.example to values-local.yaml. While you’re at it do the same thing for install.sh.example and don’t forget to chmod +x install.sh when finished.
Open values-local.yaml and review it. It’s about 200 lines of config but it’s much easier to deal with than most 20-line Gruntfiles, that’s for sure. Follow the instructions in the README to see what you absolutely need to change. These items are called out near the top of the file and include things such as the database and admin user credentials. Update them and save the file.
Here are the changes I made for the version I was running:
- set database.db.password
- set database.rootUser.password
- set database.replication.password
- set wordpress.adm.usid
- set wordpress.adm.pssw
- set wordpress.adm.pssw
- add wordpress.adm.email
I also tweaked theme settings but it’s not necessary the first time around.
And with that our values changes are finished for our first run. Next we’re going to create a local cluster to run it on.
Create Cluster
Create a throw-away cluster using K3D to run WordPress on. Here’s what I used though feel free to ad-lib on it to suit your own tastes:
k3d cluster create k3s-wordpress --api-port 6550 --agents 2
This tells K3D to create a three-node cluster called k3s-wordpress and expose Kubernetes API on port 6550 (though the API port is not strictly necessary). If you have other clusters running with K3D and they’re conflicting with the port setting you can shut them down using k3d cluster list and delete commands.
That’s literally all you need to do for a throw-away cluster. And once the cluster is up and running you’re ready to run the WordPress installation.
Install WordPress
If you created the install.sh script as suggested earlier, you’re just about ready to roll. Before you do, however, a little housekeeping:
- Set API context: export KUBECONFIG=$(k3d kubeconfig write k3s-wordpress)
- Add Bitnami charts for DB and Redis as instructed in the README
- Update Helm dependencies as instructed in the README
That’s it, now let ’er rip with this super pithy shell one-liner:
./install
You should receive output letting you know things got kicked off:
Release "wordpress-production" does not exist. Installing it now.
NAME: wordpress-production
LAST DEPLOYED: Wed Dec  9 17:59:46 2020
NAMESPACE: default
STATUS: deployed
REVISION: 1
At this point a few things are happening. The MariaDB image is downloading and Pods are starting for the database, and another Pod got kicked off with the Init Container which is creating the hardened WordPress installation from scratch using the WP CLI (with Ansible) pushed to Docker Hub earlier in the tutorial.
While WordPress is bootstrapping, take a look at where things stand with:
watch kubectl get all
Or monitor rollout of the Helm deployment with:
kubectl -n default rollout status statefulset wordpress-production
Tip: The watch command-line utility is useful for monitoring cluster resources over time. Install it via Homebrew with brew install watch.
The wordpress-production-0 Pod will take some time as it’s the one running the Ansible set-up to build everything from scratch. While the Pod is initializing you will not be able to do kubectl get pod on it until it finishes. Instead to introspect on it use kubectl describe as well as the container access flag along with kubectl logs mentioned in the Init Container docs.
Wait until the initialization finishes and run kubectl get all again:
You should see output like:
Expand to view expected output
NAME                                         READY   STATUS    RESTARTS   AGE
pod/wordpress-production-database-master-0   1/1     Running   0          8h
pod/wordpress-production-database-slave-0    1/1     Running   0          8h
pod/wordpress-production-0                   1/1     Running   0          8h

NAME                                          TYPE        CLUSTER-IP      EXTERNAL-IP   PORT(S)    AGE
service/kubernetes                            ClusterIP   10.43.0.1       <none>        443/TCP    8h
service/wordpress-production                  ClusterIP   10.43.125.128   <none>        8080/TCP   8h
service/wordpress-production-database-slave   ClusterIP   10.43.93.44     <none>        3306/TCP   8h
service/wordpress-production-database         ClusterIP   10.43.218.250   <none>        3306/TCP   8h

NAME                                                    READY   AGE
statefulset.apps/wordpress-production-database-master   1/1     8h
statefulset.apps/wordpress-production-database-slave    1/1     8h
statefulset.apps/wordpress-production                   1/1     8h
Notice service/wordpress-production running on port 8080. Next you’re going to connect to it from outside the cluster. Before you do verify the Init Container finished and the wordpress-production-0 Pod is in a Running state. If it’s getting stuck, check the Ansible logs the following and debug before proceeding:
kubectl logs -l "app=wordpress" -c init-wordpress -f

export POD_NAME=$(kubectl get pods --namespace default -l "app=wordpress,release=wordpress-production" -o jsonpath="{.items[0].metadata.name}") && \
kubectl describe pod/$POD_NAME
When all Pods are ready, it’s time to view the site.
View Your Site
To view your site outside the cluster forward port 80 to port 8080 on the service:
sudo -E kubectl port-forward service/wordpress-production 80:8080
Here we’re using sudo because 80 is generally a reserved port and the -E flag tells sudo to pass the environment (specifically the KUBECONFIG) to kubectl.
You should see output like:
Forwarding from 127.0.0.1:80 -> 8080
Forwarding from [::1]:80 -> 8080
And now you can view your WordPress site at http://localhost in the browser and sign-in as an admin a la values-local.yaml at http://localhost/wp-login.php:
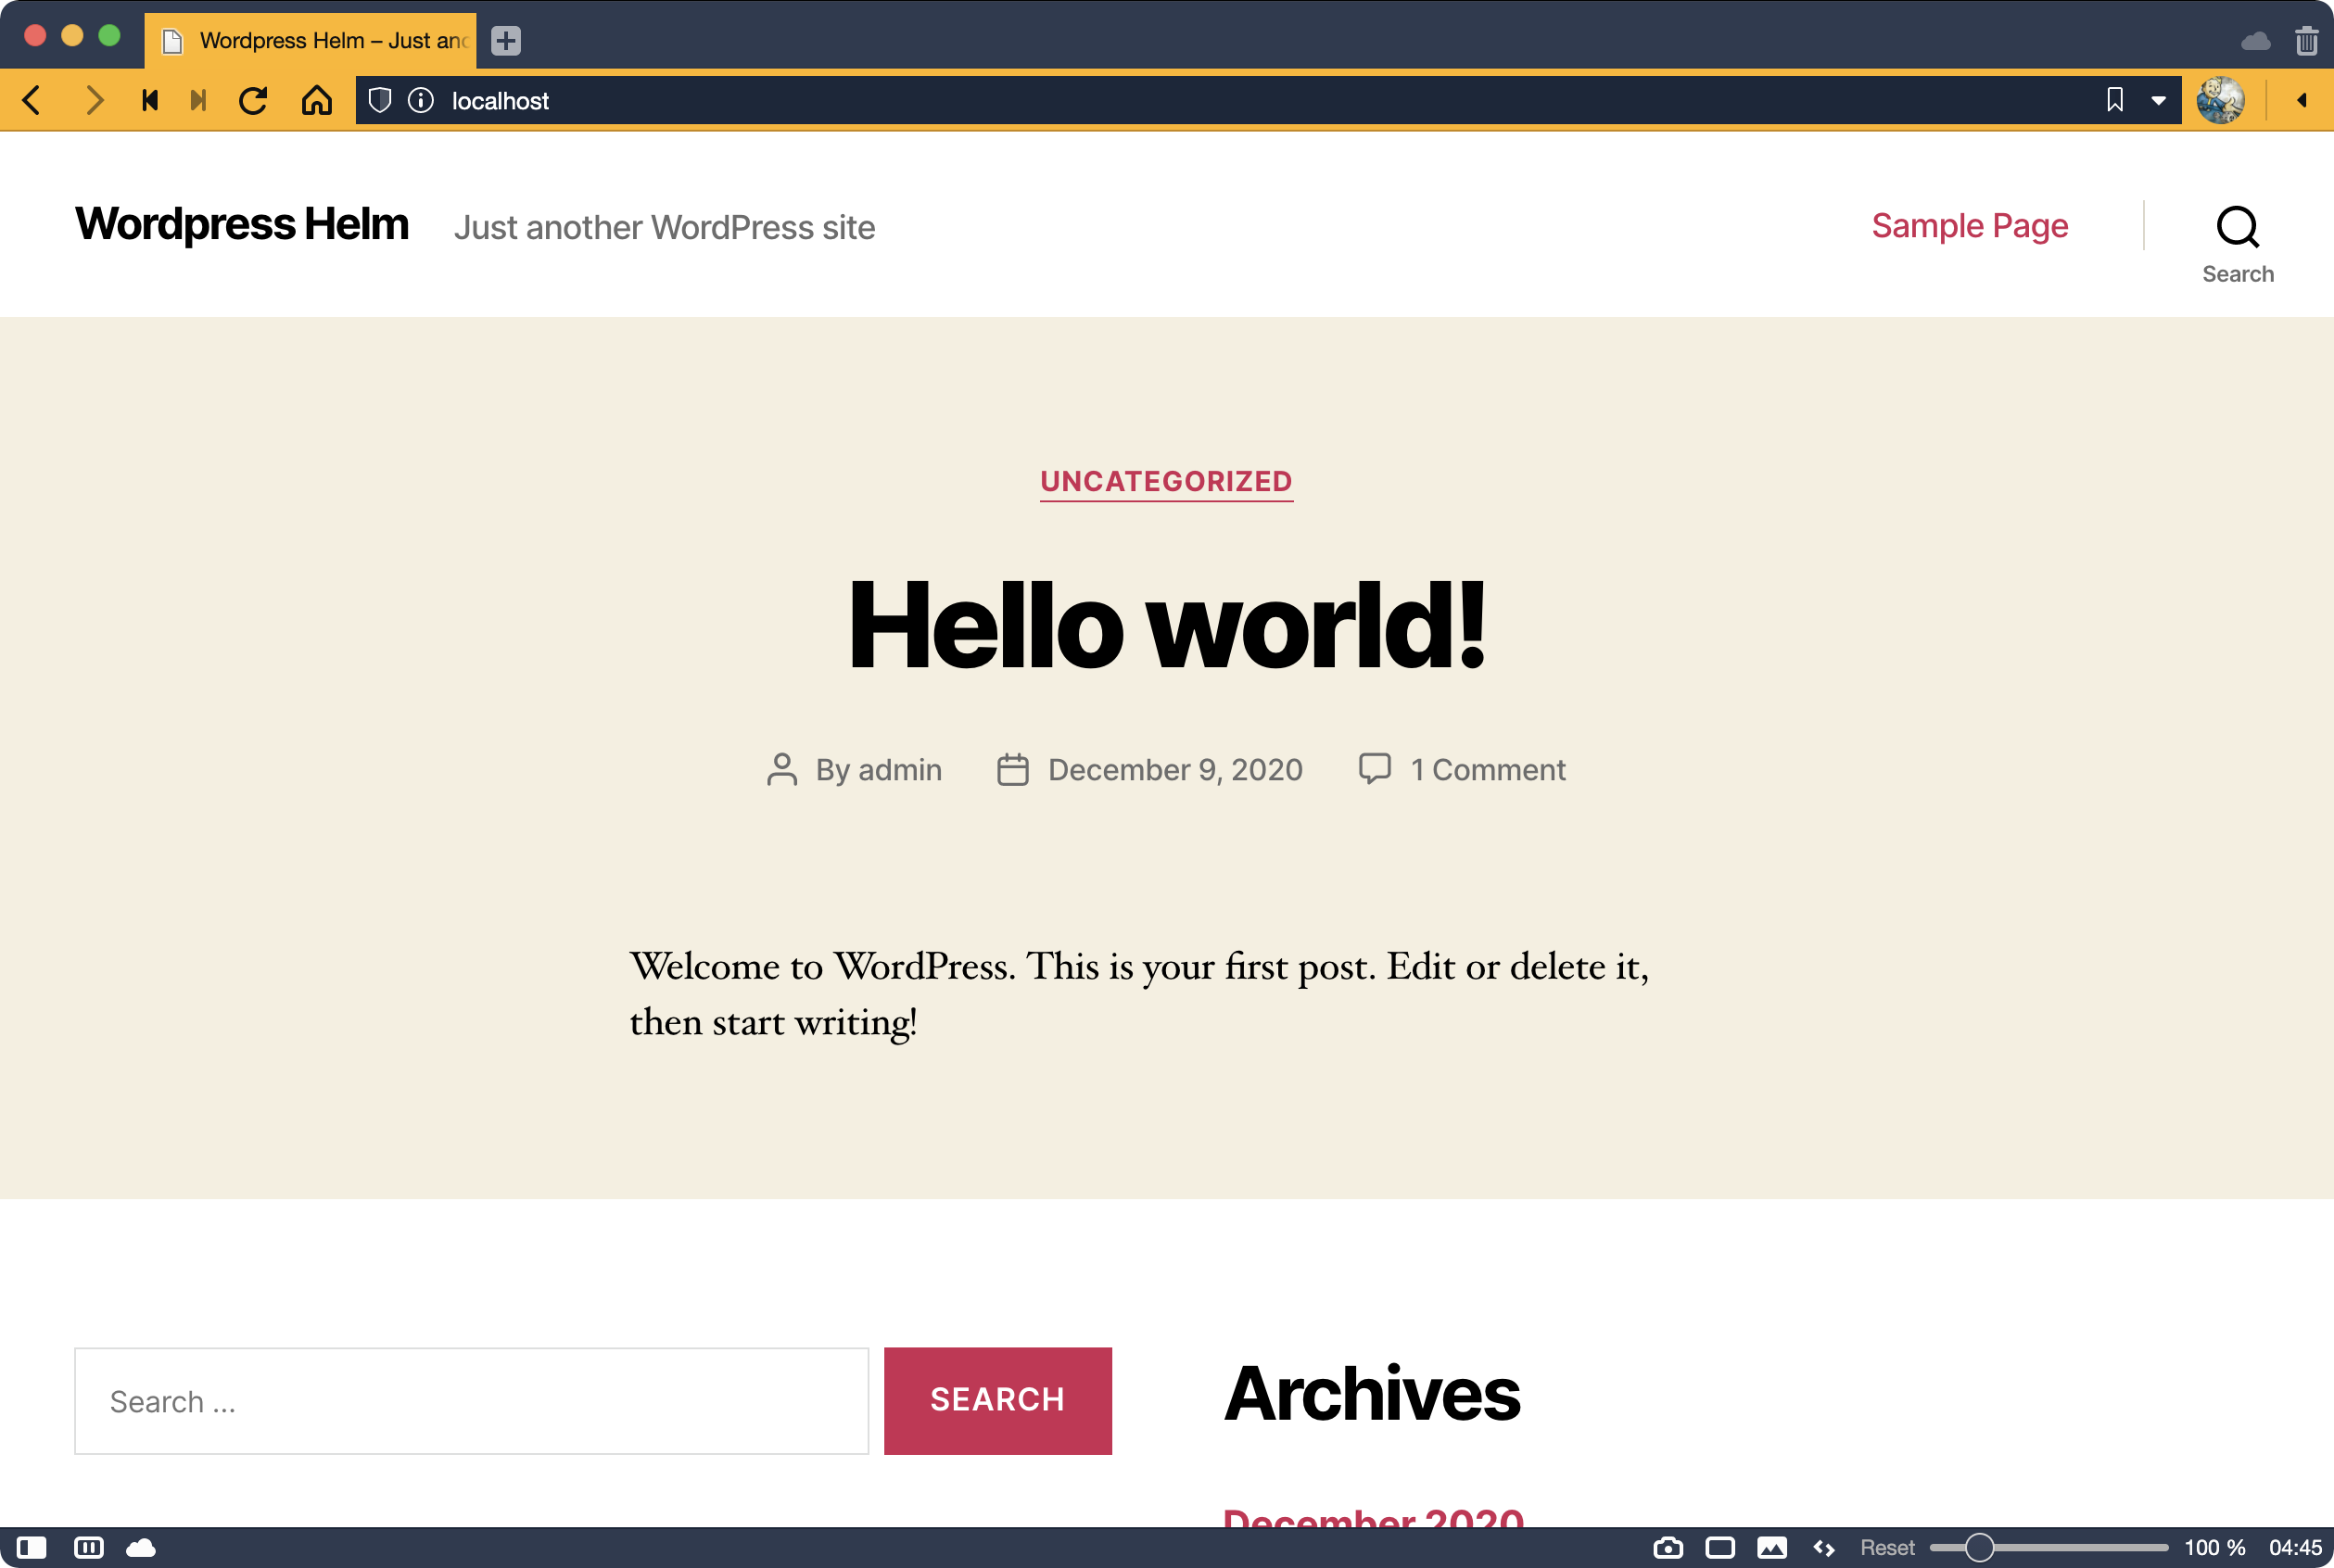
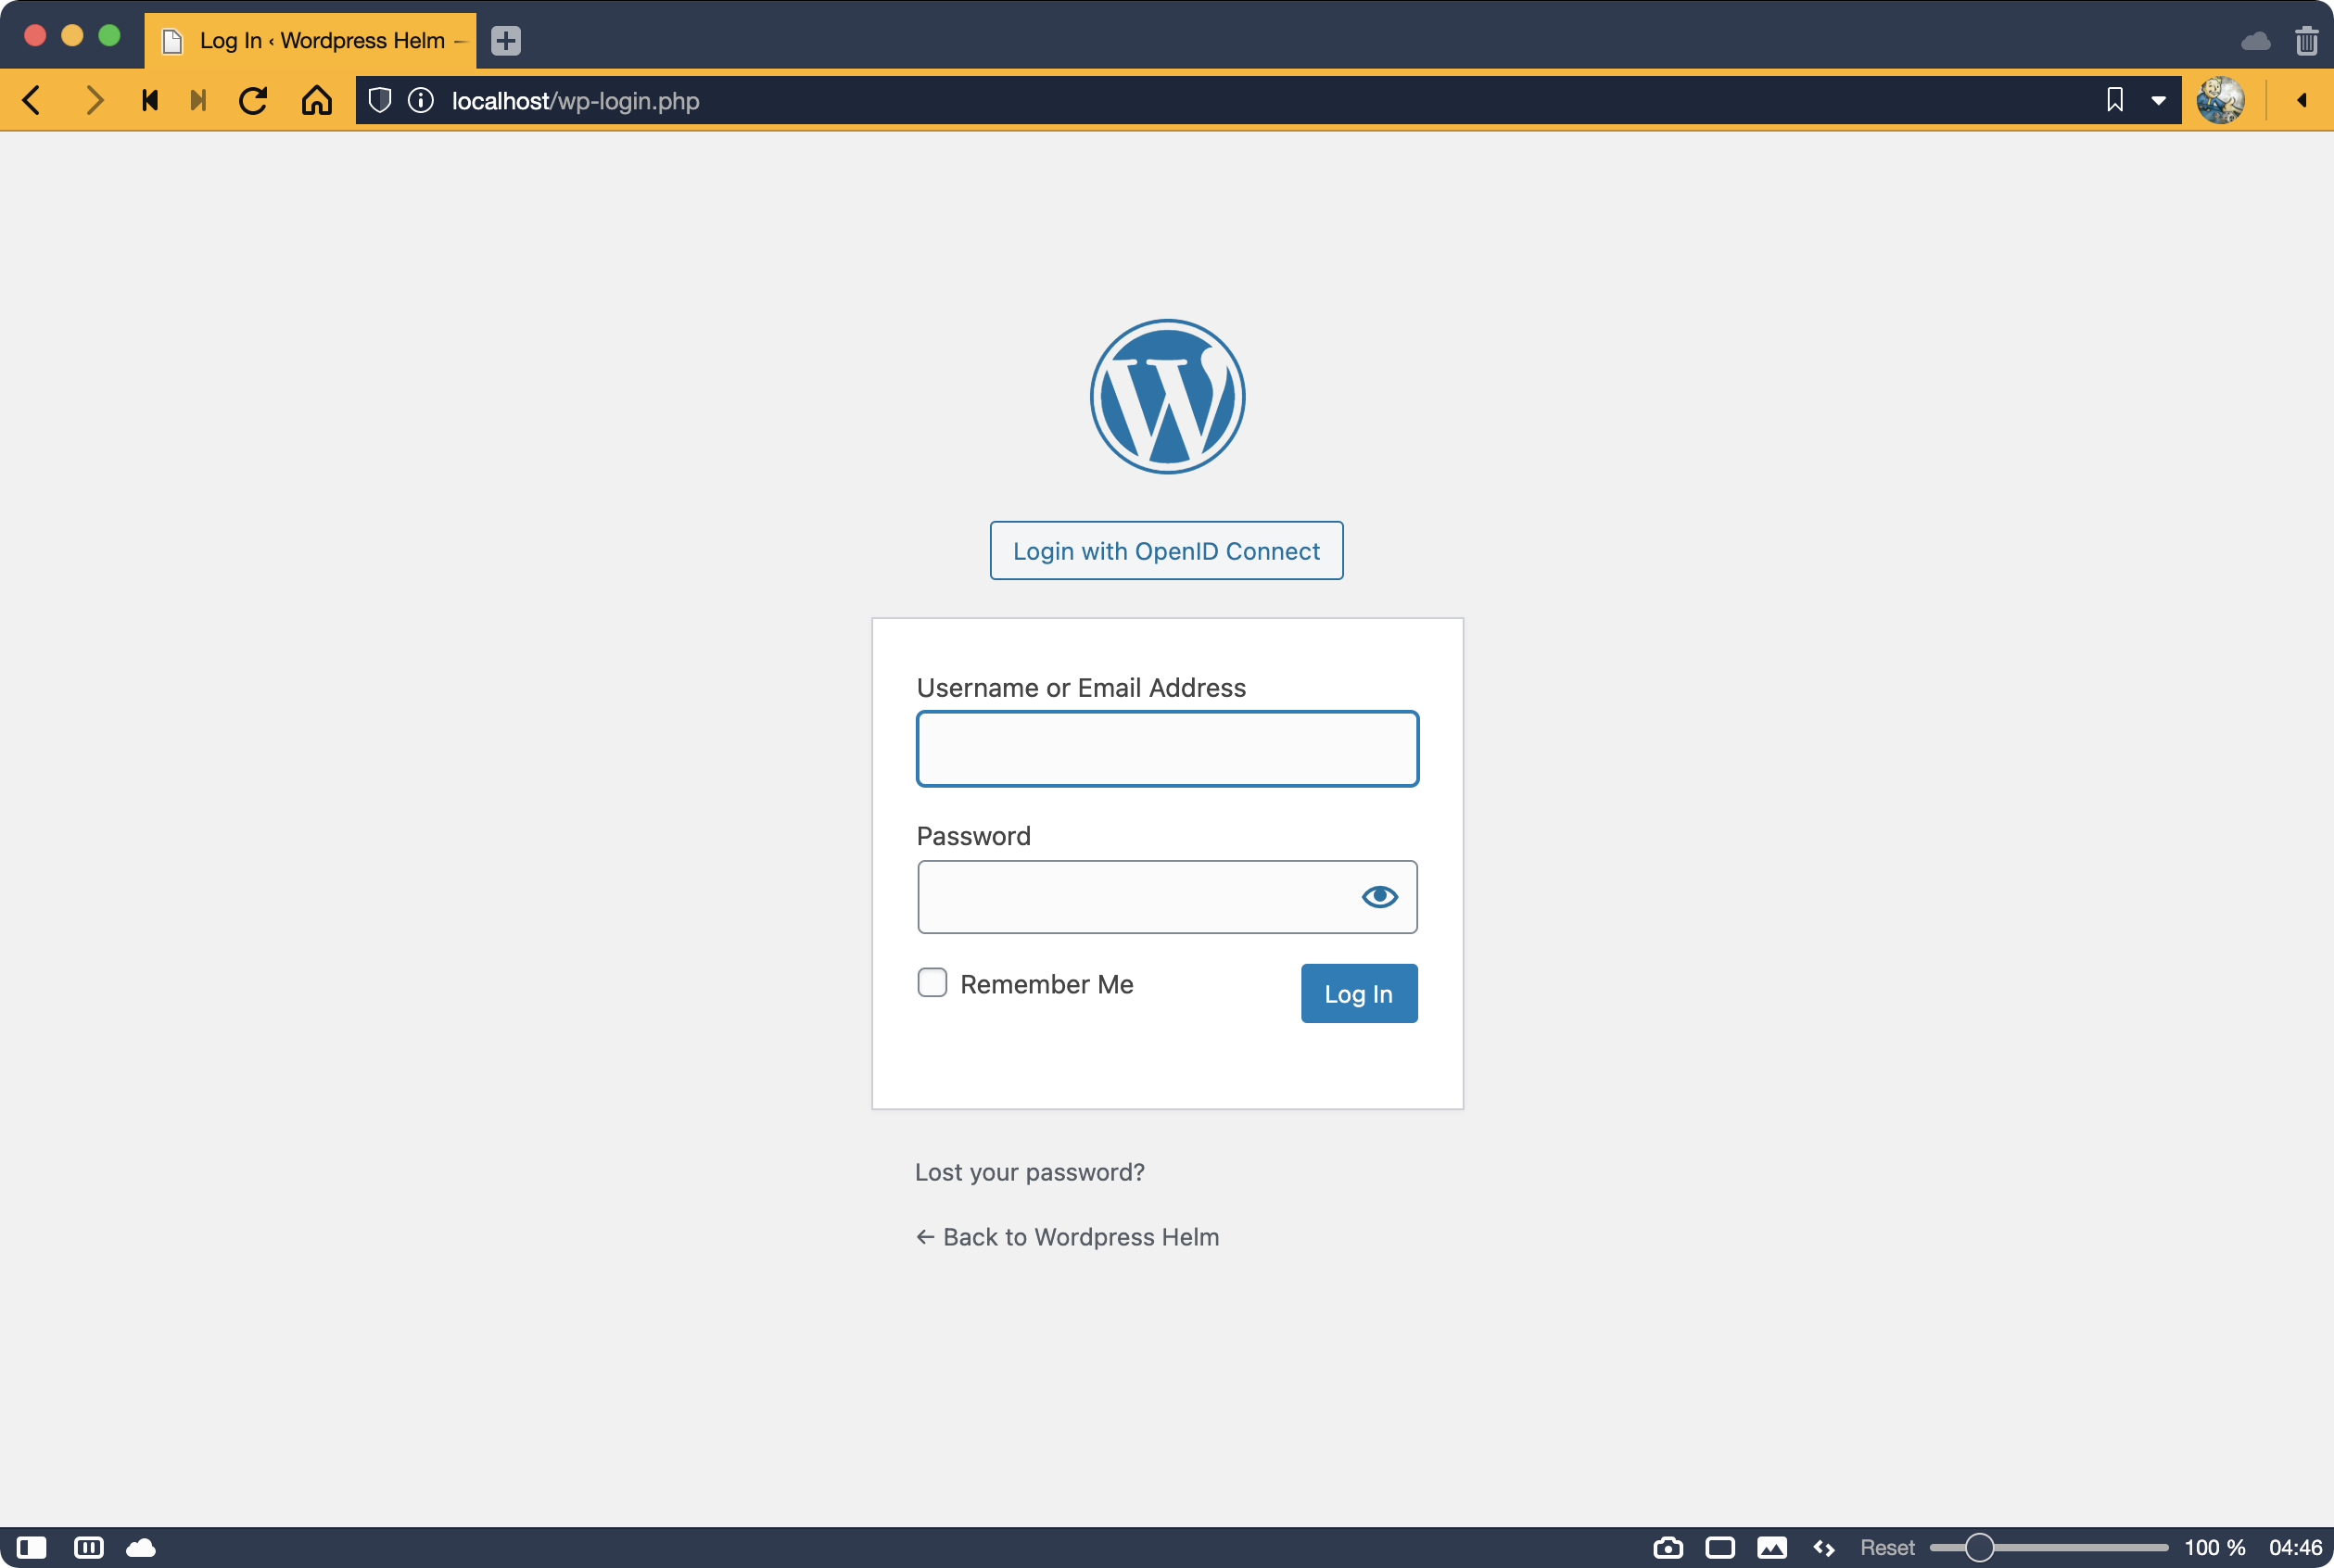
As shown in the screenshots above, WordPress is running on the local loopback. To verify this disconnect from Wi-Fi or air gap your machine and browse the site.
Now that WordPress is up-and-running, let’s add a Redis cache to make it faster.
Enabling Redis
To enable Redis simply change the redis.enabled to true in values-local.yaml and then use Helm to rollout a new revision by rerunning the ./install script.
Tip: When specifying redis.password consider avoiding use of special characters as they can lead to unexpected issues in the YAML parser.
Try this while you watch kubectl get all and you will see the STATUS of pod/wordpress-production-0 change from Running back to Init: 0/1:
Expand to view sample output
Every 2.0s: kubectl get all                                                   mbp: Sat Dec 12 19:11:36 2020

NAME                                         READY   STATUS      RESTARTS   AGE
pod/wordpress-production-redis-master-0      1/1     Running     3          145m
pod/wordpress-production-database-master-0   1/1     Running     3          145m
pod/wordpress-production-database-slave-0    1/1     Running     3          145m
pod/wordpress-production-1607770440-vn9pm    0/1     Completed   0          17m
pod/wordpress-production-0                   0/1     Init:0/1    0          16s

NAME                                          TYPE        CLUSTER-IP      EXTERNAL-IP   PORT(S)    AGE
service/kubernetes                            ClusterIP   10.43.0.1       <none>        443/TCP    146m
service/wordpress-production-redis-headless   ClusterIP   None            <none>        6379/TCP   145m
service/wordpress-production                  ClusterIP   10.43.243.118   <none>        8080/TCP   145m
service/wordpress-production-database-slave   ClusterIP   10.43.113.176   <none>        3306/TCP   145m
service/wordpress-production-database         ClusterIP   10.43.167.193   <none>        3306/TCP   145m
service/wordpress-production-redis-master     ClusterIP   10.43.139.196   <none>        6379/TCP   145m

NAME                                                    READY   AGE
statefulset.apps/wordpress-production-redis-master      1/1     145m
statefulset.apps/wordpress-production-database-master   1/1     145m
statefulset.apps/wordpress-production-database-slave    1/1     145m
At this point WP is being rebuilt from scratch. You can get more information about its progress using kubectl commands:
kubectl describe pod/wordpress-production-0
# Show Events which occurred during initialization

kubectl logs pod/wordpress-production-0 -c init-wordpress
# Show results of the Ansible playbook used to do the initialization
If you decide you want to make other changes, you can continue making updates to the values-local.yaml and running the install script again to create a new Helm revision. And if you decide you’d like to rollback some changes you made (e.g. because something broke) simply run:
helm rollback wordpress-production
And you’re off to the races.
Stop the Cluster
If for any reason you’d like to stop and restart your cluster, it is safe to do so without losing state of items mounted using using physical volumes such as any media uploads and the database state itself. Bear in mind, however, the rest of the application is stateless — and by design.
So when you do restore you’ll lose any plug-in updates made until you set-up and connect a git repo using the git_repo configuration options in values-local.yaml. At which point you’ll need to figure out how to keep the Git repo up-to-date based on the changes made within the cluster.
Also, note when restarting the cluster via k3d cluster stop k3s-wordpress or by simply restarting Docker Engine you may notice the Init Container error and fail to rebuild WordPress. This is a known issue with a simple workaround.
Conclusion
In this post you learned how to run WordPress inside a K3s cluster on macOS. There are plenty of ways to run WordPress which are easier. But slim to few of them will give you as much bang for the buck as WP running with a Redis Object Cache as I pointed out at a talk once in Bali. Add in the durability and scale of Kubernetes and there’s not much you can’t do to scale a WordPress website.
So long Pantheon. We were happy with your service when you offered hosting with Redis for $25/month in 2017. I guess the Gods got a little too greedy.
But as we all know, lightning never strikes the same place twice.
What’s Next
Here are some additional things to try once you’ve gotten the hang of getting WordPress up-and-running on your local machine:
- Adjust install.sh and install WordPress in its own Namespace
- Configure a cronjob to perform regular database backups from values-local.yaml.
- Learn to generate an SSL certificate and use it to secure local WP traffic.
- Use the git_repo to add a Git repository to bootstrap from
- Create a test environment starting from test-install.sh.example
- Try setting up WordPress using a VPS from Digitial Ocean
- Learn to install and run Rancher to help manage your cluster
Good luck and have fun out there!