
A friend in Bali handed me a 1 terabyte external SATA drive recently and that’s great because the device is an integral part of a 3-2-1 backup strategy I’m adopting after Apple Care suggested I make a full backup of my 15" MacBook Pro.
The principle is simple:
3 copies, 2 different types of storage (physical and in the cloud for example) and one copy being physically separated from the others
Emanuele M. Monterosso
Of the 3 copies I needed 2 are complete. One copy is stored on MicroSD and kept with me. The other encrypted in the cloud on a Scaleway server in France. The last copy is going on the external SATA drive given to me last week which would be cool to put in a time capsule.
In this post I will show you how to securely store your backup data with two layers of encryption on an external drive or disk. After securing the disk we will start to automate the creation of space-efficient backups. Tools we’ll be using include GNU Parted, DMCrypt, a device-mapper crypto target, and Borgmatic to automate our backups in a expressive way.
Assumptions
You have a MacBook or laptop with Manjaro Linux dual-boot configuration. If you don’t, these instructions may be adapted for other platforms and systems at your discretion. To complete this tutorial, however, you’ll need few hours on your hands. Though the result is worth far more than the individual time investment.
Inspect Disk with GNU Parted
GNU Parted is a tool for managing disk volumes and partition logic. Use it via CLI with the gparted command or run it using a GUI as shown here:
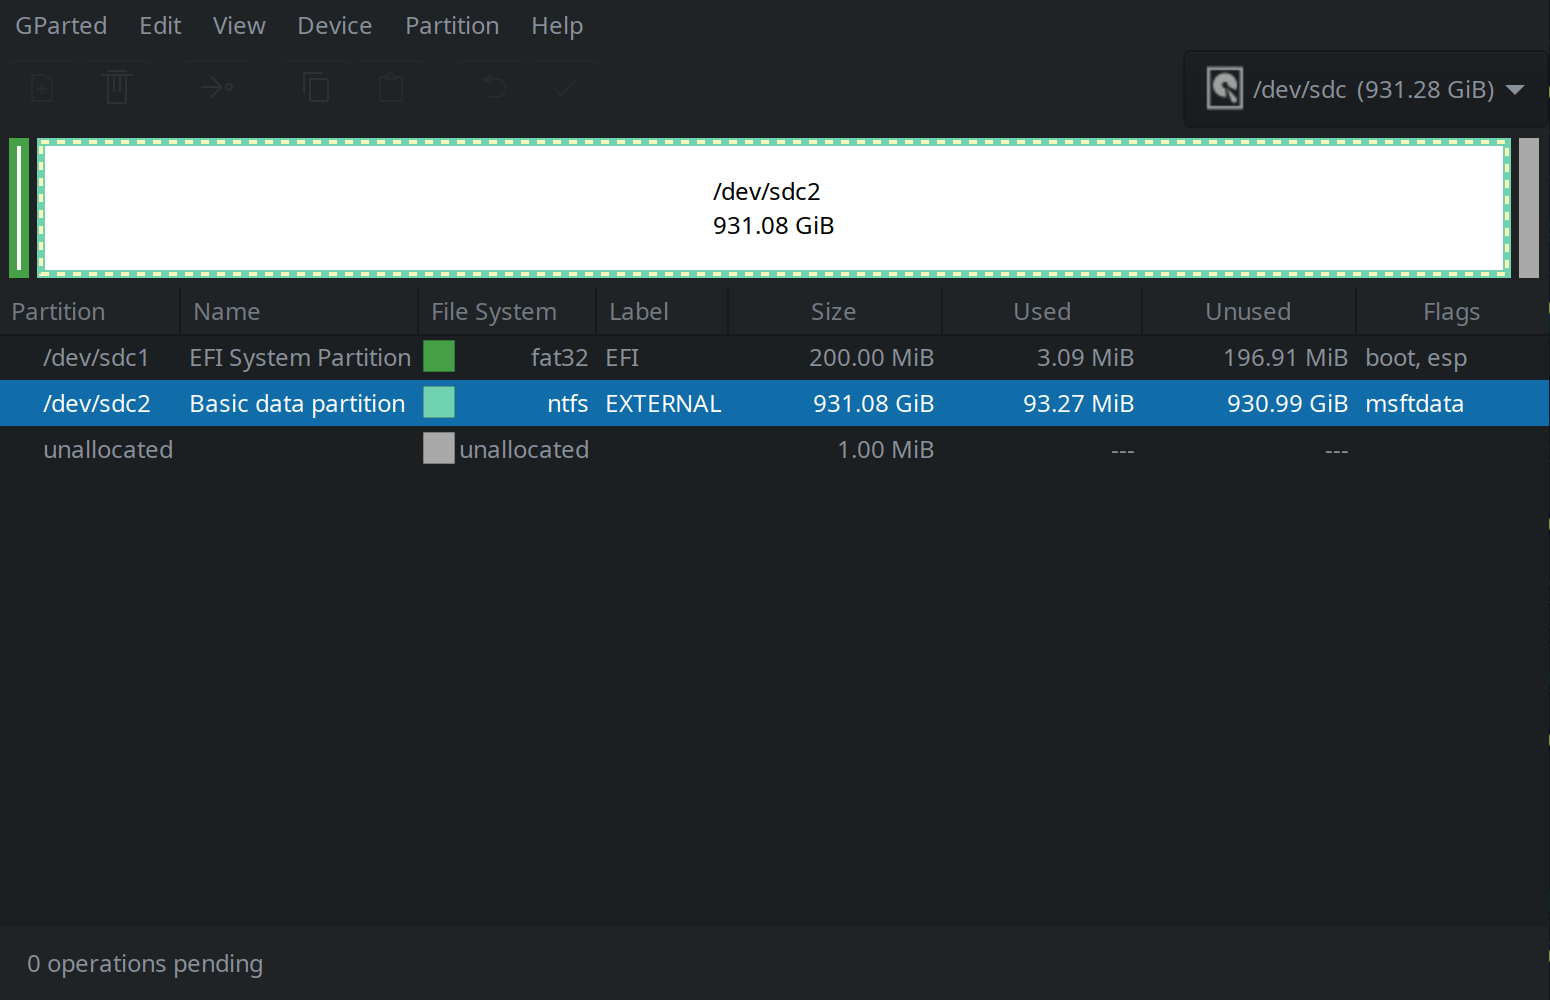
Notice the file system for the data partition is NTFS, a file system introduced by Microsoft in 1993 with the release of Windows NT 3.1 – in the days before Windows Server was even a thing. At that age the partition scheme may be mature but it was designed for networking and not suitable for our security purposes.
Before we reformat the partition we should securely erase the external disk.
Securely Erase External Disk
Assuming there’s nothing of value on the external drive the first step is to wipe existing data and create crypto-grade entropy on the disk surface to afford us solid block device encryption. Once the disk surface has been cleaned we’ll create an encrypted LUKS container to secure our backup data in a meaningful way.
LUKS is the standard for Linux hard disk encryption. By providing a standard on-disk-format, it does not only facilitate compatibility among distributions, but also provides secure management of multiple user passwords.
Guardian Project
We recommend you use LUKS to encrypt files for Tails and Linux.
Tails OS developers
Start by running lsblk to list block devices. You should see output like:
NAME   MAJ:MIN RM   SIZE RO TYPE MOUNTPOINT
sda      8:0    0 465,9G  0 disk
├─sda1   8:1    0   200M  0 part /boot/efi
├─sda2   8:2    0 148,2G  0 part /run/media/jos/ac8d5db2-0388-48e7-9300-80531dd
├─sda3   8:3    0 148,2G  0 part /
└─sda4   8:4    0  93,1G  0 part
sdc      8:32   0 931,3G  0 disk
├─sdc1   8:33   0   200M  0 part
└─sdc2   8:34   0 931,1G  0 part /run/media/jos/EXTERNAL
Here sda contains the primary OS and sdc the external device. Each block device is partitioned into several logical volumes which can be managed using GParted.
Map DMCrypt container
For crypto-grade randomnsess start by using DMCrypt to map the container as plain, outlined in 2.19 of the DMCrypt FAQ:
sudo cryptsetup open --type plain -d /dev/random /dev/<block-device> to_be_wiped
Where <block-device> is the external disk NAME and to_be_wiped a string literal. This maps the container as plain to /dev/mapper/to_be_wiped with random password.
You may see an error if a file system on the external device is mounted:
In which case you need to first unmount any mounted file systems on the external device before running cryptsetup again. See umount --help for help unmounting. Use lsblk to confirm removal of any MOUNTPOINT on the external drive.
Once the container is mapped run ls /dev/mapper to view the dm-crypt device:
Then run lsblk once again. You should see output like:
NAME   MAJ:MIN RM   SIZE RO TYPE  MOUNTPOINT
sda      8:0    0 465,9G  0 disk
├─sda1   8:1    0   200M  0 part
├─sda2   8:2    0 148,2G  0 part  /run/media/jos/ac8d5db2-0388-48e7-9300-80531dd
├─sda3   8:3    0 148,2G  0 part  /
└─sda4   8:4    0  93,1G  0 part
sdc      8:16   0 931,3G  0 disk
├─sdc1   8:17   0   200M  0 part
├─sdc2   8:18   0 931,1G  0 part
└─to_be_wiped
       254:0    0 931,3G  0 crypt
Zero-write to container
With the device mapping complete run the following to perform a zero-wipe with progress indication using dd_rescue (though wcs may be used instead):
hash dd_rescue && sudo dd_rescue -w /dev/zero /dev/mapper/to_be_wiped
Where hash dd_rescue checks for the dd_rescue binary before executing the command to write zeros inside the plain dm-crypt container. If you don’t have dd_rescue install it using pamac install just as we did with DMCrypt.
Once the zero-write starts you should see output like:
dd_rescue: (info): Summary for /dev/zero -> /dev/mapper/to_be_wiped
dd_rescue: (info): ipos:  25681792.0k, opos:  25681792.0k, xferd:  25681792.0k
                   errs:      0, errxfer:         0.0k, succxfer:  25681792.0k
             +curr.rate:    85675kB/s, avg.rate:   107298kB/s, avg.load:  8.5%
Hang in there. This step may take a while…
Depending on the size of your device and any speed constraints wiping the drive in this manner will take some time. My personal experience with a 1 TB Samsung SATA external with throughput constrained to USB 3.0 speeds the zero-write to the external drive ran from 17:40 to 21:00 for 3 hours & 20 minutes total to finish.
When the zero-write completes expect to see an error:
write /dev/mapper/to_be_wiped (976516096.0kiB): No space left on device
Because the stream we were writing was infinite we can expect the crypto container will eventually run out of space. Which it did at ~931 GiB as shown here:
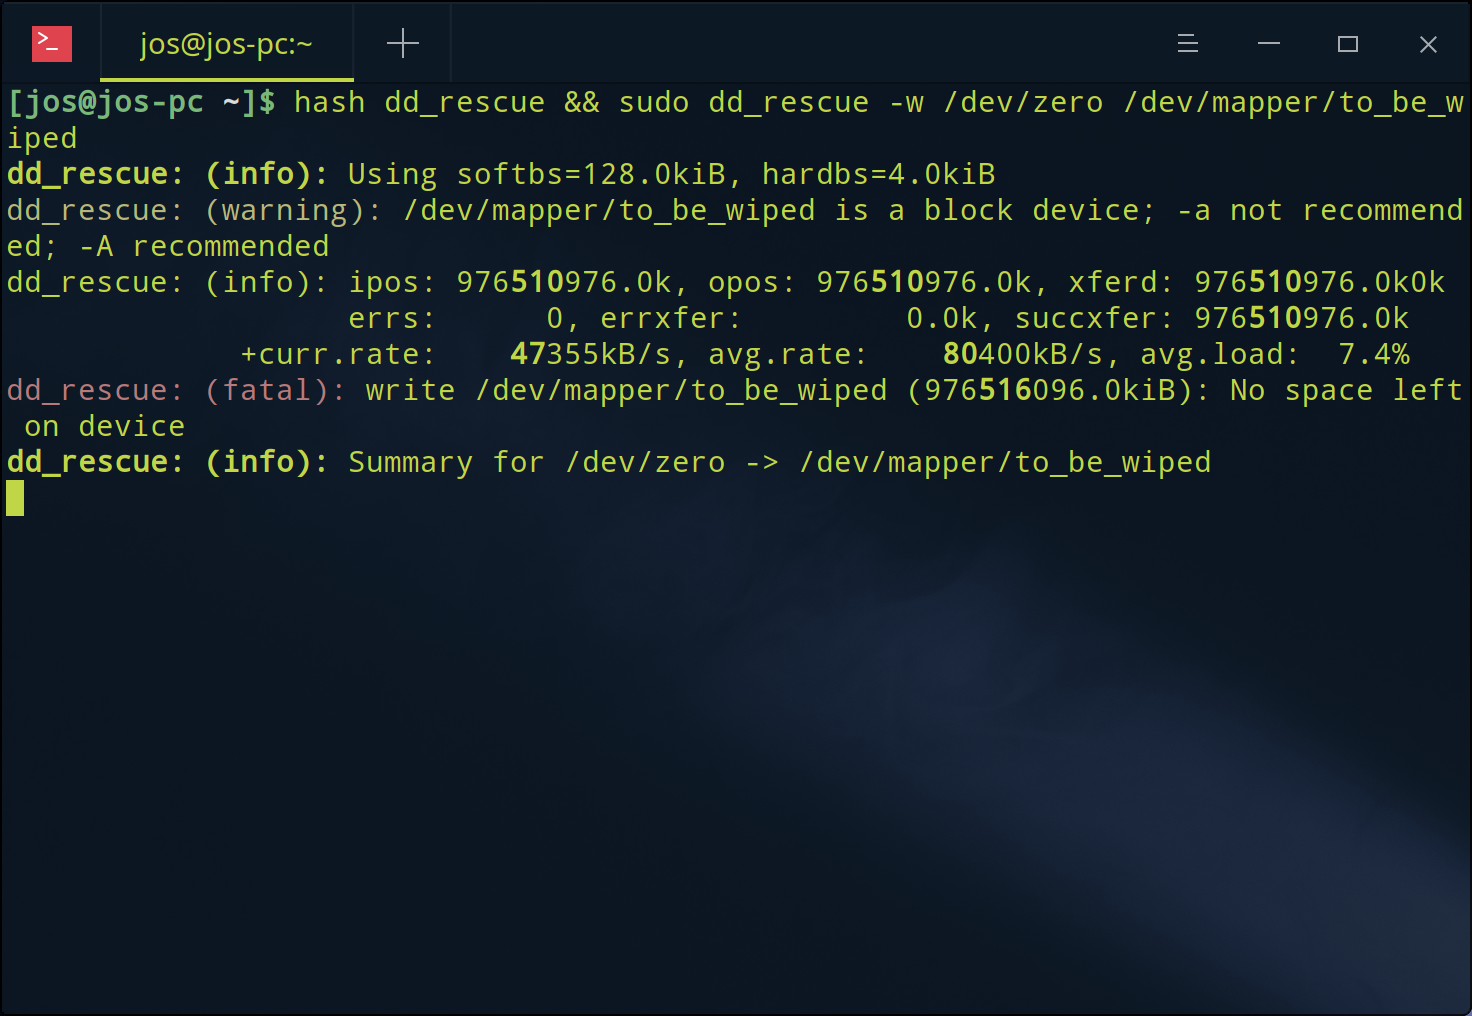
Recall from earlier 931,1G was the size of the block device reported by lsblk as well as by GNU Parted and the logical place an infinite stream would abend.
With the zero-write finished GParted should look like this:
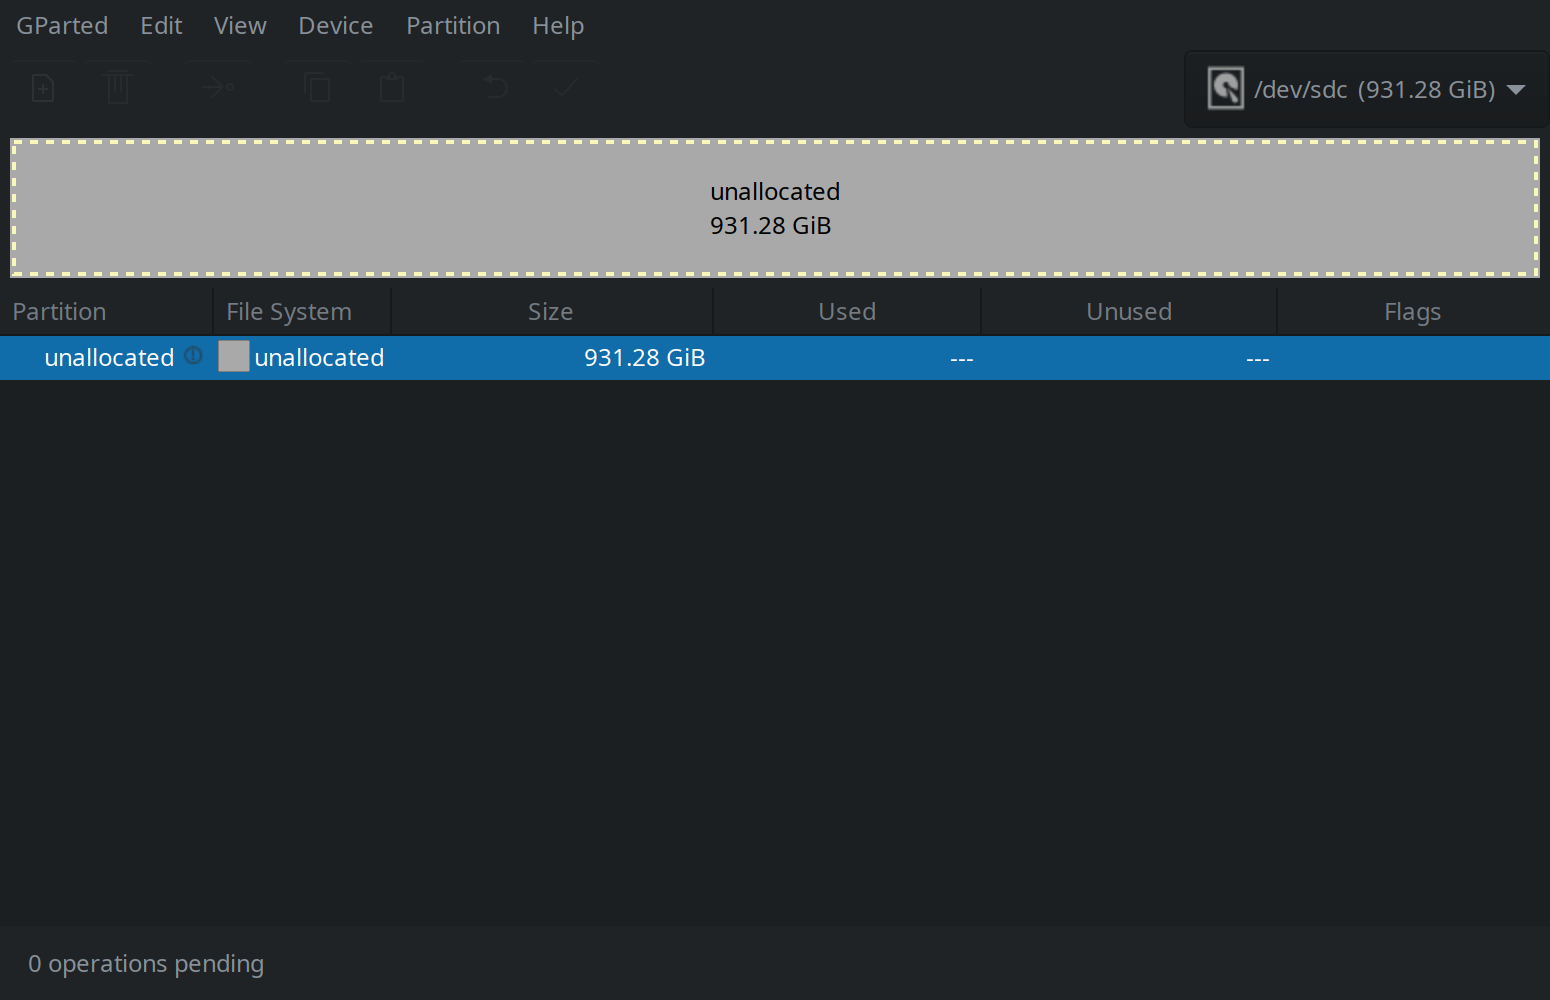
The external drive is now securely erased save for any data remanance and may now be repartitioned using standardized drive encryption technology called LUKS.
Encrypt External Disk with LUKS
As with the secure disk erasure we’ll be using DMCrypt once more. Only this time, instead of performing a zero-write, we’ll simply be using DMCrypt create an encrypted LUKS container to safely store backup data.
And thanks to backup redundancy inherit in the 3-2-1 backup strategy we may take advantage of the experimental features in LUKS2 without creating undue risk.
LUKS2 On-Disk Format Specification Version 1.0.0 (PDF copied from 861197a and unmodified from its original. (C) 2018 Milan Brož, licensed under CC BY-SA 4.0.)
It’s assumed below you want to fully encrypt the entire raw external block device. If you choose otherwise, consult the DMCrypt Wiki for caveats first. Otherwise, go ahead and create a LUKS container on the external drive now:
cryptsetup luksFormat <target device>
Where <target device> is the device mapping for the external drive you’re targeting. Check GParted or use /dev/NAME after retrieving NAME from lsblk.
Then follow the prompts:
LUKS container creation should finish in a few seconds. No partitioning needed.
Tip: Review DMCrypt Wiki for suggestions on creating a secure passphrase. A secure passphrase helps protect against LUKS bruteforcing attacks.
Note: If running cryptsetup from device with constrained CPU (e.g. Raspberry Pi) increase iteration count using -i flag as noted in the DMCrypt Wiki.
Next map the container:
sudo cryptsetup luksOpen <target device> c1
Enter your passphrase when prompted:
Create a file system in the mapped container:
sudo mke2fs -t ext4 /dev/mapper/c1
You should see output like:
Expand to view output
mke2fs 1.45.3 (14-Jul-2019)
Creating filesystem with 244128512 4k blocks and 61038592 inodes
Filesystem UUID: fda9f736-0359-42a1-ab85-007dec046bfc
Superblock backups stored on blocks:
	32768, 98304, 163840, 229376, 294912, 819200, 884736, 1605632, 2654208,
	4096000, 7962624, 11239424, 20480000, 23887872, 71663616, 78675968,
	102400000, 214990848

Allocating group tables: done
Writing inode tables: done
Creating journal (262144 blocks): done
Writing superblocks and filesystem accounting information: done
When process completes mount the new file system, here on /mnt:
sudo mount /dev/mapper/c1 /mnt
Running lsblk now should show a mounted crypt device:
Expand to view output
NAME MAJ:MIN RM SIZE RO TYPE MOUNTPOINT
sda 8:0 0 465,9G 0 disk
├─sda1 8:1 0 200M 0 part
├─sda2 8:2 0 148,2G 0 part /run/media/jos/ac8d5db2-0388-48e7-9300-80531dd
├─sda3 8:3 0 148,2G 0 part /
└─sda4 8:4 0 93,1G 0 part
sdb 8:16 0 931,3G 0 disk
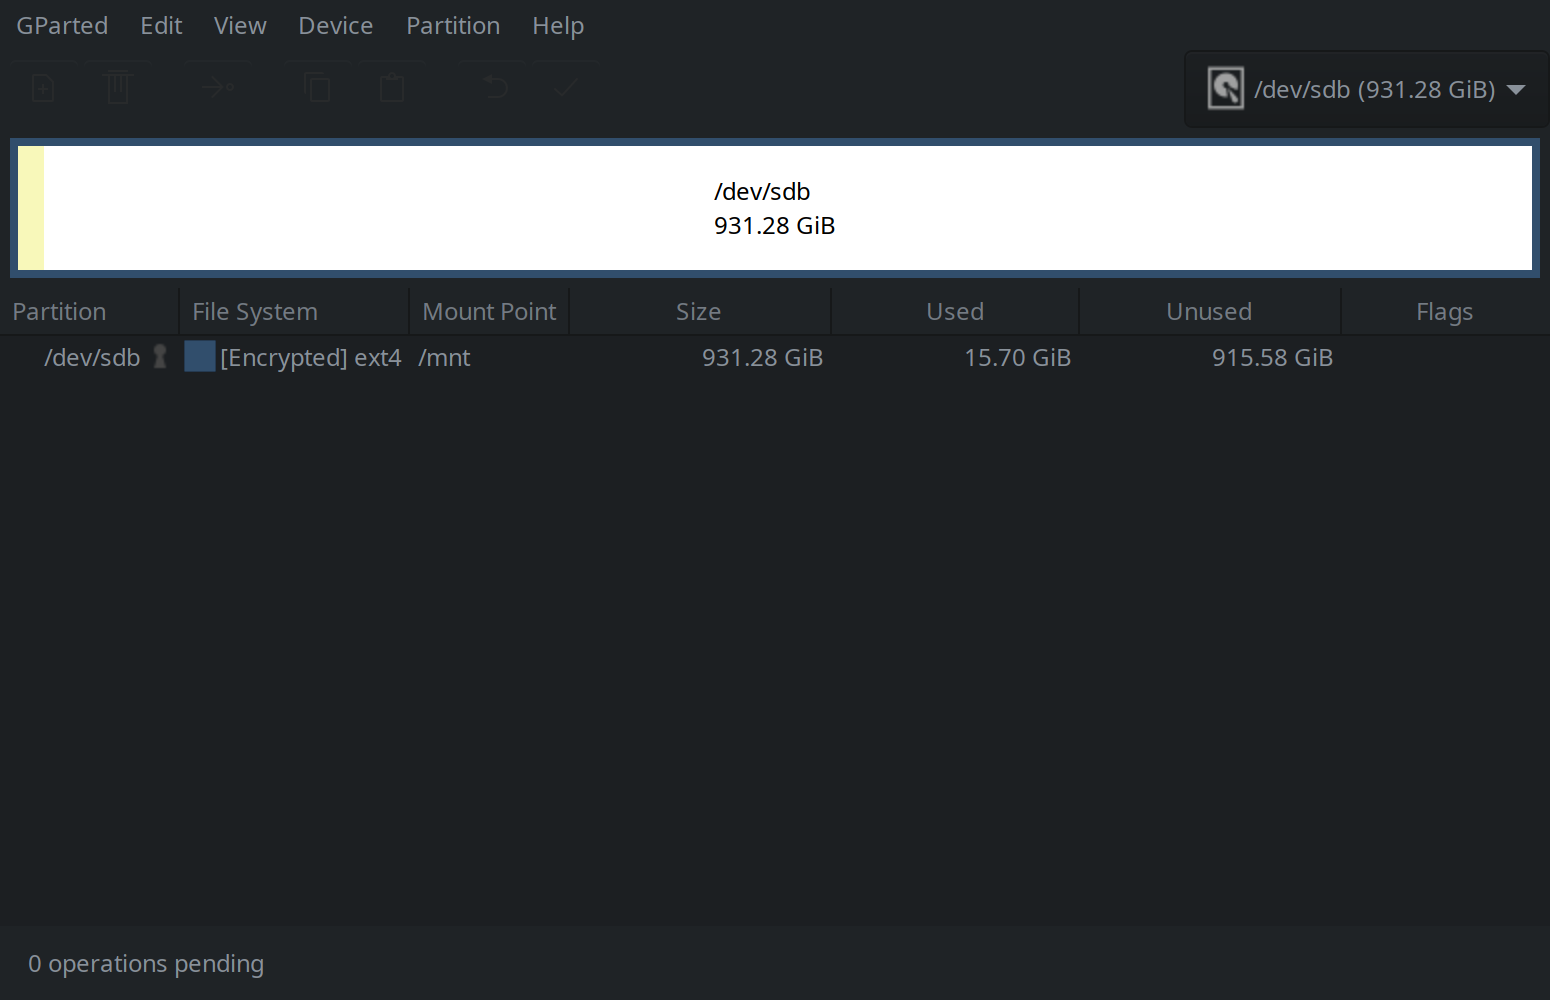
└─c1 254:1 0 931,3G 0 crypt /mntGParted should show an encrypted ext4 file system:
And following a pamac install jq the following command:
lsblk -ObJ | jq '.blockdevices[] | select(.fstype == "crypto_LUKS") | {name, path, uuid, size}'
Will return a JSON blob with info about your LUKS-encrypted block devices:
{
  "name": "sdc",
  "path": "/dev/sdc",
  "uuid": "d7fc9920-45b0-423e-8a66-781228ad3729",
  "size": 999952482304
}
Helping you identify the path needed to reopen your encrypted drive:
sudo cryptsetup luksOpen /dev/sdc c1
And mount it again following an interactive passphrase challenge.
However, if you’re running Manjaro Linux and disconnect and reconnect the drive it will mount automatically in a locked state without using the command line:
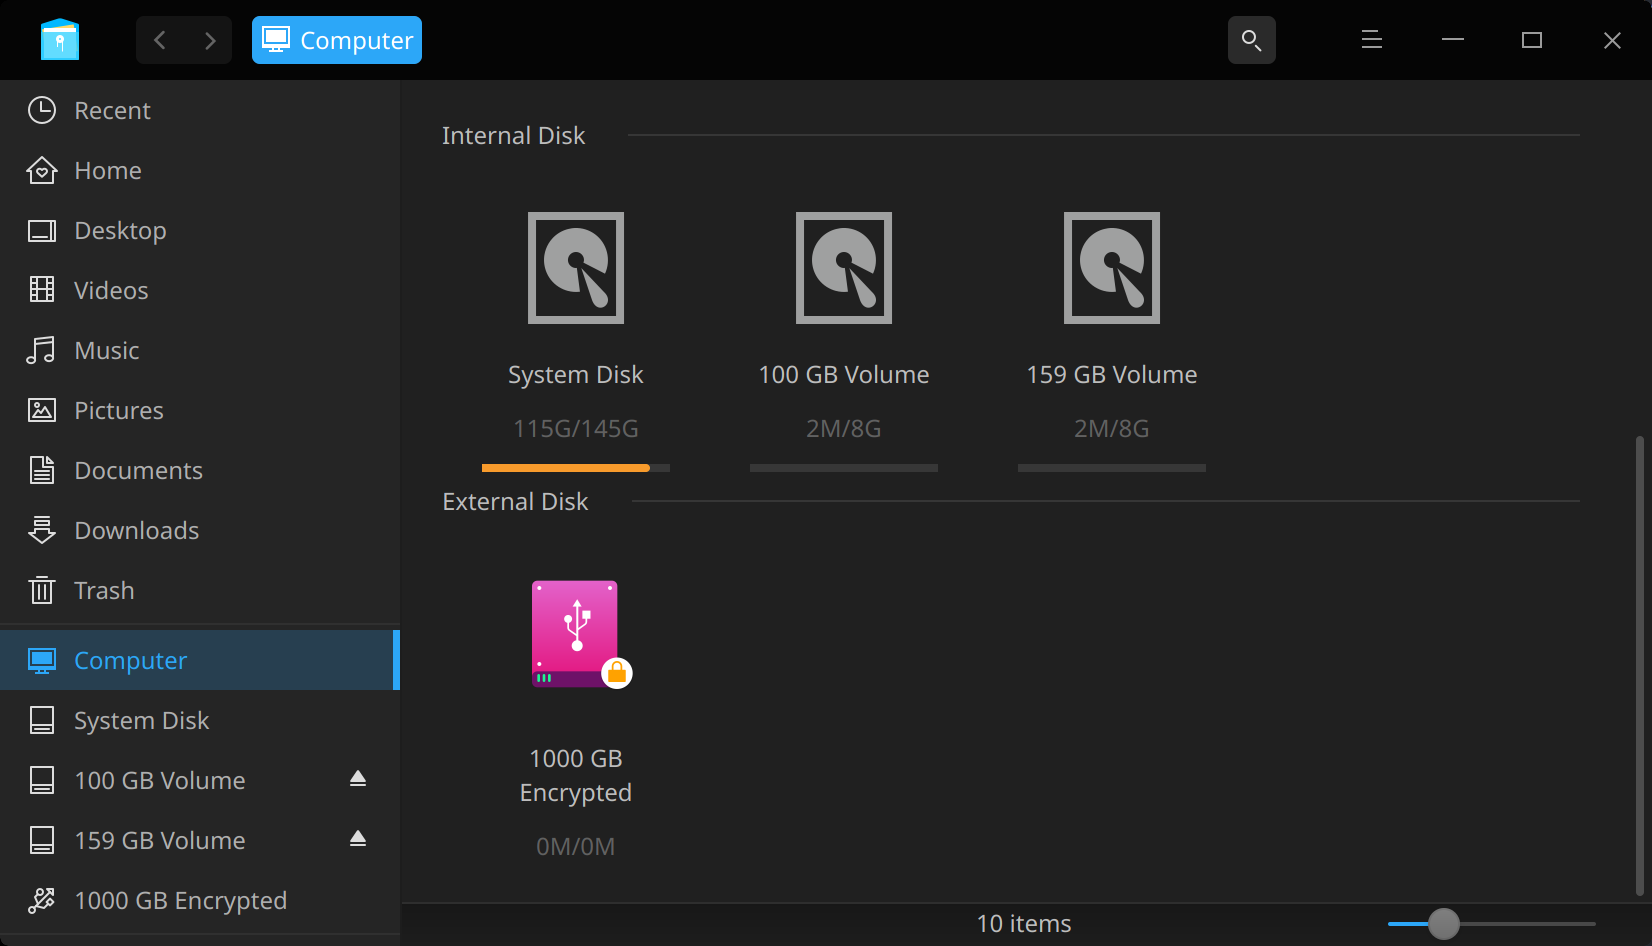
From here you can unlock the external disk using the Deeping File Manager or using cryptsetup from Terminal as detailed above and start loading data onto the disk.
Important: Create back-up a copy of your LUKS header using cryptsetup luksHeaderBackup. See section 6 of DMCrypt Wiki for instructions.
Next we’ll use our LUKS-encrypted disk to create a backup process and put in place the final steps necessary for a solid 3-2-1 backup strategy.
Create Encrypted Backup
Steps to create an encrypted backup on your encrypted LUKS volume.
Join the Borg
After reading heaps of online material about backup tooling I chose a lesser known tool called BorgBackup for my backup process.
Some of it’s most attractive features include:
- Source code licensed under GNU GPL.
- Supports BLAKE2 encryption among others.
- Supports several different compression algorithms.
- Both encryption and compression may be disabled.
- Powerful CLI with online help and topic-based examples.
- Focused on creating backups, not synchronization.
You may have reasons to choose a different backup tool. And there are a number of alternatives to consider. Just be sure you’re rabid about your tooling.
Tip: Contrast Borg with another popular backup tool called Restic in the podcast titled Join the Borg? Restic is futile on Sysadministrivia.
To use Borg install it from the Manjaro community repo:
pamac install borg
Then run borg or borg help for usage instructions or to get started.
BorgBackup has number of wrappers including a GUI called Vorta for Borg as well as a backup automation tool called Borgmatic. Now we’re going to use Borgmatic to start automating a backup routine leave the exploration of the GUI and details of the BorgBackup CLI itself as an exercise for the reader.
Build Borgmatic from AUR
With Borg installed use Pamac to build Borgmatic from AUR now:
pamac build borgmatic
You should see output like:
Once Borgmatic is installed generate your config.
Generate Borgmatic configuration
Follow the instructions to generate configuration:
sudo generate-borgmatic-config
You should see output like:
Generated a sample configuration file at /etc/borgmatic/config.yaml.

Please edit the file to suit your needs. The values are representative.
All fields are optional except where indicated.
If you do, go ahead and edit the file.
Edit config
Open the generated Borgmatic configuration file for editing:
sudo nano /etc/borgmatic/config.yaml
Update the repositories section to add a local repository using the lsblk MOUNTPOINT of your LUKS-encrypted block device:
repositories:
  - /run/media/jos/677c9bef-614b-408b-819f-049d364996e7/borgbackup
Then Exit and Save the file. Next we’ll use it to create an encrypted backup.
Initialize Borgmatic
With your edits to borgmatic.yaml saved go ahead and init Borgmatic:
sudo borgmatic init --encryption=repokey-blake2
This will use the local repository specified in borgmatic.yaml and initialize a new BorgBackup repository using BLAKE2 encryption. You should see output like:
Expand to view output
Repository /run/media/jos/677c9bef-614b-408b-819f-049d364996e7/borgbackup does not exist.
Enter new passphrase:
Enter same passphrase again:
Do you want your passphrase to be displayed for verification? [yN]: N

By default repositories initialized with this version will produce security
errors if written to with an older version (up to and including Borg 1.0.8).

If you want to use these older versions, you can disable the check by running:
borg upgrade --disable-tam /run/media/jos/677c9bef-614b-408b-819f-049d364996e7/borgbackup

See https://borgbackup.readthedocs.io/en/stable/changes.html#pre-1-0-9-manifest-spoofing-vulnerability for details about the security implications.

IMPORTANT: you will need both KEY AND PASSPHRASE to access this repo!
Use "borg key export" to export the key, optionally in printable format.
Write down the passphrase. Store both at safe place(s).
Save encryption key
As suggested, be sure to export your repo’s backup key:
sudo borg key export /run/media/jos/677c9bef-614b-408b-819f-049d364996e7/borgbackup ~/borgkey
This will create a read-only cleartext key file in the home directory.
Run a backup
With Borg repository key and password stored safely run a backup:
sudo borgmatic --verbosity 1
You should see a flurry of activity and output like:
Expand to view output
/run/media/jos/677c9bef-614b-408b-819f-049d364996e7/borgbackup: Pruning archives
Enter passphrase for key /run/media/jos/677c9bef-614b-408b-819f-049d364996e7/borgbackup:
------------------------------------------------------------------------------
                       Original size      Compressed size    Deduplicated size
Deleted data:                    0 B                  0 B                  0 B
All archives:                    0 B                  0 B                  0 B
                       Unique chunks         Total chunks
Chunk index:                       0                    0
------------------------------------------------------------------------------
/run/media/jos/677c9bef-614b-408b-819f-049d364996e7/borgbackup: Creating archive
Enter passphrase for key /run/media/jos/677c9bef-614b-408b-819f-049d364996e7/borgbackup:
Creating archive at "/run/media/jos/677c9bef-614b-408b-819f-049d364996e7/borgbackup::{hostname}-{now:%Y-%m-%dT%H:%M:%S.%f}"
A /home/jos/.atom
A /home/jos/.tor-browser
A /home/jos/...
A /home/jos/...
A /home/jos/...
A /home/jos/.vscode-oss
A /home/jos/.z
------------------------------------------------------------------------------
Archive name: jos-pc-2019-09-08T15:27:51.775553
Archive fingerprint: 0e3e1644ed374d8f6fd06bd25bd7a5ab2d24acf897b1b262a32e7b68fa4e662d
Time (start): Sun, 2019-09-08 15:28:03
Time (end):   Sun, 2019-09-08 15:28:05
Duration: 1.46 seconds
Number of files: 27
Utilization of max. archive size: 0%
------------------------------------------------------------------------------
                       Original size      Compressed size    Deduplicated size
This archive:              174.11 MB            162.45 MB            162.45 MB
All archives:              174.11 MB            162.45 MB            162.45 MB
                       Unique chunks         Total chunks
Chunk index:                      99                   99
------------------------------------------------------------------------------
/run/media/jos/677c9bef-614b-408b-819f-049d364996e7/borgbackup: Running consistency checks
Starting repository check
Starting repository index check
Completed repository check, no problems found.
Starting archive consistency check...
Enter passphrase for key /run/media/jos/677c9bef-614b-408b-819f-049d364996e7/borgbackup:
Analyzing archive jos-pc-2019-09-08T15:27:51.775553 (1/1)
Orphaned objects check skipped (needs all archives checked).
Archive consistency check complete, no problems found.

summary:
/etc/borgmatic/config.yaml: Successfully ran configuration file
Unlike typical backups Borg optimizes backups with deduplication and chunking, and it also checks backup data integrity to ensure nothing is lost:
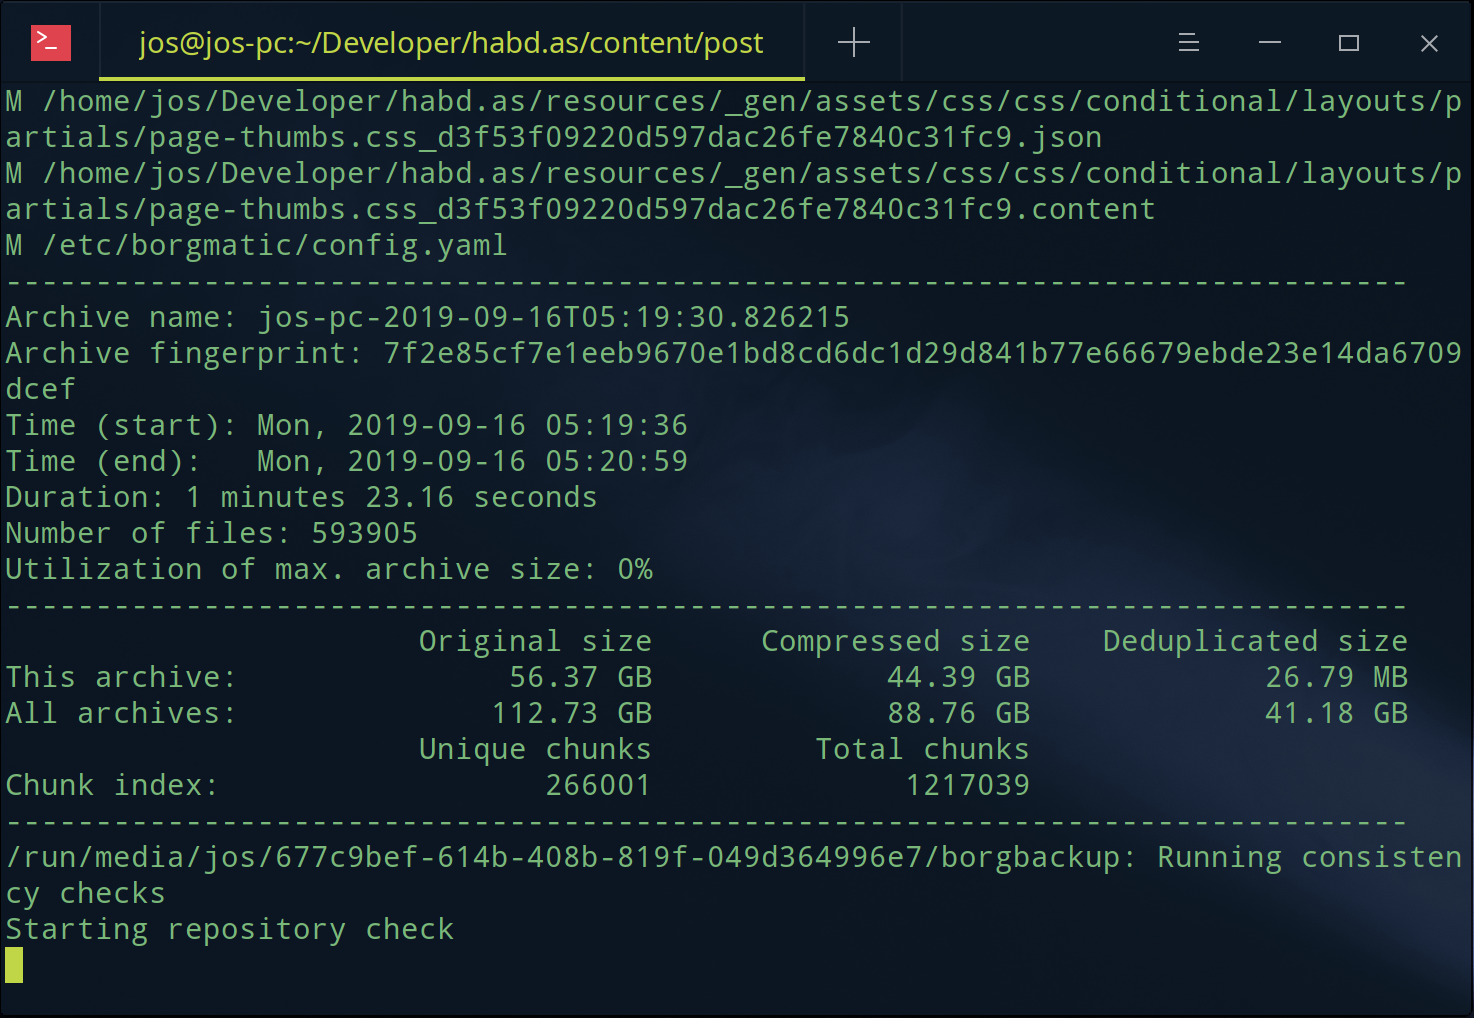
You can also check integrity yourself. Run sudo borgmatic --help to learn how; and investigate the Borgmatic Autopilot docs to learn how to configure and maintain a periodic backup schedule, and create and extract a borg repository.
While you’re explorning Borgmatic don’t forget to explore the raw borg cli and give Vorta for Borg by running pamac build vorta to install it from AUR.
Still not assimilating? No sweat. You already have an encrypted LUKS volume and there are plenty of other suitable backup tools.
Other Backup Tools
Borg isn’t the only back-up tool out there. Some other backup tools you may wish to consider are detailed on Arch Wiki and broken down by use case with notes. But before you move on, however, give Borg a try first. Restic is futile.
Summary
In this post I showed you how to securely store your backup data with two layers of encryption on an external drive or disk. After securing the disk with DMCrypt to perform a secure erase we used BorgBackup Borgmatic to automate our backups in a expressive way via configuration to help meet the objectives of a 3-2-1 backup strategy outside the cloud.
Thanks for your time. Now we are one.