
Back in 2017 I decided to move my passion project After Dark off GitHub so I could have better repo usage insights. I was surprised to learn how much faster a self-hosted VCS was compared to GitHub. Not only was GitHub limiting the useful metrics I could capture they were actually slowing down my development!
Which brings me back to one of if not the most important concepts I learned as a developer after watching a talk given by Paul Irish at Fluent Conf 2012. During his talk Paul introduced rupa/z (a shell hack) along with a profound development productivity mantram called The Foamy Rules for Rabid Tools.
One tool I’ve been incredibly rabid about since leaving GitHub is a VCS called Gitea. Gitea is a self-hosted version control management system which can improve your development productivity tremendously by decreasing the time it takes to commit code. Using your own VCS also affords a new habit field which can make coding with it an almost zen-like experience if you do it right.
In order to complete the move off GitHub I created a Docker Compose file for using Gitea with Traefik. The Docker Compose project has served me admirably for over three years now but I am no longer rabid about the approach.
If the purpose of rabid tools is for productivity, then the tools themselves ought to be easy enough to set-up they have the chance to make a real impact. So in this post I’ll show you how to say goodbye to Docker Compose for running Gitea and hello to Kubernetes.
Requirements
The following are needed to complete this tutorial:
- A Vultr hosting account (referral account bonus)
- Git git github.com/git/git
- Kubernetes CLI kubectl github.com/kubernetes/kubectl
- Helm package manager helm github.com/helm/helm
- Vultr CLI vultr github.com/vultr/vultr-cli
- Ketchup k3sup github.com/alexellis/k3sup
- Watch watch (optional) linux.die.net/man/1/watch
Have each of those before you continue.
Provision Server
To get started we’ll provision a single-node cluster on Vultr using the Vultr CLI. To create the node edit the code inline below and run it in a terminal:
export VULTR_API_KEY=your_api_key
vultr server create --name k3s-server-1 \
  --region 40 --os 413 --plan 202 \
  --tag k3s --tag k3s-server --sshkey 5f7e8d5ddc911
Where 5f7e8d5ddc911 comes from vultr sshkey list and your_api_key is an API key generated from Vultr website. Run vultr sshkey create to create a new key.
And where:
| Flag | Code | Description |
|---|---|---|
| region | 40 | Singapore |
| os | 413 | Ubuntu 20.10 x64 |
| plan | 202 | 2048 MB RAM, 55 GB SSD, 2.00 TB BW |
Run vultr plans for list of available plans, vultr regions and choose a region close your users and vultr os for a list of operating systems. You must choose a plan with at least 2048 MB RAM ($10/month) or you will run out of resources.
Tip: If $10/month is too much, see Self-host Gitea on Amazon Lightsail for instructions which can be adapted for Vultr using the 1024 MB RAM plan.
After running the server create command above you should see output like:
Virtual machine created

SUBID           NAME            DCID    VPSPLANID       OSID
48962587        k3s-server-1    40      202             413
Wait for your VPS to activate so you know the IP with watch vultr servers:
Every 2.0s: vultr servers                                                     mbp: Tue Dec 22 15:11:22 2020

SUBID           STATUS  IP              NAME            OS                      LOCATION        VCPU    RAM                DISK            BANDWIDTH       COST
48962587        active  139.172.45.54   k3s-server-1    Debian 10 x64 (buster)  Singapore       1       2048 MB            Virtual 55 GB   0/2000          10.00
With server IP in hand clone the Gitea Helm chart and use Ketchup to remotely install K3s, a lightweight Kubernetes distribution, on the new Vultr server:
export GITPROJ=~/Developer
export KEYPATH=~/.ssh/vultrcom_ed25519
export SERVER1=$(vultr server list | grep k3s-server-1 | awk '{ print $3 }')

git clone https://gitea.com/gitea/helm-chart.git $GITPROJ/gitea-helm && \
cd $GITPROJ/gitea-helm && \
k3sup install --ip $SERVER1 --user root \
    --context vultr-k3s-cluster --ssh-key $KEYPATH
Edit the above code inline, replacing GITPROJ with the place you keep your git projects and KEYPATH with the SSH key associated when provisioning the server.
Run the command. You should see output like:
Expand to view sample output
Cloning into '/Users/jos/Developer/gitea-helm'...
remote: Enumerating objects: 426, done.
remote: Counting objects: 100% (426/426), done.
remote: Compressing objects: 100% (363/363), done.
remote: Total 426 (delta 274), reused 104 (delta 54)
Receiving objects: 100% (426/426), 114.91 KiB | 846.00 KiB/s, done.
Resolving deltas: 100% (274/274), done.
Running: k3sup install
2020/12/22 17:07:06 139.172.45.54
Public IP: 139.172.45.54
[INFO]  Finding release for channel v1.19
[INFO]  Using v1.19.5+k3s2 as release
[INFO]  Downloading hash https://github.com/rancher/k3s/releases/download/v1.19.5+k3s2/sha256sum-amd64.txt
[INFO]  Downloading binary https://github.com/rancher/k3s/releases/download/v1.19.5+k3s2/k3s
[INFO]  Verifying binary download
[INFO]  Installing k3s to /usr/local/bin/k3s
[INFO]  Creating /usr/local/bin/kubectl symlink to k3s
[INFO]  Creating /usr/local/bin/crictl symlink to k3s
[INFO]  Creating /usr/local/bin/ctr symlink to k3s
[INFO]  Creating killall script /usr/local/bin/k3s-killall.sh
[INFO]  Creating uninstall script /usr/local/bin/k3s-uninstall.sh
[INFO]  env: Creating environment file /etc/systemd/system/k3s.service.env
[INFO]  systemd: Creating service file /etc/systemd/system/k3s.service
[INFO]  systemd: Enabling k3s unit
Created symlink /etc/systemd/system/multi-user.target.wants/k3s.service → /etc/systemd/system/k3s.service.
[INFO]  systemd: Starting k3s
Result: [INFO]  Finding release for channel v1.19
[INFO]  Using v1.19.5+k3s2 as release
[INFO]  Downloading hash https://github.com/rancher/k3s/releases/download/v1.19.5+k3s2/sha256sum-amd64.txt
[INFO]  Downloading binary https://github.com/rancher/k3s/releases/download/v1.19.5+k3s2/k3s
[INFO]  Verifying binary download
[INFO]  Installing k3s to /usr/local/bin/k3s
[INFO]  Creating /usr/local/bin/kubectl symlink to k3s
[INFO]  Creating /usr/local/bin/crictl symlink to k3s
[INFO]  Creating /usr/local/bin/ctr symlink to k3s
[INFO]  Creating killall script /usr/local/bin/k3s-killall.sh
[INFO]  Creating uninstall script /usr/local/bin/k3s-uninstall.sh
[INFO]  env: Creating environment file /etc/systemd/system/k3s.service.env
[INFO]  systemd: Creating service file /etc/systemd/system/k3s.service
[INFO]  systemd: Enabling k3s unit
[INFO]  systemd: Starting k3s
 Created symlink /etc/systemd/system/multi-user.target.wants/k3s.service → /etc/systemd/system/k3s.service.

apiVersion: v1
clusters:
- cluster:
    certificate-authority-data: LS0tLS1CRU1JSUJlRENDQVIyZ0F3SUJBZ0lCQURBS0JnZ3Foa2pPUFFRREFqQWpNU0V3SHdZRFZRUUREQmhyTTNNdGMyVnkKZG1WeUxXTmhRREUyTURnMk1qZ3dOREl3SGhjTk1qQXhNakl5TURrd056SXTRFRmdRVVZUeCtKVkY3VmRpaFqSXdNRGt3TnpJeQpXakFqTVNFd0h3WURWUVFEREJock0zTXRjMlZ5ZG1WeUxXTmhRREUyTURnMk1qZ3dOREl3V1RBVEJnY3Foa2pPClBRSUJCZ2dxaGtqT1BRTUJCd05DQUFSYk9EWkJmNi92VmZ3SndUOTlydnYxWHVhcUxBWkM5bWxrRisxY1NDOU0KNWNXaUZtTVlwU2VYYzNTV0hOVkhFQ2NlaGpCVmptVU0rUm5XK2E1bmV4WDVvMEl3UURBT0JnTlZIUThCQWY4RQpCQU1DQXFRd0R3WURWUjBUQVFIL0JBVXdBd0VCL3pBZpwU0wySGtwCmMxRUg0cmt3Q2dZSUtvWkl6ajBFQXdJRFNRQXdSZ0loQUlDV1ViODdGd3VocldiUmxBSVg4dlVQUGZtb3QzRlIKVUgzYUJJS3RMa2kdJTiBDRVJUSUlXaGNOTXpBeE1EJnTlZIUZJQ0FURS0tLS0tCkxQWlFQXJyeHJUUEJGZmxKSGZUaDg3YXpqRC8ySjNCcDNPV1RZMGdpTVNYeWIrL2M9Ci0tLS0tRU5EIENFUlRJRklDQVRFLS0tLS0K
    server: https://127.0.0.1:6443
  name: default
contexts:
- context:
    cluster: default
    user: default
  name: default
current-context: default
kind: Config
preferences: {}
users:
- name: default
  user:
    client-certificate-data: LS0tLS1CRUdJTrUFlDSVFDMVduNTBXanM1rS0hDOXNXYVQKTVB1NHhXaGhEK3YwZTR0WldaeliBDRVJUSUZJQ0FURS0tLS0tCk1JSUJrakNDQVRlZ0F3SUJBZ0lJYzRQZkVuMHhTdGd3Q2dZSUtvWkl6ajBFQXdJd0l6RWhNQjhHQTFVRUF3d1kKYXpOekxXTnNhV1Z1ZEMxallVQXhOakE0TmpJNE1EUXlNQjRYRFRJd01USXlNakE1TURjeU1sb1hEVEl4TVRJeQpNakE1TURjeU1sb3dNREVYTUJVR0ExVUVDaE1PYzNsemRHVnRPbTFoYzNSbGNuTXhGVEFUQmdOVkJBTVRESE41CmMzUmxiVHBoWkcxcGJqQlpVMk0wcVpzY2xReDJndDl0bEowRUNQk1HQnlxR1NNNDlBZ0VHQ0NxR1NNNDlBd0VIQTBJQUJDQTlc1ZUJ3UjVSaTVaeVIwc2dqYXMzclZOMXE0YW5nTVdMYzFPTzhHcWt4aQoyZ3czKzRDalNEQkdNQTRHQTFVZER3RUIvd1FFQXdJRm9EQVRCZ05WSFNVRUREQUtCZ2dyQmdFRkJRY0RBakFmCkJnTlZIU01FR0RBV2dCU21XYjJLa1N1TkIzTk9SclNTM2pOT21hU21tekFLQmdncWhrak9QUVFEQWdOSkFEQkcKQWlFQTJ3NDddQOUxNNXlWS0pGClBSTWZEIdjYvME5RUkdVZOLwpPWVZoVGxKSStIMjlGVGx2ajZKMEY1a1JaSU9VWEE9PQotLS0tLUVORCBDRVJUSUZJQ0FURS0tLS0tCi0tLS0tQkVHSU4gQ0VSVElGSUNBVEUtLS0tLQpNSUlCZGpDQ0FSMmdBd0lCQWdJQkFEQUtCZ2dxaGtqT1BRUURBakFqTVNFd0h3WURWUVFEREJock0zTXRZMnhwClpXNTBMV05oUURFMk1EZzJNamd3TkRJd0hoY05NakF4TWpJeU1Ea3dOekl5V2hjTk16QXhNakl3TURrd056SXkKV2pBak1TRXdId1lEVlFRRERCaHJNM010WTJ4cFpXNTBMV05oUURFMk1EZzJNamd3TkRJd1dUQVRCZ2NxaGtqTwpQUUlCQmdncWhrak9QUU1CQndOQ0FBUlJnY0RSNlAzbDA3blc2RGR2UklxMXk0OWlCS3VscTZra0grU0VVVE1ZCm10Q1dsZmhaenZJMGEySjAweDlXd2pIUmZJWFRRZ0FLbmpIcE5GbnQrVGRvbzBJd1FEQU9CZ05WSFE4QkFmOEUKQkFNQ0FxUXdEd1lEVlIwVEFRSC9CQVV3QXdFQi96QWRWMTJwvRjFXM2RnWHdhU0J0NW1xRlERRaXCZ05WSFE0RUZnUVVwbG05aXBFcmpRZHpUa2Ewa3Q0egpUcG1rcHBzd0NnWUlLb1pJemowRUF3SURSd0F3UkFJZ0YrYWZsNVpITkNT1FWbllRQ0lHaUV1WlZ3b3J3Z1pSZ0huQUo1dWcwTUFIeWkxbFpzTDVTTHpyM1c5MkZKCi0tLS0tRU5EIENFUlRJRklDQVRFLS0tLS0K
    client-key-data: LS0tLS1CRUdJTiBFQyBUTJvQW9HQ0NxR1NNNDkKQXIEtFWS0tLS0tCk1IY0NBUUVFSU5IN0FzZlIxTWtXaXlQcUV1amhrZEI4NDhZeW5OeUQ3NdFSG9VUURRZ0FFSUQxWFhhUW9jTDJ4WnBNdys3akZhR0VQNi9SN2kxbFpuTk5DTERsNEhCSGxHTGxuSkVRFUYweG1zaVMvM1dyaHFlQXhZdHpVNDd3YXFUR0xhRERmN2dBPT0KLS0tLS1FTkQgRUMhTeQpDTnF6ZXRVQUklWQgUFJJVkFURSBLRVktLS0tLQo=
Result: apiVersion: v1
clusters:
- cluster:
    certificate-authority-data: LS0tLS1CRUdJTiBDRVJUSUdnYxWHVhcUxBWkM5bWxrRisxY1NDZJQ0FURS0tLS0tCk1JSUJlRENDQVIyZ0F3SUJBZ0lCQURBS0JnZ3Foa2pPUFFRREFqQWpNU0V3SHdZRFZRUUREQmhyTTNNdGMyVnkKZG1WeUxXTmhRREUyTURnMk1qZ3dOREl3SGaGNOTXpBeE1qSXdNRGt3TnpJeQpXakFqTVNFd0h3WURWUVFEREJock0zTXRjMlZ5ZG1WeUxXTmhRREUyTURnMk1qZ3dOREl3V1RBVEJnY3Foa2pPClBRSUJCZUeCtKVkY3VmRpaFpwU0wySGtwCmMxRdxaGtqT1BRTUJCd05DQUFSYk9EWkJmNi92VmZ3SndUOTlyOU0KNWNXaUZtTVlwU2VYYzNTV0hOVkhFQ2NlaGpCVmptVU0rUm5XK2E1bmV4WDVvMEl3UURBT0JnTlZIUThCQWY4RQpCQU1DQXFRd0R3WURWUjBUQVFIL0JBVXdBd0VCL3pBZEJnTlZIUTRFRmdRVVZUg0cmt3Q2dZSUtvWkl6ajBFQXdJRFNRQXdSZ0loQUlDV1ViODdGd3VocldiUmxBSVg4dlVQUGZtb3QzRlIKVUgzYUJJShjTk1qQXhNakl5TURrd056SXlX3RMa2kxQWlFQXJyeHJUUEJGZmxKSGZUaDg3YXpqRC8ySjNCcDNPV1RZMGdpTVNYeWIrL2M9Ci0tLS0tRU5EIENFUlRJRklDQVRFLS0tLS0K
    server: https://127.0.0.1:6443
  name: default
contexts:
- context:
    cluster: default
    user: default
  name: default
current-context: default
kind: Config
preferences: {}
users:
- name: default
  user:
    client-certificate-data: LS0tLS1CRUdJTiBDRVJIcE5GbnQrVGRvbzBJd1USUZJQ0FURS0tLS0tCk1JSUJrakNDQVRlZ0F3SUJBZ0lJYzRQZkVuMHhTdGd3Q2dZSUtvWkl6ajBFQXdJd0l6RWhNQjhHQTFVRUF3d1kKYXpOekxXTnNhV1Z1ZEMxallVQXhOakE0TmpJNE1EUXlNQjRYRFRJd01USXlNakEXBFcmpRZHpUa2Ewa3Q0egpUcG1rcHBzd0NnWUlL1TURjeU1sb1hEVEl4TVRJeQpNakE1TURjeU1sb3dNREVYTUJVR0ExVUVDaE1PYzNsemRHVnRPbTFoYzNSbGNuTXhGVEFUQmdOVkJBTVRESE41CmMzUmxiVHBoWkcxcGJqQlpNQk1HQnlxR1NNNDlBZ0VHQ0NxR1NNNDlBd0VIQTBJQUJDQTlWMTJrVWEE9PQotLS0tLUVORCBDRVJUSUZJQ0FURS0tLS0tS0hDOXNXYVQKTVB1NHhXaGhEK3YwZTR0WldaelRRaXc1ZUJ3UjVSaTVaeVIwc2dqYXMzclZOMXE0YW5nTVdMYzFPTzhHcWt4aQoyZ3czKzRDalNEQkdNQTRHQTFVZER3RUIvd1FFQXdJRm9EQVRCZ05WSFNVRUREQUtCZ2dyQmdFRkJRY0RBakFmCkJnTlZIU01FR0RBV2dCU21XYjJLa1N1TkIzTk9SclNTM2pOT21hU21tekFLQmdncWhrak9QUVFEQWdOSkFEQkcKQWlFQTJ3NDdVMk0wcVpzY2xIdjYvME5RUkwvRjFXM2RnWHdhU0J0NW1xRlErUFlDSVFDMVduNTBXanM1dVZOLwpPWVZoVGxKSStIMjlGVGx2ajZKMEY1a1JaSU9Ci0tLS0tQkVHSU4gQ0VSVElGSUNBVEUtLS0tLQpNSUlCZGpDQ0FSMmdBd0lCQWdJQkFEQUtCZ2dxaGtqT1BRUURBakFqTVNFd0h3WURWUVFEREJock0zTXRZMnhwClpXNTBMV05oUURFMk1EZzJNamd3TkRJd0hoY05NakF4TWpJeU1Ea3dOekl5V2hjTk16QXhNakl3TURrd056SXkKV2pBak1TRXdId1lEVlFRRERCaHJNM010WTJ4cFpXNTBMV05oUURFMk1EZzJNamd3TkRJd1dUQVRCZ2NxaGtqTwpQUUlCQmdncWhrak9QUU1CQndOQ0FBUlJnY0RSNlAzbDA3blc2RGR2UklxMXk0OWlCS3VscTZra0grU0VVVE1ZCm10Q1dsZmhaenZJMGEySjAweDlXd2pIUmZJWFRRZ0FLbmpFEQU9CZ05WSFE4QkFmOEUKQkFNQ0FxUXdEd1lEVlIwVEFRSC9CQVV3QXdFQi96QWRCZ05WSFE0RUZnUVVwbG05ab1pJemowRUF3SURSd0F3UkFJZ0YrYWZsNVpITkNReDJndDl0bEowRUdQOUxNNXlWS0pGClBSTWZET1FWbllRQ0lHaUV1WlZ3b3J3Z1pSZ0huQUo1dWcwTUFIeWkxbFpzTDVTTHpyM1c5MkZKCi0tLS0tRU5EIENFUlRJRklDQVRFLS0tLS0K
    client-key-data: LS0tLS1CRRFIEtFWS0tLS0tCk1IFpuTk5DTERsNEhCSGxHTGxY0NBUUVFSU5IN0FzZlIxTWtXaXlQcUV1amhrZEI4TJvQW9HQ0NxR1NNNDkKQXdFSG9VUURRZ0FFSUQxWFhhUW9jTDJUdJTiBFQyBQUklWQV4WnBNdys3akZhR0VQNi9SN2kxbuSkhTeQpDTnF6ZXRVM1dyaHFNDhZeW5OeUQ3NUYweG1zaVMvUlQXhZdHpVNDd3YXFUR0xhRERmN2dBPT0KLS0tLS1FTkQgRUMgUFJJVkFURSBLRVktLS0tLQo=

Saving file to: /Users/jos/Developer/gitea-helm/kubeconfig

# Test your cluster with:
export KUBECONFIG=/Users/jos/Developer/gitea-helm/kubeconfig
kubectl get node -o wide
Once finished follow the steps to test your cluster:
export KUBECONFIG=`pwd`/kubeconfig
kubectl get node -o wide
You should see output like:
NAME          STATUS   ROLES    AGE     VERSION        INTERNAL-IP     EXTERNAL-IP   OS-IMAGE       KERNEL-VERSION     CONTAINER-RUNTIME
vultr.guest   Ready    master   2m35s   v1.19.5+k3s2   139.172.45.54   <none>        Ubuntu 20.10   5.8.0-29-generic   containerd://1.4.3-k3s1
Notice EXTERNAL-IP is <none>. This is expected as your single-node K3s cluster is now running but there’s no ingress yet directing external traffic to it.
Next you will install Gitea.
Install Gitea
Once K3s is running inside your single-node cluster, install Gitea and dependencies from the $GITPROJ/gitea-helm directory cloned in the last section:
helm dep update && \
helm upgrade gitea . --install
You should see output like:
Expand to view sample output
Downloading memcached from repo https://charts.bitnami.com/bitnami
Downloading mysql from repo https://charts.bitnami.com/bitnami
Downloading postgresql from repo https://charts.bitnami.com/bitnami
Downloading mariadb from repo https://charts.bitnami.com/bitnami
Deleting outdated charts
Release "gitea" does not exist. Installing it now.
NAME: gitea
LAST DEPLOYED: Sat Dec 26 16:06:11 2020
NAMESPACE: default
STATUS: deployed
REVISION: 1
NOTES:
1. Get the application URL by running these commands:
  echo "Visit http://127.0.0.1:3000 to use your application"
  kubectl --namespace default port-forward svc/gitea-http 3000:3000
Wait for Gitea Pods to start Running with with watch kubectl get pods:
Every 2.0s: kubectl get pods                                                  mbp: Sat Dec 26 16:11:03 2020

NAME                               READY   STATUS    RESTARTS   AGE
gitea-memcached-79758cc459-8sbr6   1/1     Running   0          4m51s
gitea-postgresql-0                 1/1     Running   0          4m51s
gitea-0                            1/1     Running   0          4m51s
At this point you can preview your running Gitea installation using the kubectl port-forward command output when deploying the chart. Before you do, however, deploy a revision telling Gitea to use a darker theme and your own app name:
appName="Gitea Helm"
cat > values-local.yaml <<EOT
gitea:
  config:
    APP_NAME: $appName
    ui:
      DEFAULT_THEME: arc-green
EOT
helm upgrade gitea . --install -f values-local.yaml
You should see output like:
Expand to view sample output
Release "gitea" has been upgraded. Happy Helming!
NAME: gitea
LAST DEPLOYED: Sat Dec 26 16:16:32 2020
NAMESPACE: default
STATUS: deployed
REVISION: 2
NOTES:
1. Get the application URL by running these commands:
  echo "Visit http://127.0.0.1:3000 to use your application"
  kubectl --namespace default port-forward svc/gitea-http 3000:3000
Observe the REVISION is now 2 and cat values-local.yaml shows your custom chart values. At this point the gitea-0 Pod will be replaced with a new Pod using the custom values from values-local.yaml to override the values.yaml defaults.
Now proxy the gitea-http service running inside your cluster:
$ kubectl port-forward svc/gitea-http 3000:3000
Forwarding from 127.0.0.1:3000 -> 3000
Forwarding from [::1]:3000 -> 3000
Then browse to localhost:3000 to access your Gitea server:
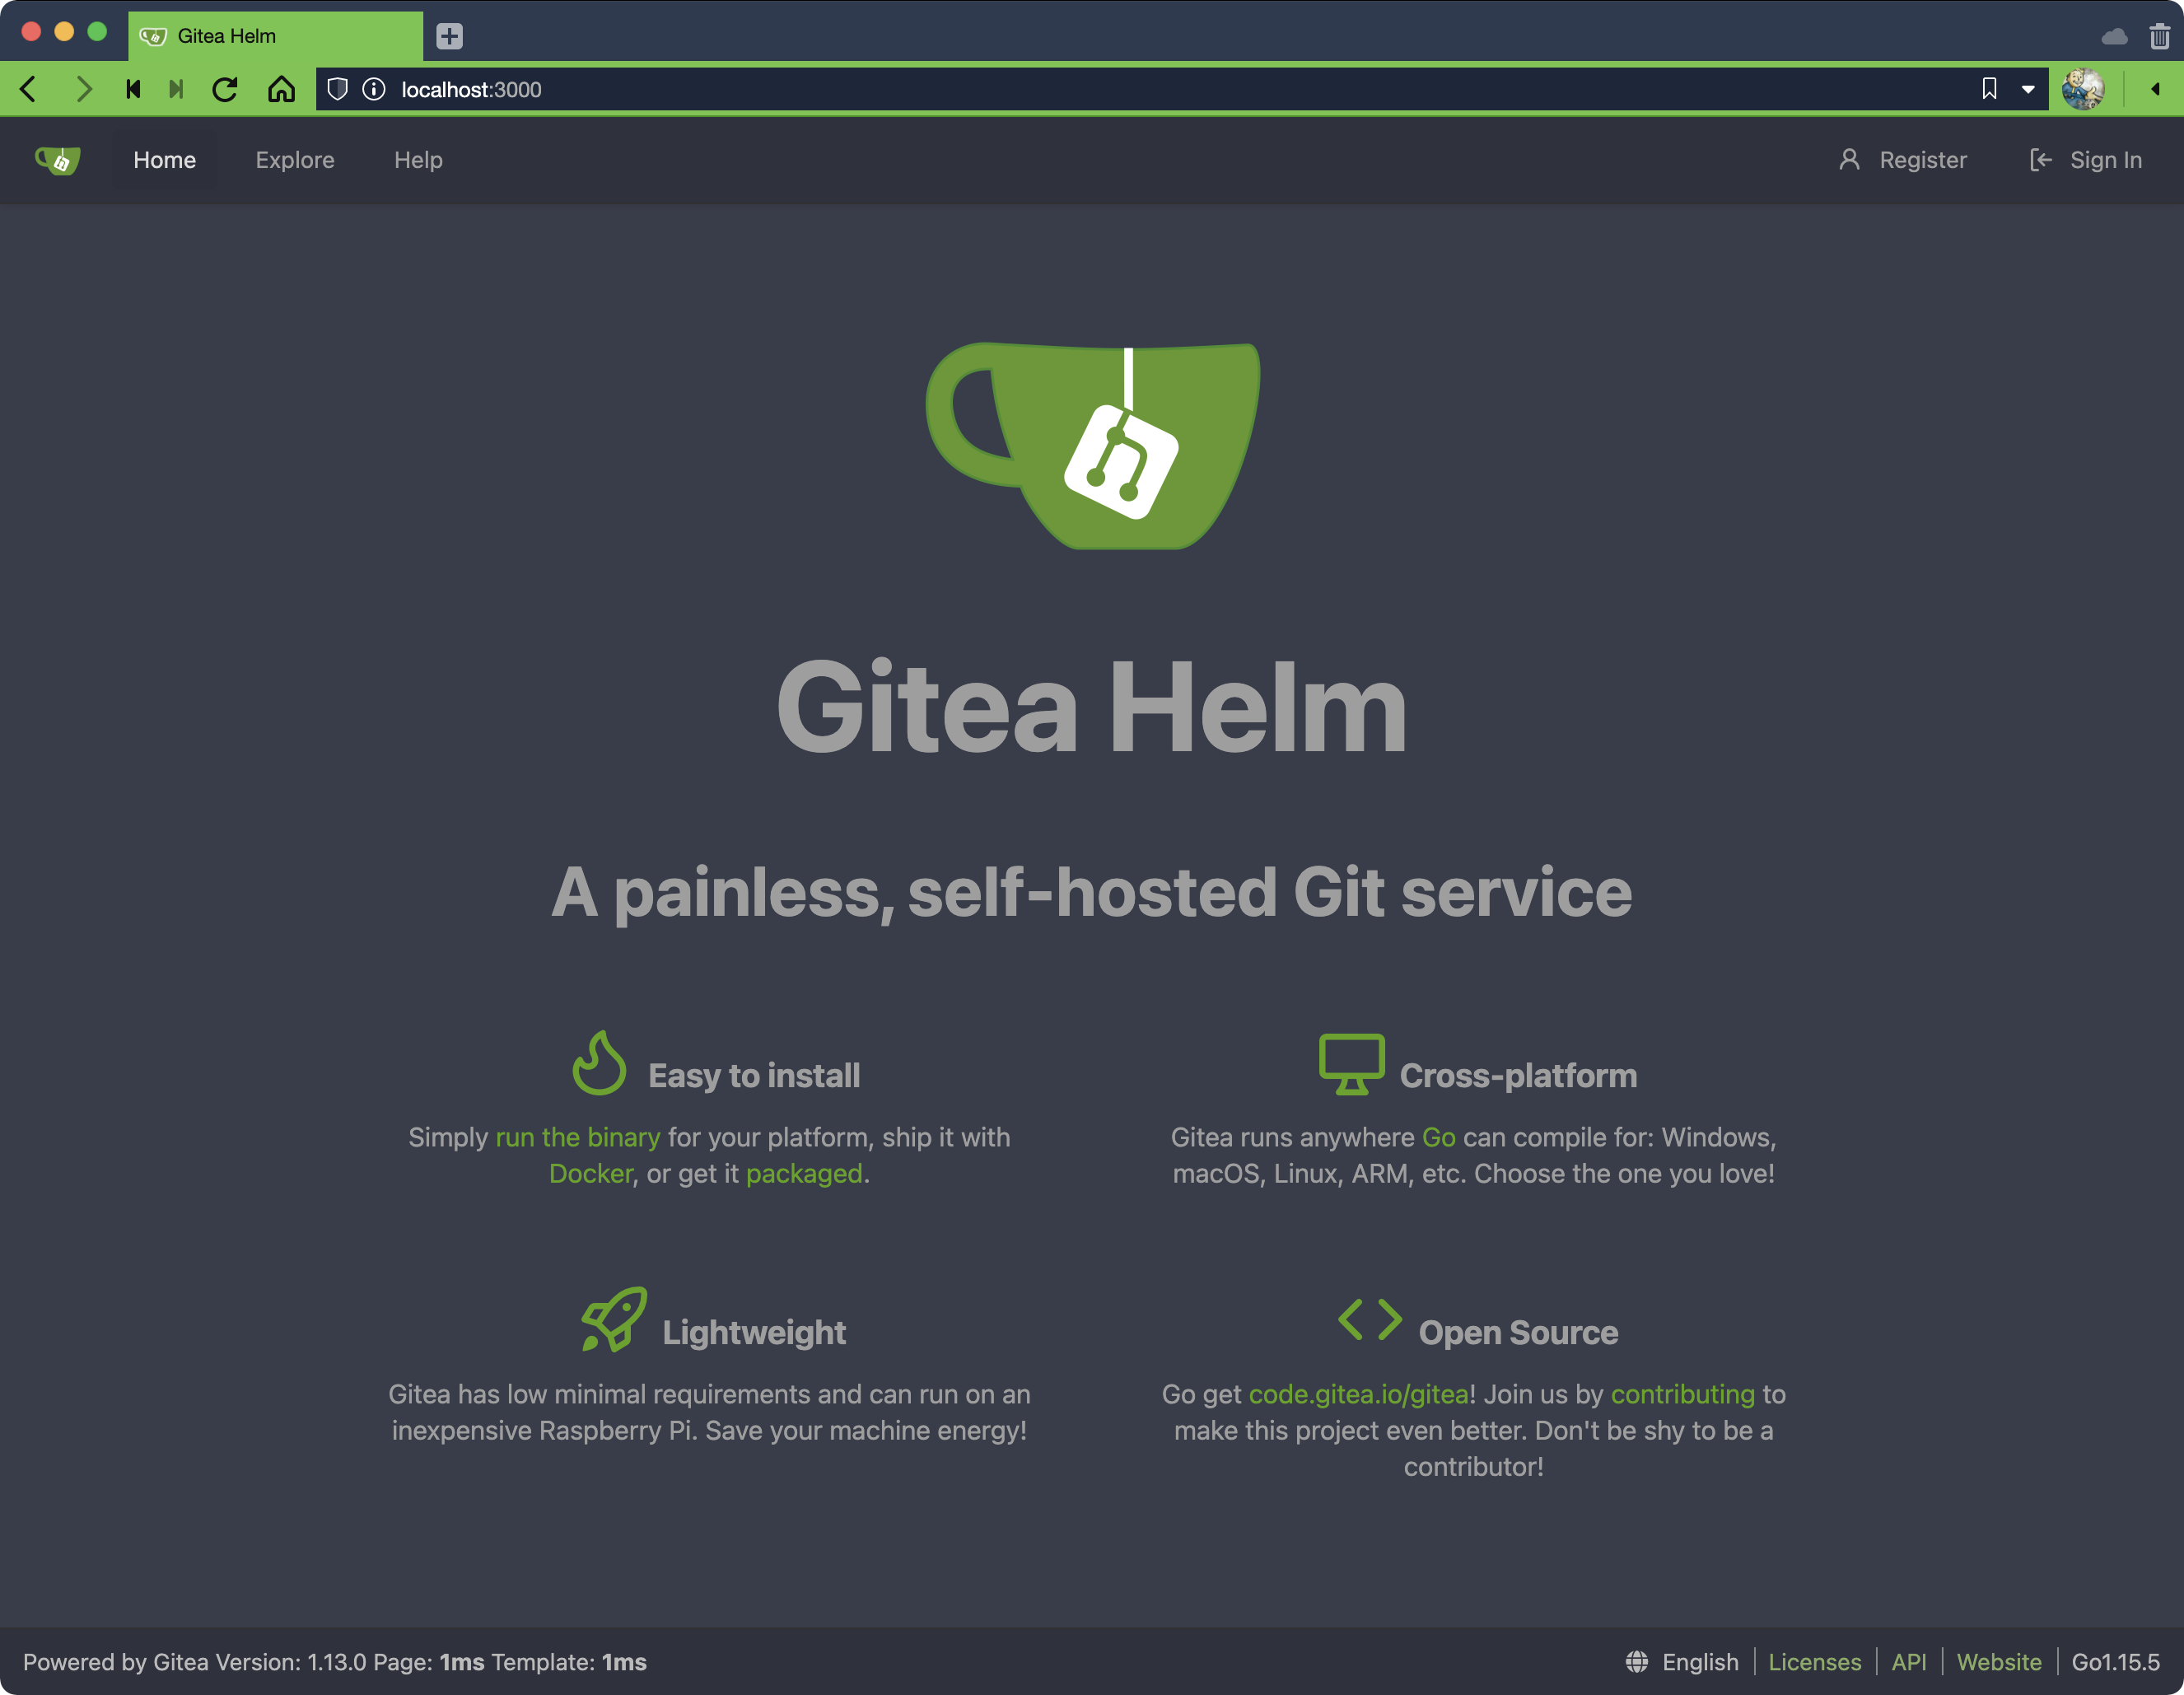
You should see your customized Gitea website. Use it to login as an administrator with username gitea_admin and password *************** from values.yaml, create a new administrative user for yourself then login as you and delete gitea_admin.
Expose to Web
Your Gitea can now be exposed to the Web. To access it from the Web purchase a domain name with Route 53 or the like and use their DNS tools to add an A record pointing to your server’s IP address (get it with vultr servers):
code.example.com
139.172.45.54
Confirm the A record change propagated with dig +short code.example.com. You should see the same IP used for the A record and earlier assigned to SERVER1. If the expected IP doesn’t appear right away, wait a few minutes and try again.
Once the dig IP agrees with the server IP curl the page:
curl code.example.com
You should see output like:
404 page not found
The 404 is occurring because your cluster doesn’t have an Ingress configured for the gitea-http service yet. Add an ingress with your hosts and roll it out:
cat >> values-local.yaml <<EOT
ingress:
  enabled: true
  annotations:
    kubernetes.io/ingress.class: traefik
  hosts:
    - code.example.com
EOT
helm upgrade gitea . --install -f values-local.yaml
You should see output like:
Expand to view sample output
Release "gitea" has been upgraded. Happy Helming!
NAME: gitea
LAST DEPLOYED: Sat Dec 26 16:56:42 2020
NAMESPACE: default
STATUS: deployed
REVISION: 3
NOTES:
1. Get the application URL by running these commands:
  http://code.example.com/
Verify the ingress resource was created in your cluster:
kubectl get ingresses
You should see output like:
NAME    CLASS    HOSTS              ADDRESS         PORTS   AGE
gitea   <none>   code.example.com   139.172.45.54   80      7m25s
Verify HOSTS matches your expected host. If not, update values-local.yaml and rollout a revision with helm upgrade gitea . –install -f values-local.yaml.
With ingress configured, curl the service again using the -I flag:
curl -I code.example.com
You should see output like:
Expand to view sample output
HTTP/1.1 200 OK
Date: Sat, 26 Dec 2020 09:08:57 GMT
Set-Cookie: lang=en-US; Path=/; Max-Age=2147483647
Set-Cookie: i_like_gitea=b697849b2a48e201; Path=/; HttpOnly
Set-Cookie: _csrf=JJkUdhwrduyHg6aHyR4DDvMHO3o6MTYwODk3MzczNzM5MDE1MTMyMw; Path=/; Expires=Sun, 27 Dec 2020
09:08:57 GMT; HttpOnly
Vary: Accept-Encoding
X-Frame-Options: SAMEORIGIN
Verify HTTP/1.1 200 OK appears in the output. If it does, you can now browse to your site directly from its domain name and no longer need to use a proxy:
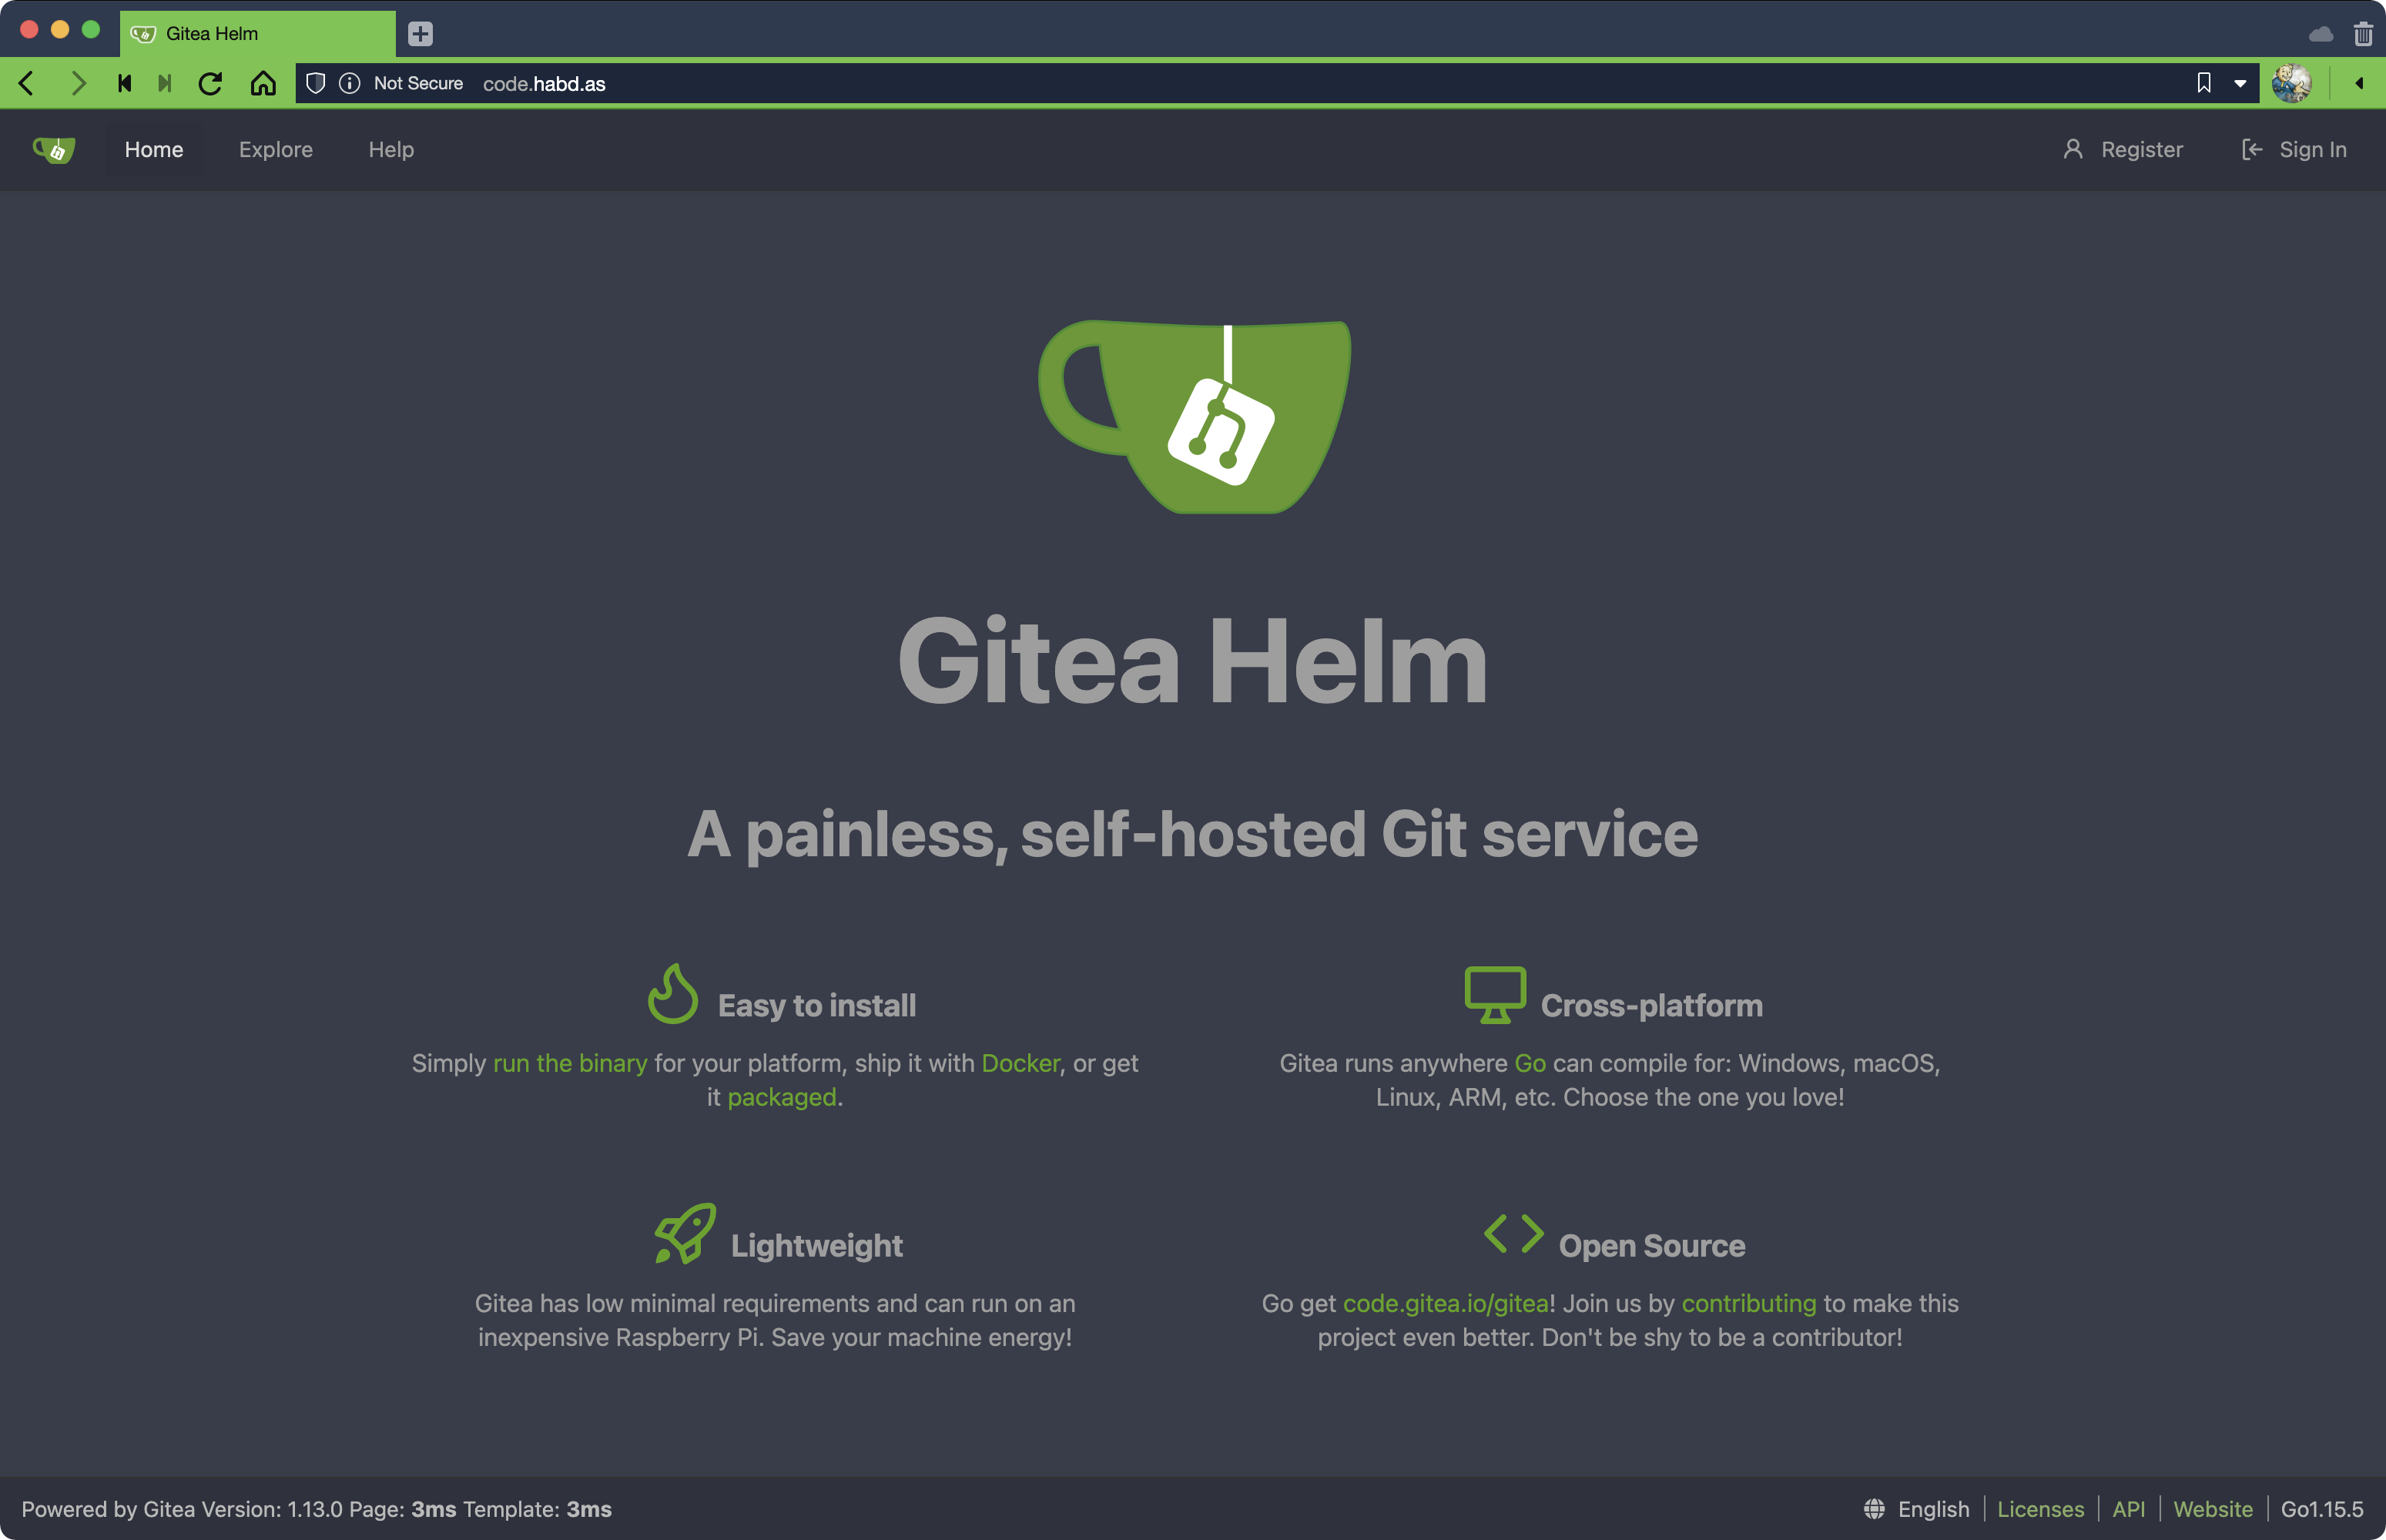
Note the connection is Not Secure because TLS hasn’t been configured. Adding TLS via cert-manager can be done later following the instructions in Installing and using cert-manager with k3s. For now we want to get SSH working first.
Add SSH Access
SSH is already possible using ssh code.example.com. But this SSH is not coming from the gitea-ssh service — it’s coming from the Vultr VPS server itself. As such it cannot be used with Gitea. More work is necessary for Gitea SSH access.
To use Gitea’s SSH instead of Vultr add the following to values-local.yaml and rollout a new version of the Gitea Helm chart using Klipper, the K3s’ internal load balancer:
cat >> values-local.yaml <<EOT
service:
  http:
    type: ClusterIP
    port: 3000
    clusterIP: None
    annotations:
  ssh:
    type: LoadBalancer
    port: 22
    annotations:
EOT
helm upgrade gitea . --install -f values-local.yaml
You should see an error like:
Error: UPGRADE FAILED: cannot patch "gitea-ssh" with kind Service: Service "gitea-ssh" is invalid: spec.clusterIP: Invalid value: "": field is immutable
After reviewing GitHub issues, best I can tell this is a feature in Helm 3 or some kind of corner case with Kubernetes. Workaround it with the following:
helm uninstall gitea && \
helm upgrade gitea . --install -f values-local.yaml
You should see output like:
Expand to view sample output
release "gitea" uninstalled
Release "gitea" does not exist. Installing it now.
NAME: gitea
LAST DEPLOYED: Sat Dec 26 18:24:59 2020
NAMESPACE: default
STATUS: deployed
REVISION: 1
NOTES:
1. Get the application URL by running these commands:
  http://code.example.com/
After that run kubectl get svc to view services:
NAME                        TYPE           CLUSTER-IP      EXTERNAL-IP     PORT(S)        AGE
kubernetes                  ClusterIP      10.43.0.1       <none>          443/TCP        160m
gitea-postgresql-headless   ClusterIP      None            <none>          5432/TCP       72s
gitea-http                  ClusterIP      None            <none>          3000/TCP       72s
gitea-postgresql            ClusterIP      10.43.192.71    <none>          5432/TCP       72s
gitea-memcached             ClusterIP      10.43.127.210   <none>          11211/TCP      72s
gitea-ssh                   LoadBalancer   10.43.240.242   139.172.45.54   22:30913/TCP   72s
Verify gitea-ssh has TYPE of LoadBalancer and an EXTERNAL-IP assigned. The external IP will be the same IP as the cluster itself unless you set-up and use vultr server create-ipv4 which is outside the scope of this tutorial.
Once this step is complete your Gitea server’s SSH service will be available on port 22 of your domain name. Confirm by running curl -I code.example.com:
You should see output like:
The authenticity of host 'code.example.com (66.42.57.19)' can't be established.
ECDSA key fingerprint is SHA256:2+u9u77RvxW11Zm0NbxnwugES9HqEH0JGBojwbkSXHI.
Are you sure you want to continue connecting (yes/no/[fingerprint])? yes
username@code.example.com: Permission denied (publickey).
If instead you see a WARNING message regarding remote host identification, see the Troubleshooting section for what to do. Otherwise, go ahead and create a test repository and try closing it using SSH. After that set-up TLS for encrypted HTTPS access and make any other configuration changes desired.
Summary
In this tutorial you learned how to set-up a self-hosted version control system called Gitea for the purpose of managing your own code and server access metrics. After a little time with Gitea you’ll soon realize common development routines such as pushing and pulling branches is faster using your own repo than it is using GitHub. If you’re rabid about your tools this change can have a significant impact on your day-to-day coding activities. It certainly did for me.
Troubleshooting
If you see the following message while running kubectl commands:
The connection to the server 0.0.0.0:6550 was refused - did you specify the right host or port?
Run kubectl config current-context and verify context is vultr-k3s-cluster. If it’s not, run export KUBECONFIG=`pwd`/kubeconfig to set the expected kubectl context from the $GITPROJ/gitea-helm directory.
If you see the following message when attempting to use Gitea’s SSH service:
@@@@@@@@@@@@@@@@@@@@@@@@@@@@@@@@@@@@@@@@@@@@@@@@@@@@@@@@@@@
@    WARNING: REMOTE HOST IDENTIFICATION HAS CHANGED!     @
@@@@@@@@@@@@@@@@@@@@@@@@@@@@@@@@@@@@@@@@@@@@@@@@@@@@@@@@@@@
IT IS POSSIBLE THAT SOMEONE IS DOING SOMETHING NASTY!
Someone could be eavesdropping on you right now (man-in-the-middle attack)!
It is also possible that a host key has just been changed.
The fingerprint for the ECDSA key sent by the remote host is
SHA256:2+u9u77RvxW11Zm0NbxunwgES9HqEH0JGBojwbkSXHI.
Please contact your system administrator.
Add correct host key in /home/username/.ssh/known_hosts to get rid of this message.
Offending ECDSA key in /home/username/.ssh/known_hosts:68
ECDSA host key for code.example.com has changed and you have requested strict checking.
Host key verification failed.
Remove the host entry for code.example.com from the known_hosts file.
If you see the following message while running vultr commands:
Method requires authentication, no API key present
You need to authenticate with Vultr as noted in Provision Server.
If you see the following error while upgrading your helm chart:
Error: UPGRADE FAILED: cannot patch "gitea-ssh" with kind Service: Service "gitea-ssh" is invalid: spec.clusterIP: Invalid value: "": field is immutable
If you see any of the following errors while running vultr commands:
dial tcp: lookup api.vultr.com: no such host
Your IP is not authorized to use this API key
And you’re running a Wiregard VPN, try restarting Wireguard. There’s something in the Vultr API which can cause issues when working over a secure connection.